


DSS-1000 User Manual
29
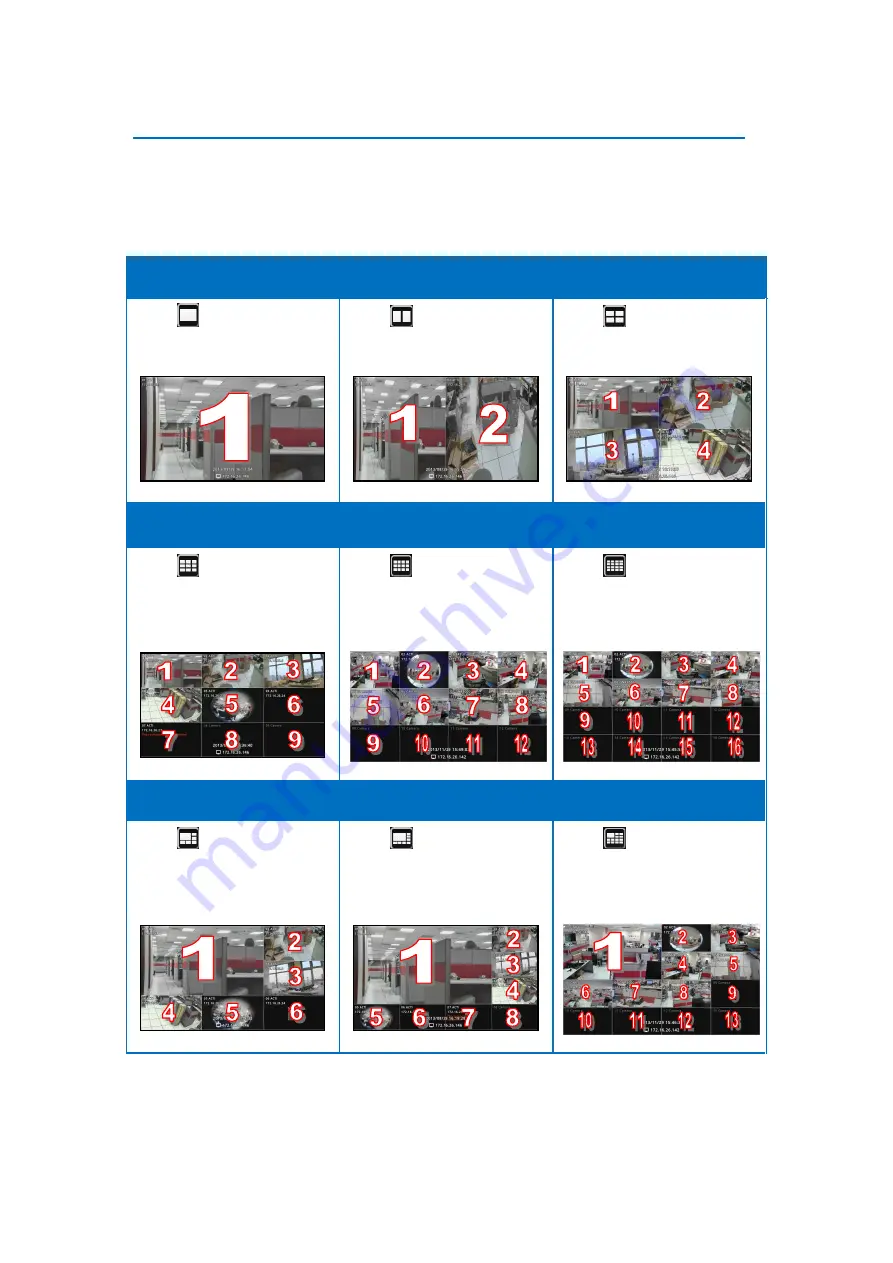
Changing the Layout
By default, the local
Live View
is displayed with a 9-channel layout. The layout can be
changed into a 1-channel, 2-channel, 1+7-channel display, etc. Available layout varies
depending on current channel mode (see
on page 44).
Layout 1
Layout 2
Layout 4
Click
to display one
channel on full screen.
Click
to display 2
channels at a time.
Click
to display 4
channels at a time.
Layout 9
Layout 12
Layout 16
Click
to display 9
channels at a time.
Click
to display 12
channels at a time.
Click
to display 16
channels at a time.
Layout 1+5
Layout 1+7
Layout 1+12
Click
to display 6
channels at a time on a 1+5
layout.
Click
to display 8
channels at a time on a 1+7
layout.
Click
to display 13
channels at a time on a 1+12
layout.
Содержание 53143703
Страница 1: ...DSS 1000 User Manual For V1 02 09 Firmware Ver 2014 10 03...
Страница 32: ...DSS 1000 User Manual 32 Repositioned Channels To reset the default channel position click...
Страница 102: ...DSS 1000 User Manual 102 3 Click Search Cameras...
Страница 107: ...DSS 1000 User Manual 107...
Страница 133: ......


