Tips for using the wireless WAN feature
To achieve the best connection, use the following guidelines:
• Keep your computer away from your body.
• Place your computer on a flat surface and open your computer display to an angle of slightly more
than 90 degrees.
• Place your computer away from concrete or brick walls that might dampen cellular signals.
• Best reception will be available near windows and other locations where cellular phone reception is the
strongest.
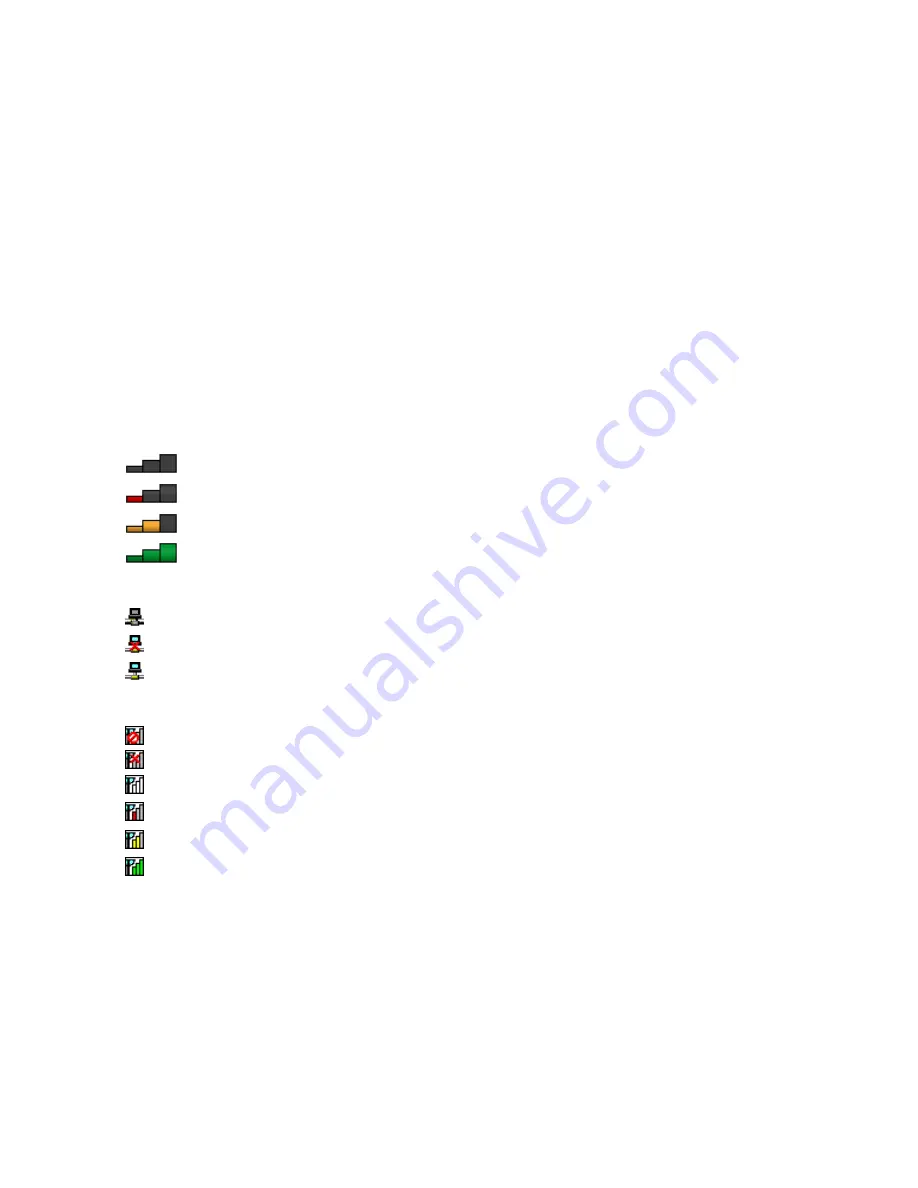
Checking the wireless-WAN connection status
You can check the wireless-WAN connection status through the wireless-network-connection-status icon in
the Windows notification area. The more bars encompassed, the better the signal is.
For the Windows 7 operating system, you also can check the Access Connections gauge, the Access
Connections status icon, or the Access Connections wireless status icon in the Windows notification area.
Access Connections gauge:
•
No signal
•
Weak signal
•
Medium signal
•
Strong signal
Access Connections status icon:
•
No location profile is active or none exists.
•
Current location profile is disconnected.
•
Current location profile is connected.
Access Connections wireless status icon:
•
Power to the WAN radio is off
•
No association
•
No signal
•
Weak signal
•
Medium signal
•
Strong signal
Using the Bluetooth connection
Bluetooth can connect devices a short distance from one another, and is commonly used for connecting
peripheral devices to a computer, transferring data between hand-held devices and a personal computer, or
remotely controlling and communicating with devices such as mobile phones.
Depending on the model, your computer might support the Bluetooth feature. To transfer data through
the Bluetooth feature, do the following:
Note:
If you use the wireless feature (the 802.11 standards) of your computer simultaneously with a
Bluetooth option, the data transmission speed can be delayed and the performance of the wireless feature
can be degraded.
Chapter 2
.
Using your computer
41
Содержание ThinkPad Yoga 460
Страница 1: ...ThinkPad P40 Yoga ThinkPad S3 ThinkPad Yoga 14 and ThinkPad Yoga 460 User Guide ...
Страница 6: ...iv ThinkPad P40 Yoga ThinkPad S3 ThinkPad Yoga 14 and ThinkPad Yoga 460 User Guide ...
Страница 16: ...xiv ThinkPad P40 Yoga ThinkPad S3 ThinkPad Yoga 14 and ThinkPad Yoga 460 User Guide ...
Страница 70: ...54 ThinkPad P40 Yoga ThinkPad S3 ThinkPad Yoga 14 and ThinkPad Yoga 460 User Guide ...
Страница 82: ...66 ThinkPad P40 Yoga ThinkPad S3 ThinkPad Yoga 14 and ThinkPad Yoga 460 User Guide ...
Страница 108: ...92 ThinkPad P40 Yoga ThinkPad S3 ThinkPad Yoga 14 and ThinkPad Yoga 460 User Guide ...
Страница 124: ...108 ThinkPad P40 Yoga ThinkPad S3 ThinkPad Yoga 14 and ThinkPad Yoga 460 User Guide ...
Страница 132: ...116 ThinkPad P40 Yoga ThinkPad S3 ThinkPad Yoga 14 and ThinkPad Yoga 460 User Guide ...
Страница 151: ...6 Remove the dc in bracket 7 Remove the ac power card Chapter 10 Replacing devices 135 ...
Страница 158: ...142 ThinkPad P40 Yoga ThinkPad S3 ThinkPad Yoga 14 and ThinkPad Yoga 460 User Guide ...
Страница 162: ...146 ThinkPad P40 Yoga ThinkPad S3 ThinkPad Yoga 14 and ThinkPad Yoga 460 User Guide ...
Страница 172: ...156 ThinkPad P40 Yoga ThinkPad S3 ThinkPad Yoga 14 and ThinkPad Yoga 460 User Guide ...
Страница 176: ...160 ThinkPad P40 Yoga ThinkPad S3 ThinkPad Yoga 14 and ThinkPad Yoga 460 User Guide ...
Страница 181: ......
Страница 182: ......


