


The algorithm that generates the number is designed to provide unique IDs until
the year A.D. 3400. No two computers in the world have the same number.
When you replace the system board, you must set the UUID on the new system
board as follows:
1.
Install the LENOVO ThinkPad Hardware Maintenance Diskette Version 1.76 or
later, and restart the computer.
2.
From the main menu, select
4. Assign UUID
.
A new UUID is created and written. If a valid UUID already exists, it is not
overwritten.
Reading or writing the ECA information
Information on Engineering Change Announcements (ECA) are stored in the
EEPROM of the system board. The electronic storage of this information simplifies
the procedure to check if the ECA has been previously applied to a machine. The
machine does not need to be disassembled to check for the ECA application.
To check what ECAs have been previously applied to the machine, use the ECA
Information Read/Write function on the LENOVO ThinkPad Hardware
Maintenance Diskette Version 1.76 or later.
1.
Insert the LENOVO ThinkPad Hardware Maintenance Diskette Version 1.76 or
later, and restart the computer.
2.
From the main menu, select
6. Set ECA Information
.
3.
To read ECA information, select
2. Read ECA/rework number from EEPROM
and follow the instruction.
4.
To read box build date, select
5. Read box build date from EEPROM
, and
follow the instruction on the screen.
After an ECA has been applied to the machine, the EEPROM must be updated to
reflect the ECA’s application. Use the LENOVO ThinkPad Hardware Maintenance
Diskette Version 1.76 or later to update the EEPROM.
Note:
Only the ECA number is stored in the EEPROM. The machine type of the
ECA is assumed be the same as the machine type of the machine that had the ECA
applied to it.
1.
Insert the LENOVO ThinkPad Hardware Maintenance Diskette Version 1.76 or
later, and restart the computer.
2.
From the main menu, select
6. Set ECA Information
.
3.
To write ECA information, select
1. Write ECA/rework number from EEPROM
,
and follow the instruction.
4.
To write box build date, select
4. Write box build date from EEPROM
, and
follow the instruction on the screen.
If the system board is being replaced, try to read the ECA information from the old
system board and transfer the information to the new system. If the system board
is inoperable, this will not be possible.
FRU replacement notices
83
Содержание ThinkPad 700
Страница 1: ...ThinkPad W700 and W700ds Hardware Maintenance Manual ...
Страница 2: ......
Страница 3: ...ThinkPad W700 and W700ds Hardware Maintenance Manual ...
Страница 8: ...vi ThinkPad W700 and W700ds Hardware Maintenance Manual ...
Страница 18: ...10 ThinkPad W700 and W700ds Hardware Maintenance Manual ...
Страница 19: ...Safety information 11 ...
Страница 26: ...18 ThinkPad W700 and W700ds Hardware Maintenance Manual ...
Страница 27: ...Safety information 19 ...
Страница 28: ...20 ThinkPad W700 and W700ds Hardware Maintenance Manual ...
Страница 29: ...Safety information 21 ...
Страница 30: ...22 ThinkPad W700 and W700ds Hardware Maintenance Manual ...
Страница 31: ...Safety information 23 ...
Страница 34: ...26 ThinkPad W700 and W700ds Hardware Maintenance Manual ...
Страница 35: ...Safety information 27 ...
Страница 37: ...Safety information 29 ...
Страница 41: ...Safety information 33 ...
Страница 42: ...34 ThinkPad W700 and W700ds Hardware Maintenance Manual ...
Страница 43: ...Safety information 35 ...
Страница 45: ...Safety information 37 ...
Страница 46: ...38 ThinkPad W700 and W700ds Hardware Maintenance Manual ...
Страница 78: ...70 ThinkPad W700 and W700ds Hardware Maintenance Manual ...
Страница 84: ...76 ThinkPad W700 and W700ds Hardware Maintenance Manual ...
Страница 88: ...80 ThinkPad W700 and W700ds Hardware Maintenance Manual ...
Страница 92: ...84 ThinkPad W700 and W700ds Hardware Maintenance Manual ...
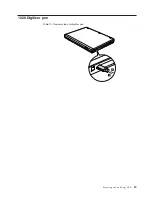
Страница 97: ...1020 Digitizer pen Table 10 Removal steps of digitizer pen 2 1 Removing and replacing a FRU 89 ...
Страница 105: ...Table 14 Removal steps of palm rest continued 2 3 3 4 5 Removing and replacing a FRU 97 ...
Страница 114: ...Table 19 Removal steps of numeric keypad continued 2 a 106 ThinkPad W700 and W700ds Hardware Maintenance Manual ...
Страница 123: ...Table 24 Removal steps of Intel Turbo Memory Minicard continued 4 Removing and replacing a FRU 115 ...
Страница 130: ...Table 30 Removal steps of video card continued 3 122 ThinkPad W700 and W700ds Hardware Maintenance Manual ...
Страница 153: ...Table 41 Removal steps of LCD panel hinges and LCD cable continued 2 3 3 Removing and replacing a FRU 145 ...
Страница 163: ...Table 44 Removal steps of second LCD panel for ThinkPad W700ds continued 4 Removing and replacing a FRU 155 ...
Страница 197: ...LCD FRUs for ThinkPad W700ds 3 4 8 7 6 2 1 14 13 11 12 10 9 15 5 Parts list 189 ...
Страница 212: ...204 ThinkPad W700 and W700ds Hardware Maintenance Manual ...
Страница 215: ......
Страница 216: ...Part Number 43Y9442_05 1P P N 43Y9442_05 ...


