


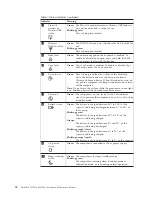


Table 8. Fn key combinations (continued)
Key combination Description
Fn+F7
Apply a presentation scheme directly, with no need to start
Presentation Director.
To disable this function and use the Fn+F7 key combination for
switching a display output location, start Presentation Director, and
change the settings.
Note:
If the computer is a Windows 7 model, it does not support
presentation schemes, but the Fn+F7 combination is available for
switching a display output location.
For Windows 7:
Switch a display output location
v
Computer display only (LCD)
v
Computer display and external monitor (same image)
v
Computer display and external monitor (extended desktop)
v
External monitor only
Note:
To switch between the computer display and an external
monitor, the Win+P key combination is also available.
For Windows Vista and Windows XP:
Switch a display output location
v
External monitor (CRT display)
v
Computer display and external monitor (LCD + CRT display)
v
Computer display (LCD)
Notes:
v
This function is not supported if different desktop images are
displayed on the computer display and the external monitor (the
Extend desktop function).
v
This function does not work while a DVD movie or a video clip is
playing.
To enable this function, start Presentation Director, and change the
Fn+F7 settings.
Note:
Multiple users can log on to a single operating system by using
different user IDs. Each user needs to change the settings.
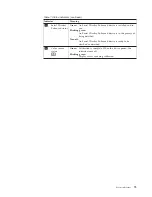
Fn+F8
Change the settings of the UltraNav
®
pointing device.
Fn+F9
Open the EasyEject Utility screen. Buttons for the following choices are
displayed:
v
Eject ThinkPad PC from Mini Dock
: This button is displayed only if
the ThinkPad computer has been attached to a ThinkPad W700 Mini
Dock. If you click this button, the computer is detached from the
ThinkPad W700 Mini Dock
v
Run EasyEject Actions
: This button is used to select, stop, or remove
external devices connected to the ThinkPad computer.
v
Configure EasyEject Actions
: This button is used to open the
EasyEject Utility main window.
v
Fn+F9 Settings
: Configures the settings for the Fn+F9 function.
Note:
If the computer is a Windows 7 model, it does not support the
EasyEject Utility function.
Fn+F10
Reserved.
Fn+F11
Reserved.
78
ThinkPad W700 and W700ds Hardware Maintenance Manual
Содержание ThinkPad 700
Страница 1: ...ThinkPad W700 and W700ds Hardware Maintenance Manual ...
Страница 2: ......
Страница 3: ...ThinkPad W700 and W700ds Hardware Maintenance Manual ...
Страница 8: ...vi ThinkPad W700 and W700ds Hardware Maintenance Manual ...
Страница 18: ...10 ThinkPad W700 and W700ds Hardware Maintenance Manual ...
Страница 19: ...Safety information 11 ...
Страница 26: ...18 ThinkPad W700 and W700ds Hardware Maintenance Manual ...
Страница 27: ...Safety information 19 ...
Страница 28: ...20 ThinkPad W700 and W700ds Hardware Maintenance Manual ...
Страница 29: ...Safety information 21 ...
Страница 30: ...22 ThinkPad W700 and W700ds Hardware Maintenance Manual ...
Страница 31: ...Safety information 23 ...
Страница 34: ...26 ThinkPad W700 and W700ds Hardware Maintenance Manual ...
Страница 35: ...Safety information 27 ...
Страница 37: ...Safety information 29 ...
Страница 41: ...Safety information 33 ...
Страница 42: ...34 ThinkPad W700 and W700ds Hardware Maintenance Manual ...
Страница 43: ...Safety information 35 ...
Страница 45: ...Safety information 37 ...
Страница 46: ...38 ThinkPad W700 and W700ds Hardware Maintenance Manual ...
Страница 78: ...70 ThinkPad W700 and W700ds Hardware Maintenance Manual ...
Страница 84: ...76 ThinkPad W700 and W700ds Hardware Maintenance Manual ...
Страница 88: ...80 ThinkPad W700 and W700ds Hardware Maintenance Manual ...
Страница 92: ...84 ThinkPad W700 and W700ds Hardware Maintenance Manual ...
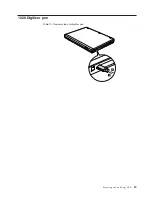
Страница 97: ...1020 Digitizer pen Table 10 Removal steps of digitizer pen 2 1 Removing and replacing a FRU 89 ...
Страница 105: ...Table 14 Removal steps of palm rest continued 2 3 3 4 5 Removing and replacing a FRU 97 ...
Страница 114: ...Table 19 Removal steps of numeric keypad continued 2 a 106 ThinkPad W700 and W700ds Hardware Maintenance Manual ...
Страница 123: ...Table 24 Removal steps of Intel Turbo Memory Minicard continued 4 Removing and replacing a FRU 115 ...
Страница 130: ...Table 30 Removal steps of video card continued 3 122 ThinkPad W700 and W700ds Hardware Maintenance Manual ...
Страница 153: ...Table 41 Removal steps of LCD panel hinges and LCD cable continued 2 3 3 Removing and replacing a FRU 145 ...
Страница 163: ...Table 44 Removal steps of second LCD panel for ThinkPad W700ds continued 4 Removing and replacing a FRU 155 ...
Страница 197: ...LCD FRUs for ThinkPad W700ds 3 4 8 7 6 2 1 14 13 11 12 10 9 15 5 Parts list 189 ...
Страница 212: ...204 ThinkPad W700 and W700ds Hardware Maintenance Manual ...
Страница 215: ......
Страница 216: ...Part Number 43Y9442_05 1P P N 43Y9442_05 ...


