background image

Smaltire secondo la normativa in vigore (D.Lgs 22 del 5/2/9) e successive 
disposizioni nazionali e locali. 


ATTENZIONE: 

Quando si installano prodotti laser come ad esempio le unità DVD CD-ROM a 
fibre ottiche o trasmettitori prestare attenzione a quanto segue: 


Non rimuovere i coperchi. L’apertura dei coperchi di prodotti laser può 
determinare l’esposizione a radiazioni laser pericolose. All’interno delle unità 
non vi sono parti su cui effettuare l’assistenza tecnica. 


L’utilizzo di controlli regolazioni o l’esecuzione di procedure non descritti nel 
presente manuale possono provocare l’esposizione a radiazioni pericolose.


PERICOLO 

Alcuni prodotti laser contengono all’interno un diodo laser di Classe 3A o Classe 
3B. Prestare attenzione a quanto segue: 

Aprendo l’unità vengono emesse radiazioni laser. Non fissare il fascio non 
guardarlo direttamente con strumenti ottici ed evitare l’esposizione diretta al fascio. 


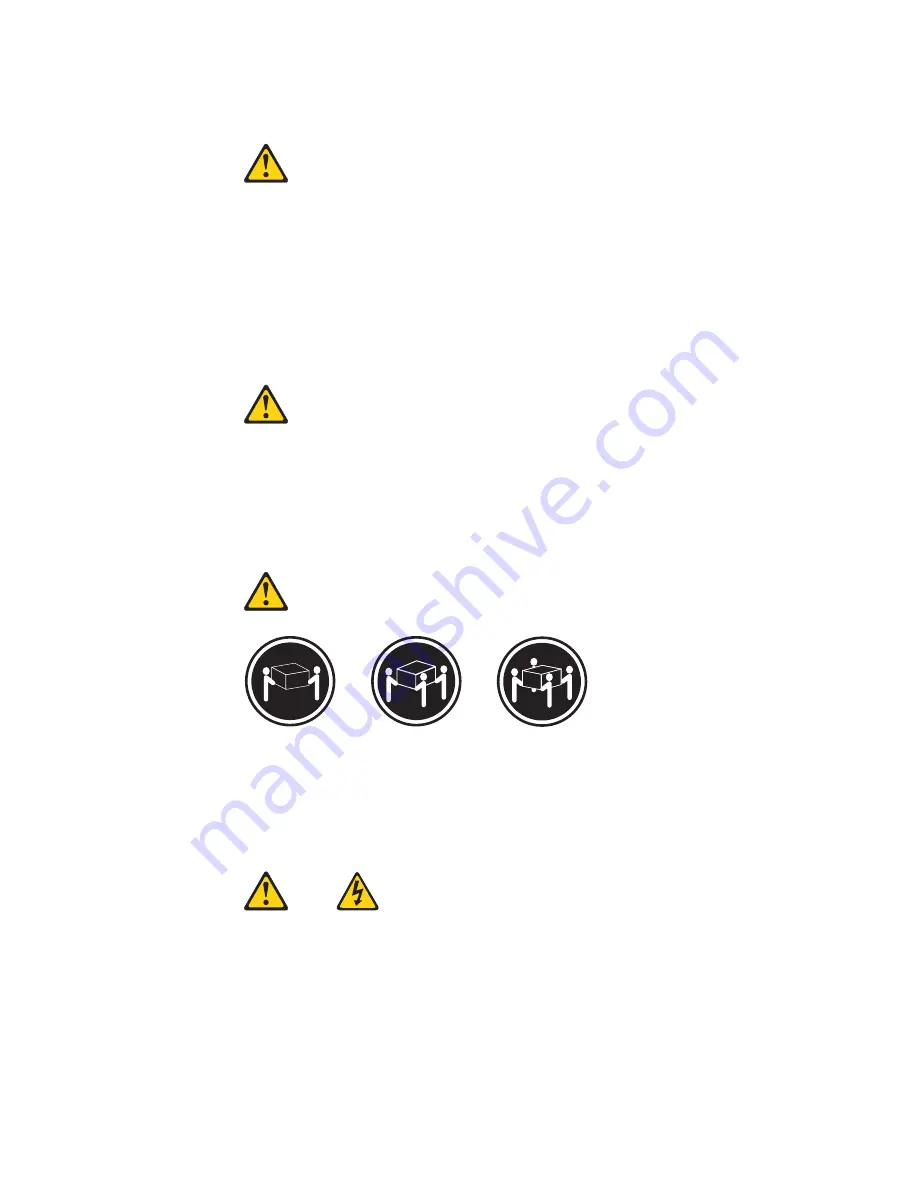
18 kg 

32 kg 

55 kg 


ATTENZIONE: 

Durante il sollevamento della macchina seguire delle norme di sicurezza. 


ATTENZIONE: 

Il pulsante del controllo dell’alimentazione situato sull’unità e l’interruttore di 
alimentazione posto sull’alimentatore non disattiva la corrente elettrica fornita 
all’unità. L’unità potrebbe disporre di più di un cavo di alimentazione. Per 
disattivare la corrente elettrica dall’unità accertarsi che tutti i cavi di alimentazione 


118 

Hardware Maintenance Manual

Содержание 6290

Страница 1: ...IBM Hardware Maintenance Manual Type 6290 ...

Страница 2: ......

Страница 3: ...IBM Hardware Maintenance Manual Type 6290 ...

Страница 4: ...s therefore this statement may not apply to you This publication could include technical inaccuracies or typographical errors Changes are periodically made to the information herein these changes will be incorporated in new editions of the publication IBM may make improvements or changes in the products or the programs described in this publication at any time Requests for technical information ab...

Страница 5: ...movals 33 Front panel card 33 CD ROM paddle card 33 Hard disk drive 34 Removing the center beam 34 Replacing a microprocessor 35 Power supply 35 System board 36 Chapter 7 Symptom to FRU Index 39 Hard disk drive boot error 39 Power Supply Errors 39 Diagnostic error codes 41 Beep symptoms 59 No beep symptoms 61 POST error codes 62 Miscellaneous error messages 77 Undetermined problems 79 Chapter 8 Pa...

Страница 6: ...iv Hardware Maintenance Manual ...

Страница 7: ...rained servicers who are familiar with IBM Personal Computer products Use this manual along with advanced diagnostic tests to troubleshoot problems effectively Before servicing an IBM product be sure to review the Safety information on page 93 Important Safety Information Be sure to read all caution and danger statements in this book before performing any of the instructions Prenez connaissance de...

Страница 8: ...das as instruções de cuidado e perigo antes de executar qualquer operação Lea atentamente todas las declaraciones de precaución y peligro ante de llevar a cabo cualquier operación 2 Hardware Maintenance Manual ...

Страница 9: ...kpoint code display when a successful POST occurs do the following 1 Select Start Options in the Configuration Setup Utility program see IBM Setup Utility program on page 9 2 Set Power On Self Test to Enhanced v Before replacing any FRUs ensure that the latest level of BIOS is installed on the system A down level BIOS might cause false errors and unnecessary replacement of the system board For mor...

Страница 10: ...isabled If it is not press Left Arrow or Right Arrow Æ to change the setting 5 Select Automatic Hardware Power Management 6 Set Automatic Hardware Power Management to Disabled 7 If the problem persists continue to 003 003 Run the Diagnostic programs If necessary refer to Diagnostics on page 12 v If you receive an error replace the part that the diagnostic program calls out or go to Symptom to FRU ...

Страница 11: ...Celeron processor with 128 KB of L2 cache memory or Pentium 4 processor with either 256 KB or 512 KB of internal L2 cache memory varies by model Memory v Support for two dual inline memory modules DIMMs v 512 KB flash memory for system programs Internal drives v 3 5 inch 1 44 MB Slimline diskette drive v Hard disk drive v EIDE CD ROM CD RW Slimline drive or DVD CD RW combo drive Video subsystem v ...

Страница 12: ...omponent interconnect PCI adapter slots v Two DIMM sockets Power v 150 W power supply with manual voltage selection switch v Automatic 50 60 Hz input frequency switching v Advanced Power Management support v Advanced Configuration and Power Interface ACPI support Security features v Power on and administrator passwords v Support for the addition of a cable lock v Startup sequence control v Startup...

Страница 13: ...imately 0 56 cubic meters per minute Acoustical noise emission values Note In this computer fan speed is controlled by temperature configuration and software Actual noise emission values might be different from the stated values depending on the speed of the fan Average sound pressure levels At operator position Idle 33 dBA Operating 35 dBA At bystander position 1 meter Idle 30 dBA Operating 32 dB...

Страница 14: ...nt interconnect PCI adapters Slimline CD ROM or CD RW drive hard disk drive Slimline diskette drive and other removable media drives For the latest information about available options see the following World Wide Web pages v http www ibm com pc us options v http www ibm com pc support You can also obtain information by calling the following telephone numbers v Within the United States call 1 800 I...

Страница 15: ...ty program To start the IBM Setup Utility program do the following 1 If the computer is already on when you start this procedure shut down the operating system and turn off the computer 2 Turn on the computer and look for the following prompt on the logo screen To interrupt normal startup press Enter Press Enter when you see the prompt The Startup Interrupt Menu is displayed 3 Press F1 to start th...

Страница 16: ... IBM Setup Utility program menu you must use the keyboard The keys used to perform various tasks are displayed at the bottom of each screen When you finish viewing or changing settings press Esc to return to the IBM Setup Utility program menu you might have to press Esc several times If you want to save the new settings select Save Settings before you exit Otherwise your changes will not be saved ...

Страница 17: ... Repair Windows NT 4 0 and 2000 Only This runs the Windows NT 4 0 emergency repair utility 2 Run Diagnostics Runs the IBM Enhanced Diagnostic Program 3 Create a Diagnostics Diskette Creates a bootable diagnostic diskette 4 System Information Displays information about your computer configuration and allows the user to gather system information that would be needed during a Help Center call 5 Creat...

Страница 18: ... highlight Run Normal Test or Run Quick Test from the Diagnostics menu and then press Enter This will automatically run a pre defined group of tests from each test category Run Normal Test runs a more extensive set of tests than does Run Quick Test and takes longer to execute 2 Press F5 to automatically run all selected tests in all categories See Test Selection 3 From within a test category press...

Страница 19: ...des on page 41 for error code listings Fixed disk advanced test FDAT PC Doctor s PCDR Fixed Disk Advanced Test module FDAT is a full featured highly configurable fixed disk test suite The configurable capabilities of FDAT allow users to enable or disable specific tests enable or disable testing features control the test log detail alter testing parameters etc FDAT will test for and report most com...

Страница 20: ...ster and slave that are on separate IDE cables but will not perform simultaneous tests on a master and slave on the same IDE cable This generally increases the amount of time needed to test multiple IDE drives Another limitation of FDAT S multitasking capability is the use of Ultra DMA UDMA Only one drive at a time can access the UDMA channel and the UDMA channel buffer must be kept high in order ...

Страница 21: ...ick Erase Hard Drive provides a DOS utility that performs the following steps v Destroys the Master Boot Record MBR on the hard drive v Destroys all copies of the FAT Table on all partitions both the master and backup v Destroys the partition table v Provides messages that warn the user that this is a non recoverable process Chapter 4 Diagnostics 15 ...

Страница 22: ...he Quick or Full Erase functions To select the Quick Erase or Full Erase Hard Drive utility use the following procedure 1 Select the UTILITY option on the toolbar and press Enter 2 Select either the QUICK ERASE or FULL ERASE HARD DISK option and follow the instructions Viewing the test log Errors reported by the diagnostic test will be displayed by the program as a failed test To view details of a...

Страница 23: ... as external speakers a printer or a scanner For some external options you must install additional software in addition to making the physical connection When adding an external option use the information in this section to identify the required connector and then use the instructions that come with the option to help you make the connection and install any software or device drivers that are requ...

Страница 24: ...llustration shows locations of the controls and connectors on the front of your computer 1 Power button 5 Headphone connector 2 Power on indicator 6 Microphone connector 3 Hard disk drive activity indicator 7 USB connectors 4 Speaker volume control 18 Hardware Maintenance Manual ...

Страница 25: ...onnector 5 Audio line in connector 12 Serial connector 6 Power cord connector 13 PS 2 Keyboard connector 7 Digital monitor connector Note Some connectors on the rear of your computer are color coded to help determine where to connect the cables Obtaining device drivers You can obtain device drivers for operating systems that are not preinstalled at http www ibm com pc support on the World Wide Web...

Страница 26: ... and turn off all attached devices and the computer 2 Unplug all power cords from electrical outlets 3 Disconnect all cables attached to the computer This includes power cords input output I O cables and any other cables that are connected to the computer 4 Remove the floor stand if attached 5 Remove the screw that secures the cover at the rear of the system unit 6 Carefully slide the cover forwar...

Страница 27: ...procedure to gain access to components on the system board such as memory DIMMs the battery and the Clear CMOS BIOS recovery jumper You can also use this procedure to learn how to remove drives when updating to different or higher capacity drives To access system board components 1 Turn off the computer and all attached devices 2 Unplug the power cord and remove the cover See Removing the cover on...

Страница 28: ...3 Remove the PCI riser Do not remove any installed adapters from the riser 4 Remove the three screws holding the hard disk drive tray 22 Hardware Maintenance Manual ...

Страница 29: ...ttached to the small circuit board at the front 6 Remove the two screws holding the CD and diskette drive tray Note The individual drives are removed with one screw each accessible from the side Chapter 5 Installing Options 23 ...

Страница 30: ...ard together Slide both drive trays out far enough to access the system board This might require disconnecting cables that are connected to the drives and to the system board Note where the cables are connected before disconnecting them 24 Hardware Maintenance Manual ...

Страница 31: ...e following illustration shows the locations of parts on the system board 1 Microprocessor 10 Speaker connector 2 DIMM connector 1 11 Front panel connector 3 DIMM connector 2 12 Front USB connector 4 Fan connector 13 Battery 5 12 V Power connector 14 Clear CMOS BIOS recovery jumper 6 Power connector 15 PCI riser connector 7 POV connector 16 CD audio connector 8 Diskette drive connector 17 Micropro...

Страница 32: ...inches in height Note Only DDR SDRAM DIMMs can be used To install DIMMs 1 Access the system board See Accessing system board components on page 21 2 locate the DIMM connectors See Identifying parts on the system board on page 25 3 Open the retaining clips 4 Make sure the notch in the DIMM aligns with the tab on the connector Push or insert the memory module straight down into the connector until t...

Страница 33: ... the card Length is the distance from the rear of the computer to the front Upper PCI slot 106 mm wide and 175 mm long Lower PCI slot 106 mm wide and 128 mm long To install an adapter 1 Remove the cover See Removing the cover on page 20 2 Remove the PCI riser Do not remove any adapters that are already installed in the riser 3 Remove the adapter slot cover latch and the slot cover for the appropri...

Страница 34: ...age 30 Installing a cable lock To help to protect against theft you can install an optional cable lock to secure your computer to a desk table or other fixture This type of cable lock also automatically locks the computer cover to the chassis The cable lock latch on your computer accommodates the same type of cable lock used with many laptop computers You can order cable locks directly from IBM Fo...

Страница 35: ...e lost An error message is displayed when you turn on the computer Refer to Safety notices multi lingual translations on page 97 for information about replacing and disposing of the battery To change the battery 1 Refer to Accessing system board components on page 21 2 Locate the battery 1 3 Remove the old battery 4 Install the new battery 5 Slide both drive trays back into the computer and secure...

Страница 36: ... screws Reconnect any cables that were disconnected 5 Install the PCI riser card and adapters 6 Replace the cover and connect the power cable See Replacing the cover and connecting the cables 7 Restart the computer leave it on for approximately 10 seconds and then turn off the computer 8 Repeat step 1 9 Move the jumper back to the standard pins 1 and 2 10 Reassemble the computer and replace the co...

Страница 37: ...e cover with the screw 4 If a floor stand was attached reattach it 5 Reconnect the external cables and power cords to the computer See Locating connectors on the rear of your computer on page 19 6 To update the configuration see IBM Setup Utility program on page 9 Chapter 5 Installing Options 31 ...

Страница 38: ...32 Hardware Maintenance Manual ...

Страница 39: ...nd disconnect all external cables and power cords then remove the cover See Removing the cover on page 20 2 Disconnect all cables attached to the front panel card 3 Remove the 2 screws holding the card to the chassis and lift off CD ROM paddle card To remove the CD ROM paddle card do the following 1 Turn off the computer and peripheral devices and disconnect all external cables and power cords the...

Страница 40: ...0 2 Remove the CD diskette drive tray See Accessing system board components on page 21 3 Remove the 3 screws holding the hard disk tray and remove 4 Disconnect all hard disk drive wires 5 Remove the 4 screws attaching the hard disk to the hard disk tray Note When replacing the hard disk drive make sure you obtain the proper Recovery CD to install after you install the new hard drive Removing the c...

Страница 41: ...enter beam See Removing the center beam on page 34 4 Unscrew the fansink from the system board and carefully lift it off The processor will come with it attached to the bottom by thermal grease 5 To remove the fansink from the processor twist the fansink to break the seal formed by the thermal grease and remove Note If the thermal grease seal cannot be broken you may want to start up the system to...

Страница 42: ...remove the cover See Removing the cover on page 20 2 Remove the CD diskette drive tray See Accessing system board components on page 21 3 Remove the hard disk drive tray See Accessing system board components on page 21 4 Remove the PCI riser See Installing adapters on page 27 5 Remove the fan by disconnecting the power cord from the system board and unscrewing the 2 screws holding the fan in place...

Страница 43: ...8 Lift out the system board Chapter 6 FRU Removals 37 ...

Страница 44: ...38 Hardware Maintenance Manual ...

Страница 45: ...ror A hard disk drive boot error error codes 1962 and I999030X can have the following causes Error FRU Action The start up drive is not in the boot sequence in configuration Check the configuration and ensure the start up drive is in the boot sequence No operating system installed on the boot drive Install an operating system on the boot drive The boot sector on the start up drive is corrupted The...

Страница 46: ...Check Verify FRU Action Check the power on switch for continuity Power on Switch 40 Hardware Maintenance Manual ...

Страница 47: ...ot block 3 System board 000 027 XXX BIOS Configuration Setup error 1 Run Setup 2 Flash the system 3 Boot block 4 System board 000 034 XXX BIOS Buffer Allocation failure 1 Reboot the system 2 Flash the system 3 Run memory test 4 System board 000 035 XXX BIOS Reset Condition detected 1 Flash the system 2 System board 000 036 XXX BIOS Register error 1 Flash the system 2 Boot block 3 System board 000 ...

Страница 48: ...board 000 270 XXX BIOS ACPI failure 1 Flash the system 2 System board 001 000 XXX System Test Passed 1 No action 001 00X XXX System Error 1 System board 001 01X XXX System Error 1 System board 001 024 XXX System Addressing test failure 1 System board 001 025 XXX System Checksum Value error 1 Flash the system 2 System board 001 026 XXX System FLASH data error 1 Flash the system 2 System board 001 0...

Страница 49: ... and or enabled 2 Re run test 3 Component that is called out in warning statement 4 Component under test 001 198 XXX System test aborted 1 If a component is called out make sure it is connected and or enabled 2 Flash the system and re test 3 Go to the Undetermined problems section 001 199 XXX System test failed cause unknown 1 Go to the Undetermined problems section 2 Flash the system and re test ...

Страница 50: ...on IRQ11 2 System board 001 279 XXX System IRQ12 failure 1 Device on IRQ12 2 System board 001 280 XXX System IRQ13 failure 1 Device on IRQ13 2 System board 001 281 XXX System IRQ14 hard disk drive failure 1 Hard disk drive cable 2 Hard disk drive 3 System board 001 282 XXX System IRQ15 failure 1 Device on IRQ15 2 System board 001 286 XXX 001 287 XXX 001 288 XXX System Timer failure 1 System board ...

Страница 51: ...d 005 027 XXX Video Configuration Setup error 1 Run Setup 2 Video drivers update 3 Video card if installed 4 System board 005 031 XXX Video Device Cable failure 1 Video cable 2 Monitor 3 Video card if installed 4 System board 005 032 XXX Video Device Controller failure 1 Video card if installed 2 System board 005 036 XXX Video Register error 1 Video card if installed 2 System board 005 038 XXX Sys...

Страница 52: ...e 2 Diskette drive 3 System board 006 195 XXX Diskette interface Test aborted by user 1 Information 2 Re start the test if necessary 006 196 XXX Diskette interface test halt error threshold exceeded 1 Press F3 to review the log file 2 Re start the test to reset the log file 006 197 XXX Diskette interface test warning 1 If a component is called out make sure it is connected and or enabled 2 Re run ...

Страница 53: ...art the test if necessary 011 196 XXX Serial port test halt error threshold exceeded 1 Press F3 to review the log file 2 Re start the test to reset the log file 011 197 XXX Serial port test warning 1 Make sure the component that is called out is connected and or enabled 2 Re run test 3 Component that is called out in warning statement 4 Component under test 011 198 XXX Serial port test aborted 1 I...

Страница 54: ...or threshold exceeded 1 Press F3 to review the log file 2 Re start the test to reset the log file 014 197 XXX Parallel port test warning 1 Make sure the component that is called out is connected and or enabled 2 Re run test 3 Component that is called out in warning statement 4 Component under test 014 198 XXX Parallel port test aborted 1 If a component is called out make sure it is connected and o...

Страница 55: ...m board 015 195 XXX USB port Test aborted by user 1 Information 2 Re start the test if necessary 015 196 XXX USB port test halt error threshold exceeded 1 Press F3 to review the log file 2 Re start the test to reset the log file 015 197 XXX USB port test warning 1 Make sure the component that is called out is connected and or enabled 2 Re run test 3 Component that is called out in warning statemen...

Страница 56: ...roblems section 2 Flash the system and re test 3 Replace component under function test 018 250 XXX PCI Card Services error 1 PCI card 2 Riser card if installed 3 System board 020 000 XXX PCI Interface Test Passed 1 No action 020 0XX XXX PCI Interface error 1 PCI card 2 Riser card if installed 3 System board 020 195 XXX PCI Test aborted by user 1 Information 2 Re start the test if necessary 020 196...

Страница 57: ... board 025 195 XXX IDE interface Test aborted by user 1 Information 2 Re start the test if necessary 025 196 XXX IDE interface test halt error threshold exceeded 1 Press F3 to review the log file 2 Re start the test to reset the log file 025 197 XXX IDE interface test warning 1 Make sure the component that is called out is connected and or enabled 2 Re run test 3 Component that is called out in wa...

Страница 58: ...2 Re start the test to reset the log file 030 197 XXX SCSI interface test warning 1 Make sure the component that is called out is connected and or enabled 2 Re run test 3 Component that is called out in warning statement 4 Component under test 030 198 XXX SCSI interface test aborted 1 If a component is called out make sure it is connected and or enabled 2 Flash the system and re test 3 Go to the U...

Страница 59: ...nterface Test Passed 1 No action 071 00X XXX 071 01X XXX 071 02X XXX Audio port error 1 Run Setup 2 Flash the system 3 System board 071 03X XXX Audio port failure 1 Speakers 2 Microphone 3 Audio card if installed 4 System board 071 04X XXX Audio port failure 1 Run Setup 2 Audio card if installed 3 System board 071 195 XXX Audio port Test aborted by user 1 Information 2 Re start the test if necessa...

Страница 60: ...t is connected and or enabled 2 Re run test 3 Component that is called out in warning statement 4 Component under test 080 198 XXX Game Port interface test aborted 1 If a component is called out make sure it is connected and or enabled 2 Flash the system and re test 3 Go to the Undetermined problems section 080 199 XXX Game Port interface test failed cause unknown 1 Go to the Undetermined problems...

Страница 61: ...XXX XXX Microprocessor failure 1 Microprocessor s 2 System board 089 195 XXX Microprocessor Test aborted by user 1 Information 2 Re start the test if necessary 089 196 XXX Microprocessor test halt error threshold exceeded 1 Press F3 to review the log file 2 Re start the test to reset the log file 089 197 XXX Microprocessor test warning 1 Make sure the component that is called out is connected and ...

Страница 62: ... under function test 170 250 XXX 170 251 XXX Voltage Sensor s Voltage limit error 1 Power supply 2 System board 170 254 XXX Voltage Sensor s Voltage Regulator Module error 1 Voltage Regulator Module VRM 2 Microprocessor 3 System board 175 000 XXX Thermal Sensor s Test Passed 1 No action 175 0XX XXX Thermal Sensor s failure 1 Flash system 2 System board 175 195 XXX Thermal Sensor s Test aborted by ...

Страница 63: ...tion 201 XXX XXX System Memory error 1 Replace the memory module called out by the test 2 System board 202 000 XXX System Cache Test Passed 1 No action 202 XXX XXX System Cache error 1 Cache if removable 2 System board 3 Microprocessor 206 000 XXX Diskette Drive Test Passed 1 No action 206 XXX XXX Diskette Drive error 1 Diskette Drive Cable 2 Check power supply voltages 3 Diskette drive 4 System b...

Страница 64: ...heck and test mouse 3 System board 301 000 XXX Keyboard Test Passed 1 No action 302 000 XXX Mouse Test Passed 1 No action 302 XXX XXX Mouse error 1 Mouse 2 Check and test Keyboard 3 System board 303 000 XXX Joystick Test Passed 1 No action 303 XXX XXX Joystick error 1 Remove the Joystick and re test the system 305 000 XXX Monitor DDC Test Passed 1 No action 305 250 XXX Monitor DDC self test failur...

Страница 65: ...d 1 2 3 DMA page register write read failed 1 System Board 1 2 4 RAM refresh verification failed 1 DIMM 2 System Board 1 3 3 1 1st 64K RAM test failed 1 DIMM 2 System Board 1 3 2 1st 64K RAM parity test failed 1 DIMM 2 Processor 3 System Board 2 2 3 1 Interrupt vector loading test failed 1 System Board 2 1 1 Secondary DMA register failed 1 System Board 2 1 2 Primary DMA register failed 1 System Bo...

Страница 66: ...per on J28 2 System Board 2 3 2 Screen memory failed 1 System Board 2 3 3 Screen retrace failed 1 System Board 1 2 Search for video ROM failed 1 System Board All other beep code sequences 1 System Board Continuous beep 1 System Board Repeating short beeps 1 Keyboard stuck key 2 Keyboard Cable 3 System Board 60 Hardware Maintenance Manual ...

Страница 67: ...eep during POST but computer works correctly 1 System Board No beep during POST 1 See Undetermined problems on page 79 2 System Board 3 Memory Module 4 Any Adapter or Device 5 Riser Card 6 Power Cord 7 Power Supply Chapter 7 Symptom to FRU Index 61 ...

Страница 68: ...rs do the following 1 Select Start Options in the Configuration Setup Utility program see IBM Setup Utility program on page 9 2 Set Power On Self Test to Enhanced If the POST detects a problem an error message appears on the screen A single problem can cause several error messages to appear When you correct the cause of the first error message the other error messages probably will not appear on t...

Страница 69: ... If not suspect that device 3 Power on external devices first then power on computer 4 CMOS Backup Battery see Safety information on page 93 System Board 5 System Board 163 Date and Time Incorrect 1 Time and Date Set 2 CMOS Backup Battery see Safety information on page 93 3 System Board 164 Memory Size Error 1 Run Setup Check System Summary menu for memory size change See IBM Setup Utility program...

Страница 70: ...enna 3 System Board 185 Corrupted boot sequence 1 Set configuration and reinstall the boot sequence 186 Security Hardware Control Logic Error 1 System Board 187 1 Clear Administration password 2 System Board 189 1 More than three password attempts were made to access the computer 190 System Security Invalid Remote Change Requested 1 System Board 191 System Security IBM Embedded Security Hardware R...

Страница 71: ...ard Cable 3 System Board 3XX Not listed above 1 Keyboard 2 Keyboard Cable 3 System Board 5XX 1 Video Adapter if installed 2 System Board 601 1 Diskette Drive A 2 Diskette Drive Cable 3 System Board 4 Riser card 602 1 Bad Diskette 2 Verify Diskette and retry 604 And able to run diagnostics 1 Run Setup and verify diskette configuration settings 2 Diskette Drive A B 3 Diskette Drive Cable 4 System Bo...

Страница 72: ...on 1 Check SCSI terminator installation 2 SCSI Cable 3 SCSI Terminator 4 SCSI Device 5 SCSI Adapter 1101 Serial connector error possible system board failure 1 Run Enhanced Diagnostics 1101 1102 1106 1108 1109 1 System Board 2 Any Serial Device 1107 1 Communications Cable 2 System Board 1102 Card selected feedback error 1 Run Enhanced Diagnostics 1103 Port fails register check 1 Run Enhanced Diagn...

Страница 73: ...rmation only 1404 System board timeout failure 1 Run Enhanced Diagnostics 1405 Parallel adapter error 1 Run Enhanced Diagnostics 1406 Presence test error 1 Run Enhanced Diagnostics 14XX Not listed above Check printer before replacing system board 1 Printer 2 System Board 15XX 1 SDLC Adapter 1692 Boot sequence error 1 Run FDISK to ensure at least one active partition is set active 16XX 1 36 38 Work...

Страница 74: ...apters to properly configure 3 Remove any suspect ISA adapters 4 Rerun diagnostics 5 PCI Adapter 1803 PCI PnP Error Not Enough Memory Space Available 1 Run Setup and verify PCI ISA configuration settings 2 If necessary set ISA adapters to Not available to allow PCI adapters to properly configure 3 Remove any suspect ISA adapters 4 Rerun diagnostics 5 PCI Adapter 1804 PCI PnP Error Not Enough Real ...

Страница 75: ...Alternate BSC adapter 2401 2402 If screen colors change 1 Display 2401 2402 If screen colors are OK 1 System Board 2 Display 2409 1 Display 2410 1 System Board 2 Display 2462 Video memory configuration error 1 Check cable connections 2 Run Setup and verify video configuration settings 3 Video Memory Modules 4 Video Adapter if installed 5 System Board 4611 4630 1 Multiport 2 Interface Board 2 Multi...

Страница 76: ...pter 79XX 1 3117 Adapter 80XX 1 PCMCIA Adapter 84XX 1 Speech Adapter 2 Speech Control Assembly 8601 8602 1 Pointing Device Mouse 2 System Board 8603 8604 Pointing Device Error 1 System Board 2 Pointing Device Mouse 86XX Not listed above 1 Mouse 2 System Board 89XX 1 PC Music Adapter 2 MIDI Adapter Unit 91XX 1 Optical Drive 2 Adapter 96XX 1 SCSI Adapter 2 Any SCSI Device 3 System Board 4 Riser card...

Страница 77: ...10140 10141 10142 10143 10144 10145 10146 10147 10148 10149 10150 10151 10152 1 Modem 10153 1 Data Fax Modem 2 System Board 3 Riser card 101XX Not listed above 1 Modem Adapter A 2 Data Fax Modem 3 System Board 4 Riser card 10450 10451 10490 10491 10492 10499 Read write error 1 Run Enhanced Diagnostics 2 Hard Disk Drive 3 System Board 4 Riser card 10452 Seek test error 1 Run Enhanced Diagnostics 10...

Страница 78: ... only 10480 1 Hard Disk Drive ESDI 2 Drive Cable 3 System Board 10481 ESDI drive D seek error 1 Run Enhanced Diagnostics 10482 Drive select acknowledgement bad 1 Run Enhanced Diagnostics 106X1 1 Check Configuration 2 Ethernet Adapter 10635 1 Power off computer wait ten seconds then power on the computer 2 Ethernet Adapter 10651 10660 1 Check Cables 2 Ethernet Adapter 106XX Not listed above 1 Ether...

Страница 79: ...Memory 148XX 1 Video Adapter 14901 14902 1491X 14922 1 Video Adapter if installed 2 System Board 3 Riser card 4 Display any type 14932 1 External Display 2 Video Adapter 161XX 1 FaxConcentrator Adapter 164XX 1 120 MB Internal Tape Drive 2 Diskette Cable 3 System Board 4 Riser card 16500 1 6157 Tape Attachment 2 Adapter 16520 16540 1 6157 Streaming Tape Drive 2 6157 Tape Attachment Adapter 166XX 16...

Страница 80: ...20104 1 Memory Module DRAM VRAM 2 Printer Scanner Option 3 Image Adapter A 20105 to 20110 1 Printer Scanner Option 2 Image Adapter A 3 Memory Module DRAM VRAM Image Adapter A Memory Test failure indicated by graphic of adapter 1 Replace memory module shown in graphic 206XX 1 SCSI 2 Adapter 2 Any SCSI Device 3 System Board 4 Riser card 208XX Verify there are no duplicate SCSI ID settings on the sam...

Страница 81: ... and power on LED is off check external voltages 1 CD ROM Drive I 2 CD ROM Drive II Enhanced CD ROM Drive II Any CD ROM Drive 3 SCSI Cable 4 SCSI Adapter or System Board 216XX 1 Scanner 217XX If an external device and power on LED is off check external voltages 1 Rewritable Optical Drive 2 SCSI Adapter or System Board 3 SCSI Cable 218XX Check for multi CD tray or jukebox 1 Changer 219XX 1 SCSI Com...

Страница 82: ...rverGuard Adapter 27558 27559 27560 27561 1 PCMCIA Type II Modem 2 ServerGuard Adapter 27562 1 External Power Control not connected 2 External Power Control 3 ServerGuard Adapter 27563 27564 1 External Power Control 2 ServerGuard Adapter 275XX 1 Update Diagnostic Software 27801 to 27879 1 Personal Dictation System 2 Adapter 3 System Board 27880 to 27889 1 External FRU Speaker Microphone 999030X Ha...

Страница 83: ...pter 2 Ensure that the operating system settings are set to enable Wake on LAN 3 Ensure Wake On LAN feature is enabled in Setup Configuration see IBM Setup Utility program on page 9 4 Ensure network administrator is using correct MAC address 5 Ensure no interrupt or I O address conflicts 6 Network adapter advise network administrator of new MAC address Dead computer See Power Supply Errors on page...

Страница 84: ...ks correctly 1 Power Supply 2 System Board 3 LED Cables Printer problems 1 Printer Program loads from the hard disk with a known good diagnostics diskette in the first 3 5 inch diskette drive 1 Run Setup 2 Diskette Drive 3 Diskette Drive Cable 4 System Board 5 Riser card 6 Power Supply RPL computer cannot access programs from its own hard disk 1 If network administrator is using LCCM Hybrid RPL ch...

Страница 85: ... the following components if installed one at a time a Non IBM devices b External devices modem printer or mouse c Any adapters d Riser card e Memory modules f Extended video memory g External Cache h External Cache RAM i Hard disk drive j Diskette drive 3 Power on the computer to re test the system 4 Repeat steps 1 through 3 until you find the failing device or adapter If all devices and adapters...

Страница 86: ...80 Hardware Maintenance Manual ...

Страница 87: ...63J 64J 65J CEJ 71J 72J 73J 74J 75J 76J 77J 81J 82J 83J 84J 85J CGJ CHJ 22P2525 Y 1 Top Cover Assembly White model 10J 23P0335 Y 2 Center Beam all models 22P2527 Y 3 Processor Intel P4 1 8 GHz models A1J A2J A3J 58P9968 N 3 Processor Intel P4 1 9 GHz models 11J 12J 13J 14J 15J 16J 17J 18J 19J 10J CBJ 49P1726 N 3 Processor Intel P4 2 0 GHz 48P7205 N 3 Processor Intel P4 2 2 GHz models 21J 22J 23J 2...

Страница 88: ...models 51J 52J 53J 54J 55J 56J 57J CFJ 58P9963 N 3 Processor Intel P4 2 8 GHz models 71J 72J 73J 74J 75J 76J 77J CHJ 01R3171 N 3 Fan Sink all models 32P4004 N 4 Planar w POV3 card models 10J 11J 12J 13J 14J 15J 16J 17J 18J 19J 21J 22J 23J 24J 25J 26J 27J 28J 29J CCJ CKJ 02R4091 N 4 Planar w o POV3 card models A1J A2J A3J 41J 42J 43J 44J 45J 46J 47J CAJ CBJ 61J 62J 63J 64J 65J CEJ CJJ 02R4093 N 4 P...

Страница 89: ...DJ CEJ CFJ 24P3687 Y 10 Power Supply 150W all models 26P9149 N Retention module all models 22P2550 Y Memory 128 MB PC 266 DDRAM DIMM models 11J 12J 13J 14J 15J 16J 17J 18J 19J 10J 41J 42J 43J 44J 45J CAJ 81J 82J 83J 84J 85J CGJ CHJ 33L3303 Y Memory 256 MB PC 266 DDRAM DIMM models 21J 22J 23J 24J 25J 26J 27J 28J 29J 31J 32J 33J 34J 35J 36J 37J 38J 39J CBJ 71J 72J 73J 74J 75J 76J 77J 33L3305 Y Memor...

Страница 90: ...33F8354 Y Mouse PS 2 2 Button Wheel Mouse Black models 11J 12J 13J 14J 15J 16J 17J 18J 19J 21J 22J 23J 24J 25J 26J 27J 28J 29J A1J A2J A3J 31J 32J 33J 34J 35J 36J 37J 38J 39J 41J 42J 43J 44J 45J CAJ CBJ CCJ CDJ 51J 52J 53J 54J 55J 56J 57J CFJ 61J 62J 63J 64J 65J CEJ 71J 72J 73J 74J 75J 76J 77J 81J 82J 83J 84J 85J CGJ CHJ 24P0491 Y Mouse PS 2 2 Button Wheel Mouse White model 10J 24P0489 Y Recovery ...

Страница 91: ...2J 33J 34J 35J 36J 37J 38J 39J 41J 42J 43J 44J 45J CAJ CBJ CCJ CDJ 51J 52J 53J 54J 55J 56J 57J CFJ 61J 62J 63J 64J 65J CEJ 71J 72J 73J 74J 75J 76J 77J 81J 82J 83J 84J 85J CGJ CHJ 32P5118 Y Japanese PS2 NetVista Fullwidth ID Pearl White model 10J 32P5158 Y Power Cords FRU CRU line cord all models 39H0212 Y 3P 2P plug all models 13H8211 Y Chapter 8 Parts listing 85 ...

Страница 92: ...86 Hardware Maintenance Manual ...

Страница 93: ... after the proper password is entered Removing a power on password To service a computer with an active and unknown power on password power off the computer and use the following procedure Note On some models this procedure will also remove the administrator password 1 Unplug the power cord and remove the top cover 2 Refer to Identifying parts on the system board on page 25 to find the recovery ju...

Страница 94: ...pdate the VPD see Flash BIOS VPD update procedure on page 89 Desktop Management Interface DMI Desktop Management Interface DMI is data containing a list of the system unit serial number along with all serialized components for example system board riser card memory and processor This can be viewed with a DMI SM BIOS browser Alert on LAN Alert on LAN provides notification of changes in the computer...

Страница 95: ...tion 1 Power off the computer 2 Insert the flash update diskette into drive A 3 Power on the computer 4 When the Update Utility appears select the country keyboard then press Enter 5 If the computer serial number was previously recorded the number is displayed with an option to update it Press Y to update the serial number 6 Type the 7 digit serial number of the computer you are servicing then pre...

Страница 96: ...ds to turn the system off 7 Remove the power cord and cover 8 Return the boot block recovery jumper to its original position and replace the cover 9 Connect the power cord back to the system and power the system on When the system POST tests it will report several POST errors These errors can be ignored The standard POST BIOS Update Utility screen will appear after a pause 10 Select the desired la...

Страница 97: ...lay Power Management Signaling DPMS Automatic Hardware Power Management features Automatic Hardware Power Management can reduce the power states of the computer processor and monitor if the monitor supports DPMS if they are inactive for a predetermined length of time Set the time for the system to enter a low power state You can define the amount of energy savings by specifying values for the foll...

Страница 98: ...t turn on the computer automatically v Serial Port A Ring Detect With this feature set to Enabled and an external modem connected to serial port COM1 the computer will turn on automatically when a ring is detected on the modem v PCI Modem Ring Detect With this feature set to Enabled the computer will turn on automatically when a ring is detected on the internal modem v PCI Wake Up This feature all...

Страница 99: ...causes hazards to the customer or that makes the equipment unsafe v Before you start the machine ensure that other service representatives and the customer s personnel are not in a hazardous position v Place removed covers and other parts in a safe place away from all personnel while you are servicing the machine v Keep your tool case away from walk areas so that other people will not trip over it...

Страница 100: ...der hazardous conditions or near equipment that has hazardous voltages v Disconnect all power before Performing a mechanical inspection Working near power supplies Removing or installing main units v Before you start to work on the machine unplug the power cord If you cannot unplug it ask the customer to power off the wall box that supplies power to the machine and to lock the wall box in the off ...

Страница 101: ...come a victim yourself Switch off power Send another person to get medical aid Safety inspection guide The intent of this inspection guide is to assist you in identifying potentially unsafe conditions on these products Each machine as it was designed and built had required safety items installed to protect users and service personnel from injury This guide addresses only those items However good j...

Страница 102: ...ndling the part are all at the same charge Notes 1 Use product specific ESD procedures when they exceed the requirements noted here 2 Make sure that the ESD protective devices you use have been certified ISO 9000 as fully effective When handling ESD sensitive parts v Keep the parts in protective packages until they are inserted into the product v Avoid contact with other people v Wear a grounded w...

Страница 103: ...rical outlet v Connect to properly wired outlets any equipment that will be attached to this product v When possible use one hand only to connect or disconnect signal cables v Never turn on any equipment when there is evidence of fire water or structural damage v Disconnect the attached power cords telecommunications systems networks and modems before you open the device covers unless instructed o...

Страница 104: ... CD ROMs DVD ROM drives fiber optic devices or transmitters are installed note the following v Do not remove the covers Removing the covers of the laser product could result in exposure to hazardous laser radiation There are no serviceable parts inside the device v Use of controls or adjustments or performance of procedures other than those specified herein might result in hazardous radiation expo...

Страница 105: ...pplied to the device The device also might have more than one power cord To remove all electrical current from the device ensure that all power cords are disconnected from the power source 1 2 CAUTION Do not place any object weighing more than 82 kg 180 lbs on top of rack mounted devices Chapter 10 Related service information 99 ...

Страница 106: ...ção e configuração v Conecte e desconecte cabos conforme descrito na seguinte tabela ao instalar ou movimentar este produto ou os dispositivos conectados ou ao abrir suas tampas Para Conectar Para Desconectar 1 DESLIGUE Tudo 2 Primeiramente conecte todos os cabos aos dispositivos 3 Conecte os cabos de sinal aos conectores 4 Conecte os cabos de alimentação às tomadas 5 LIGUE os dispositivos 1 DESLI...

Страница 107: ...cedimentos diferentes dos especificados aqui pode resultar em exposição prejudicial à radiação PERIGO Alguns produtos a laser contêm um diodo laser da Classe 3A ou Classe 3B embutido Observe o seguinte Radiação de laser quando aberto Não olhe diretamente para o raio a olho nu ou com instrumentos íticos e evite exposição direta ao raio 18 kg 37 lbs 32 kg 70 5 lbs 55 kg 121 2 lbs CUIDADO Ao levantar...

Страница 108: ...fonte de energia elétrica 1 2 CUIDADO CUIDADO Não coloque nenhum objeto com peso superior a 82 kg 180 lbs sobre dispositivos montados em rack 102 Hardware Maintenance Manual ...

Страница 109: ...Chapter 10 Related service information 103 ...

Страница 110: ...104 Hardware Maintenance Manual ...

Страница 111: ...Chapter 10 Related service information 105 ...

Страница 112: ...106 Hardware Maintenance Manual ...

Страница 113: ...Chapter 10 Related service information 107 ...

Страница 114: ...108 Hardware Maintenance Manual ...

Страница 115: ...Chapter 10 Related service information 109 ...

Страница 116: ...110 Hardware Maintenance Manual ...

Страница 117: ... installation et de configuration v Lorsque vous installez ou que vous déplacez le présent produit ou des périphériques qui lui sont raccordés reportez vous aux instructions ci dessous pour connecter et déconnecter les différents cordons Connexion Déconnexion 1 Mettez les unités hors tension 2 Commencez par brancher tous les cordons sur les unités 3 Branchez les câbles d interface sur des connecte...

Страница 118: ...yon laser respectez les consignes de réglage et d utilisation des commandes ainsi que les procédures décrites dans le présent document DANGER Certains produits laser contiennent une diode laser de classe 3A ou 3B Prenez connaissance des informations suivantes Rayonnement laser lorsque le carter est ouvert évitez de regarder fixement le faisceau ou de l observer à l aide d instruments optiques évit...

Страница 119: ...cordons d alimentation Pour isoler totalement l unité du réseau électrique débranchez tous les cordons d alimentation des socles de prise de courant 1 2 ATTENTION Ne posez pas d objet dont le poids dépasse 82 kg sur les unités montées en armoire Chapter 10 Related service information 113 ...

Страница 120: ...onsprozeduren anders angegeben v Nur nach den nachfolgend aufgeführten Anweisungen arbeiten die für Installation Transport oder öffnen von Gehäusen von Personal Computern oder angeschlossenen Einheiten gelten Kabel anschlieβen Kabel lösen 1 Alle Geräte ausschalten und Netzstecker ziehen 2 Zuerst alle Kabel an Einheiten anschließen 3 Signalkabel an Anschlußbuchsen anschließen 4 Netzstecker an Steck...

Страница 121: ...ung des CD ROM Laufwerks nicht öffnen v Steuer und Einstellelemente sowie Verfahren nur entsprechend den Anweisungen im vorliegenden Handbuch einsetzen Andernfalls kann gefährliche Laserstrahlung auftreten VORSICHT Manche CD ROM Laufwerke enthalten eine eingebaute Laserdiode der Klasse 3A oder 3B Die nachfolgend aufgeführten Punkte beachten Laserstrahlung bei geöffneter Tür Niemals direkt in den L...

Страница 122: ...n Server nicht unterbrochen Der Server könnte auch mehr als ein Netzkabel aufweisen Um die gesamte Stromversorgung des Servers auszuschalten muß sichergestellt werden daß alle Netzkabel aus den Netzsteckdosen herausgezogen wurden 1 2 ACHTUNG Keine Gegenstände die mehr als 82 kg wiegen auf Rack Einheiten ablegen 116 Hardware Maintenance Manual ...

Страница 123: ...e descritto nella seguente tabella quando si effettuano l installazione la rimozione o l apertura dei coperchi di questo prodotto o delle unità collegate Per collegare Per scollegare 1 SPEGNERE tutti i dispositivi 2 Collegare prima tutti i cavi alle unità 3 Collegare i cavi di segnale ai connettori 4 Collegare i cavi di alimentazione alle prese elettriche 5 ACCENDERE le unità 1 SPEGNERE tutti i di...

Страница 124: ...ione a radiazioni pericolose PERICOLO Alcuni prodotti laser contengono all interno un diodo laser di Classe 3A o Classe 3B Prestare attenzione a quanto segue Aprendo l unità vengono emesse radiazioni laser Non fissare il fascio non guardarlo direttamente con strumenti ottici ed evitare l esposizione diretta al fascio 18 kg 32 kg 55 kg ATTENZIONE Durante il sollevamento della macchina seguire delle...

Страница 125: ...siano scollegati dalla sorgente di alimentazione 1 2 ATTENZIONE Non poggiare oggetti che pesano più di 82 kg sulla parte superiore delle unità montate in rack Chapter 10 Related service information 119 ...

Страница 126: ...120 Hardware Maintenance Manual ...

Страница 127: ...Chapter 10 Related service information 121 ...

Страница 128: ...122 Hardware Maintenance Manual ...

Страница 129: ... tal como se describe en la tabla siguiente cuando desee realizar una operaciín de instalaciín de traslado o de apertura de las cubiertas para este producto o para los dispositivos conectados Para la conexin Para la desconexiín 1 APÁGUELO todo 2 En primer lugar conecte los cables a los dispositivos 3 Conecte los cables de señal a los conectores 4 Conecte cada cable de alimentaciín a la toma de ali...

Страница 130: ...áser perjudicial Dentro del dispositivo no existe ninguna pieza que requiera mantenimiento v El uso de controles o ajustes o la realizaciín de procedimientos que no sean los que se han especificado aquí pueden dar como resultado una exposiciín perjudicial a las radiaciones PELIGRO Algunos productos láser contienen un diodo de láser incorporado de Clase 3A o de Clase 3B Tenga en cuenta la advertenc...

Страница 131: ...ivo Es posible también que el dispositivo tenga más de un cable de alimentaciín Para eliminar la corriente eléctrica del dispositivo asegúrese de desconectar todos los cables de alimentaciín de la fuente de alimentaciín 1 2 PRECAUCIÓN No coloque ningún objeto que pese más de 82 kg 180 libras encima de los dispositivos montados en bastidor Chapter 10 Related service information 125 ...

Страница 132: ...____________________________ 2 What would you like to see added changed or deleted in this manual ________________________________________________________________ ________________________________________________________________ 3 What is your service experience level h Less than five years h More than five years 4 Which computers do you service most ________________________________________________...

Страница 133: ...the same adapters attachments in the same locations 4 Have the same address jumpers terminators cabling 5 Have the same software versions and levels 6 Have the same Reference Diagnostics Diskette version 7 Have the same configuration options set in the system 8 Have the same setup for the operation system control files Comparing the configuration and software set up between working and non working...

Страница 134: ...tates other countries or both Intel and Celeron are registered trademarks of Intel Corporation Microsoft Windows and Windows NT are trademarks of Microsoft Corporation in the United States other countries or both UNIX is a registered trademark of The Open Group in the United States and other countries Java and all Java based trademarks and logos are trademarks or registered trademarks of Sun Micro...

Страница 135: ......

Страница 136: ... Part Number 24P2968 Printed in USA 1P P N 24P2968 ...

Отзывы: