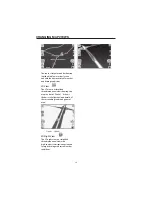
the points on the map and in the
right-hand pane. First, highlight a
point in the right-hand pane, and
then click one of these icons.
(6) When you have established all
the points on the route, click the
Create Route
icon. Notice
that all the points become
connected by a blue line that is
bordered by a corridor. You can
use any of the tools described in
step 5 to modify the route shown.
If you modify the route, you will
have to recreate the route by
simply clicking on the Create
Route icon again.
(7)To create a map of the route,
click on
Cut Map
. You
will be prompted to give the map
a name. The map will be
displayed in the “My Maps”
section on the Destinator Console.
Then, you can download the map
to your MO just as you would
download any other map.
Selecting Pre-Cut Maps
Selecting by Address
(1)
Select map to load from
Standard
Maps
.
(2)
Click
Cut Map
. The
selected map is automatically loaded to
hard disk and displayed in the Map
Cutter window.
FAVORITES IMPORTING
47
Содержание NAV-500
Страница 1: ...OWNER S MANUAL Global Positioning System NAV 500 ...
Страница 54: ...FAVORITES IMPORTING 54 ...

