background image

Preparation

EN

36

OTHER LENSES

(e.g. Leica R lenses)

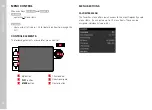
Other lenses can be used by inserting an adapter for M bayonets 

(e.g. Leica R-Adapter M).

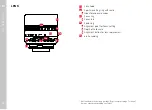
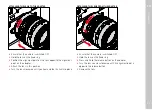
ATTACHING THE ADAPTER

1

2


Ensure that the camera is switched OFF


Position the alignment point on the adapter opposite the 

alignment point on the camera housing


Attach the lens in this position


Turn the adapter clockwise until you hear and feel it click into 

place


Attach the lens immediately

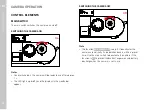
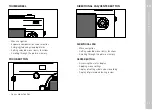
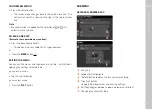
DETACHING THE ADAPTER

2

3

1


Ensure that the camera is switched OFF


Detaching the lens


Press and hold the release button on the camera housing


Turn the adapter counter-clockwise until the alignment point is 

opposite the release button


Remove the adapter

Содержание 20 050

Страница 1: ...LEICA M10 MONOCHROM Instruction manual ...

Страница 2: ...ou need it at m monochrom leica camera com Your Leica Camera AG SCOPE OF DELIVERY Before using your camera for the first time please check that the accessories supplied are complete Leica M10 Monochrom Camera bayonet cover Lithium ion battery Leica BP SCL5 Battery charger Leica BC SCL 5 incl mains cable and in car charger cable Carry strap Drawstring pouch for battery charger and cables Quick Star...

Страница 3: ...is manual or by Leica Camera AG must be used with the camera battery charger mains plug mains cable etc These accessories should only be used with this product Third party accessories may result in malfunctions or damage to the product Please read the chapters Legal information Safety remarks and General information before using your camera for the first time Knowledge of the content will prevent ...

Страница 4: ...ent or the embassy of your destination country for relevant information beforehand The People s Republic of China and Cuba exceptions Hong Kong and Macao prohibit the use of GPS within their territories and in the vicinity of their borders Violations will be prosecuted by local authorities Notes on function Prerequisite for GPS triangulation is Line of Sight LoS to at least 3 GPS satellites up to ...

Страница 5: ...d signal reception if the camera has not been used for an extended period of time Notes on safe use The electromagnetic radiation generated by the GPS system may affect electronic instruments and measuring devices Make sure to disable the GPS function on board an aircraft before takeoff or landing in hospitals and other locations where RF restrictions apply REGULATORY INFORMATION You will find the...

Страница 6: ...Maximum power dBm E I R P WLAN 2412 2462 5180 5240 MHz 5260 5320 5500 5700 MHz 20 Bluetooth Wireless Technology 2402 2480 MHz 20 DISPOSAL OF ELECTRICAL AND ELECTRONIC EQUIPMENT Applies within the EU and for other European countries with active waste separation policies This device contains electric and or electronic components which must not be disposed of in general household waste Instead it sho...

Страница 7: ...highly recommend that you activate encryption in the wireless access point settings to ensure data safety Avoid using the camera in areas where it can be exposed to magnetic fields static electricity or other interferences e g near a microwave oven RF transmissions may otherwise not reach the camera Using the camera near devices like microwave ovens or wireless phones that use the 2 4 GHz RF band ...

Страница 8: ... detection in the bayonet You must similarly prevent direct contact of the bayonet with grains of sand or similar particles as these could cause irreparable damage This component must only be cleaned with a dry cloth in system cameras Use a cotton or linen cloth instead of a microfiber cloth from an optician s synthetic when cleaning the contacts Make sure to discharge any electrostatic charge by ...

Страница 9: ...y dropped make sure to check the housing and the contacts immediately for any damage A damaged battery can damage the camera The battery must be removed from the camera or charger and must be replaced immediately in case of a strange smell discoloration deformation overheating or leakage Continued use of the battery may result in overheating which can cause fire and or explosion Never throw batter...

Страница 10: ... them clean and dry Keep memory cards out of the reach of children Swallowing a memory card may cause suffocation SENSOR Cosmic radiation e g during flights may cause pixel defects CARRY STRAP Carry straps are usually made of very robust material You should therefore keep it out of the reach of children A carry strap is not a toy and poses a strangulation risk Use the carry strap only for its inte...

Страница 11: ...EN 11 Safety remarks Safety remarks ...

Страница 12: ...off again immediately Lithium ion batteries can be charged at any time regardless of their current charge level A partially charged battery will charge to full capacity faster than a fully discharged one The rechargeable batteries come only partly charged ex works and should therefore be charged fully before their first use A new battery only reaches its full capacity after it has been fully charg...

Страница 13: ...enerally any type of memory card may be used without any damage to the camera or memory card As some no name cards may not fully comply with the SD SDHC SDXC standards Leica Camera AG cannot provide any guarantee of function We recommend formatting memory cards from time to time because fragmented residual data from deleted files may block some of the storage capacity Generally it is not necessary...

Страница 14: ...eras are always supplied from the factory with the latest firmware Otherwise you can download it from our website yourself and transfer it to your camera You will receive a newsletter informing you of the availability of a new firmware update if you register your camera on the Leica Camera homepage Visit the download section or the Customer Area for information about how to register or how to get ...

Страница 15: ...ailable online as a new service You will be able to review the warranty conditions for your product at any time without having to search fr the document Please note that this new policy applies only for products that are no longer delivered with a hardcopy product warranty included in the packaging Any products still delivered with the warranty document in the packaging remain governed exclusively...

Страница 16: ... LENS 35 LENS DETECTION 38 USING A LEICA M LENS WITH 6 BIT ENCODING 38 USING A LEICA M LENS WITHOUT 6 BIT ENCODING 38 USING A LEICA R LENS 39 DIOPTER COMPENSATION 40 CAMERA OPERATION 42 CONTROL ELEMENTS 42 MAIN SWITCH 42 SHUTTER BUTTON 43 SHUTTER SPEED SETTING DIAL 44 ISO SETTING WHEEL 44 THUMBWHEEL 45 FOCUS BUTTON 45 DIRECTIONAL PAD CENTER BUTTON 45 LV BUTTON PLAY BUTTON MENU BUTTON 46 LCD PANEL ...

Страница 17: ...FIXED ISO VALUES 70 AUTOMATIC SETTING 71 LIMITING SETTING RANGES 71 EXPOSURE 72 EXPOSURE METERING METHODS 72 SPOT METERING 72 CENTER WEIGHTED METERING 72 MULTI FIELD METERING 72 EXPOSURE MODES 73 APERTURE PRIORITY A 73 MANUAL EXPOSURE SETTING M 74 LONG TERM EXPOSURE B 75 EXPOSURE CONTROL 77 EXPOSURE PREVIEW 77 EXPOSURE LOCK 77 EXPOSURE COMPENSATION 78 PICTURE RECORDING MODES 79 SERIAL EXPOSURES 79...

Страница 18: ...OTHER FUNCTIONS 104 USER PROFILES 104 DATA MANAGEMENT 106 DATA STRUCTURE ON THE MEMORY CARD 106 EDIT FILE NAMES 107 CREATING A NEW FOLDER 107 RESETTING IMAGE NUMBERING 107 ADDING COPYRIGHT INFORMATION 108 FORMATTING A MEMORY CARD 109 DATA TRANSFER 110 USING RAW DATA DNG 110 RESETTING THE CAMERA TO FACTORY SETTINGS 110 FIRMWARE UPDATES 111 UPDATING THE CAMERA FIRMWARE 111 LEICA FOTOS 112 CONNECTION...

Страница 19: ...ous categories of information found in this manual Note Additional information Important Failure to observe the instructions may result in damage to the camera the accessories or the pictures Attention Non compliance may result in personal injury ...

Страница 20: ...with viewfinder attachment cover the brightness sensor Please read the sections Displays viewfinder and Leica M lenses for more information about how to work with these and other lenses 1 2 3 4a 4 5 5 10 12 13 14 9 8 7 3a 11 13a 21 20 19 18 17 26 15 22 27 29 23 24 30 16 28 25 6 ...

Страница 21: ...ewfinder window 11 Focus button 12 Lens release button 13 Leica M bayonet a 6 bit encoding sensor for lens detection 14 Image field selector 15 Viewfinder eyepiece 16 Thumbwheel 17 Brightness sensor for LCD panel 18 LV button 19 PLAY button 20 MENU button 21 Status LED 22 LCD panel 23 Directional pad 24 Center button 25 Locking toggle for bottom cover 26 Bottom cover locking point 27 Tripod thread...

Страница 22: ...g with scale a Index for exposure values 33 Focus ring a Focus tab 34 Fixed ring a Alignment point for focus setting b Depth of field scale c Alignment button for lens replacement 35 6 bit encoding Not included in the delivery package Representative image Technical features may vary depending on model ...

Страница 23: ...EN Part Designations 23 ...

Страница 24: ... 0 5 s when activating exposure metering by tapping the shutter button Notification for temporarily full cache Message No memory card Sd Message Memory card full Full b top Indicates when lit that the metering memory lock is active c bottom Indicates flashing that exposure compensation is in use d for manual exposure setting Concurrently as light balance for exposure compen sation The triangular L...

Страница 25: ...alues refer to the actual settings In Live View mode 1 2 10 13 14 12 21 20 19 18 16 15 17 3 4 8 9 When using the rangefinder 9 16 18 17 19 23 3 4 2 1 8 21 15 22 5 6 IN REVIEW MODE All displays values refer to the actual settings 1 2 3 10 24 25 11 15 16 18 19 27 17 8 9 26 ...

Страница 26: ...peaking identification of in sharp edges in the object 13 Exposure metering field only available in Spot Spot exposure metering method 14 Grid lines choice of 2 variants 15 Exposure mode 16 ISO Sensitivity 17 Light balance 18 Exposure compensation scale 19 Shutter speed 20 Exposure preview 21 Remaining number of exposures incl trend detection via bar chart 22 Remaining memory card capacity 23 User...

Страница 27: ...R ON THE LCD PANEL The battery charge status is displayed in the status pane and in the header line Display Charge status approx 88 100 approx 63 87 approx 47 62 approx 36 46 approx 26 35 approx 0 25 The battery needs charging or replacing ...

Страница 28: ...d the carry strap please make sure that the clips are mounted correctly to prevent the camera from falling PREPARING THE CHARGER Use the mains cable with the matching regional plug to connect the charger to mains electricity Note The charger will automatically adapt to local mains voltage ...

Страница 29: ...lly inserted into the charger REMOVING THE BATTERY FROM THE CHARGER Tilt the battery up and lift it out at an angle CHARGE STATUS INDICATORS ON THE CHARGER The status LED indicates a correct charging process Display Charge status Charge time CHARGE flashes green battery is charging 80 lights up orange 80 approx 2 hours CHARGE continuous green light 100 approx 3 h Disconnect the charger from mains ...

Страница 30: ...2 Open the bottom cover and close it again afterwards see p 32 Important Removing the battery while the camera is switched on may result in the loss of custom settings or damage to the memory card Make sure that the bottom cover is securely closed before switching on the camera INSERTION REMOVAL ...

Страница 31: ...lay a relevant message Please see the section Technical Data for information about supported cards Check the memory card for correct alignment if you are having difficulties inserting it into the camera See p 10 and p 13 for additional information Removing the bottom cover or the memory card while the camera is switched on or switching on the camera while the bottom cover is not attached will trig...

Страница 32: ...he locking toggle Turn the locking toggle in anti clockwise direction Remove the bottom cover CLOSE Insert the bottom cover Turn the locking toggle in clockwise direction Click down the locking toggle Check that the bottom cover was inserted and closed correctly ...

Страница 33: ...xtremely narrow tolerances are adhered to in this process which allow precise focusing of every camera lens combination in photographic practice If wide aperture lenses 1 4 are used with an open aperture the then sometimes resulting very low depth of field and inaccuracies in focusing with the rangefinder may lead to setting errors resulting from the added overall tolerance of the camera and lens ...

Страница 34: ...lways use the tripod mount on relevantly equipped lenses COMPATIBLE BUT EXACT FOCUSING MAY BE LIMITED Despite the high precision of the rangefinder on the camera exact focusing with 135 mm lenses with an open aperture cannot be guaranteed due to the very low depth of field We therefore recommend stopping down by at least 2 steps Live View mode on the other hand plus the various setting aids provid...

Страница 35: ... and feel it click into place REMOVAL Ensure that the camera is switched OFF see p 42 Hold the lens on the fixed ring Press and hold the release button on the camera housing Turn the lens counter clockwise until the alignment button is opposite the release button Remove the lens Important Make sure to always have a lens or the camera bayonet cover attached to prevent dust or other foreign bodies p...

Страница 36: ...apter opposite the alignment point on the camera housing Attach the lens in this position Turn the adapter clockwise until you hear and feel it click into place Attach the lens immediately DETACHING THE ADAPTER 2 3 1 Ensure that the camera is switched OFF Detaching the lens Press and hold the release button on the camera housing Turn the adapter counter clockwise until the alignment point is oppos...

Страница 37: ...t point on the adapter Attach the lens in this position Turn the lens clockwise until you hear and feel it click into place DETACHING THE LENS FROM THE ADAPTER 1 2 3 Ensure that the camera is switched OFF Hold the lens on the fixed ring Press and hold the release button on the adapter Turn the lens counter clockwise until its alignment point is opposite the release button Remove the lens ...

Страница 38: ...individually using the exposure metering system This is done whether or not an encoded or unencoded lens or a non M lens is attached via adapter and regardless of whether the lens type was entered in the menu USING A LEICA M LENS WITH 6 BIT ENCODING The camera will automatically set the correct lens type when a Leica M lens with 6 bit encoding is used No manual setting will be required The camera ...

Страница 39: ...mission of the set focal length to the camera need for mirroring the correct bright line frame in the viewfinder The focal length is scanned by the camera electronics and the information is used for focal length specific corrections Due to space limitations the menu only contains an item number 11 625 The two other variants 11 890 and 11 894 can be used as well and the menu settings will apply USI...

Страница 40: ...ography Leica M Technical Equip ment Viewfinder Accessories Correction lenses Attach the correction lens flat against the viewfinder eyepiece Hand tighten in clockwise direction Notes Please note the information provided on the Leica homepage for the selection on an appropriate correction lens Please note that the viewfinder of the Leica M10 Monochrom is set to 0 5 diopter as standard If you wear ...

Страница 41: ...EN Preparation 41 ...

Страница 42: ...prox 1 s The LED lights up briefly and the displays in the viewfinder appear SWITCHING THE CAMERA OFF Off Note The function Auto Power Saving Auto Power Saving see p 57 deactivates the camera automatically if no operation occurs within a preset time Use the main switch to deactivate the camera if this function is Off Off to prevent inadvertent exposures and battery discharge when the camera is not...

Страница 43: ...review mode from menu control from standby mode 2 Press down fully Shutter release The data is then transferred to the memory card Starting a preselected self timer delay Starting a picture series or interval shooting Notes Press down the shutter button in a smooth motion until you hear the click of the shutter to prevent camera shake The shutter button remains locked if the memory card inserted a...

Страница 44: ...ut exposure settings A Aperture priority automatic shutter speed control 4000 8 s Fixed shutter speeds of 1 4000 s to 8 s with intermediate values clicking in increments B Long term exposure bulb The shortest possible sync speed 1 180 s for flash mode ISO SETTING WHEEL A Automatic ISO sensitivity control 160 12 5K Fixed ISO values M Manual ISO sensitivity control Fig 1 Fig 2 Push the ISO setting w...

Страница 45: ...tions Scrolling through the picture memory FOCUS BUTTON Focus aid activation DIRECTIONAL PAD CENTER BUTTON DIRECTIONAL PAD Menu navigation Setting selected menu items functions Scrolling through the picture memory CENTER BUTTON Accessing the status display Applying menu settings Display of settings data when recording Display of picture data during review ...

Страница 46: ...ON Activation and deactivation of the continuous review mode Return to full screen display MENU BUTTON Accessing the FAVORITES FAVORITES or MAIN MENU MAIN MENU Accessing the Review menu Exiting the currently displayed sub menu LCD PANEL Display of most important current settings Quick access to some menus Touch control ...

Страница 47: ... Focus aid activation Enlarging reducing viewed pictures swipe Shifts the enlarged image section Scrolling through the picture memory Shifts the enlarged image section horizontal swipe full length vertical swipe full length touch and hold two finger pinch spread Enlarging reducing viewed pictures swipe and hold hold and swipe A light touch is enough don t apply pressure ...

Страница 48: ...ails on how to manage this list CONTROL ELEMENTS The following elements are used for menu control 18 16 23 24 19 20 18 LV button 16 Thumbwheel 19 PLAY button 23 Directional pad 20 MENU button 24 Center button MENU SECTIONS FAVORITES MENU The favorites menu offers quick access to the most frequently used menu items It can contain up to 15 menu items These can be assigned individually see p 54 ...

Страница 49: ... menu list Note Some menu items can only be accessed under specific circumstances The text in the relevant line is displayed in gray to signify the existence of a submenu SUBMENU There are various types of submenus available The following pages describe their operation F G I F G H F Current menu item G Submenu item H References to other submenus I Scrollbar Note In some cases an additional scale w...

Страница 50: ...ites menu Switching from MAIN MENU MAIN MENU to FAVORITES FAVORITES Press the directional pad left Note MAIN MENU MAIN MENU and FAVORITES FAVORITES are accessible only in recording mode SCREEN BY SCREEN NAVIGATION Scrolling forward Press the MENU button Screen 1 of the main menu will be displayed again after Screen 4 LINE BY LINE NAVIGATION Function function option selection Press the directional ...

Страница 51: ...left This option is only available for list type submenus or Press the MENU button 1x EXITING THE MENU You can exit the menus and submenus at any time with without applying the settings selected there go to picture mode Tap the shutter button go to review mode Press the PLAY button SUBMENU KEYBOARD NUMBER PAD D C B A E F A C B D A Entry line B Keyboard Number pad C Delete button deletes the last c...

Страница 52: ...will be an automatic jump to the next previous line when the end beginning of the line is reached Press the center button Using touch control Press the button of your choice SAVE Select button D CANCEL Press the MENU button SCALE MENU Using button control Press the directional pad left right or Turn the thumbwheel Using touch control Select the desired setting directly or swipe Notes The currently...

Страница 53: ...perordinate menu item Press the center button on the last setting field COMBI MENU The setting of the individual menu items is done via a setting bar in the lower display area To access individual menu items Press the directional pad up down To set individual items Press the directional pad left right or Turn the thumbwheel To apply the setting Press the center button To return to the superordinat...

Страница 54: ...ist on p 124 MANAGING THE FAVORITES MENU Select Customize Control Customize Control in the main menu Select Edit Favorites Edit Favorites Select the desired menu item Select On On Off Off A warning message appears when the favorites menu has reached the maximum of 15 menu items and no further items can be added Note The favorites menu will be deleted completely if all menu items are set to Off Off...

Страница 55: ...the status screen Press the MENU button Returning to recording mode Tap the shutter button Note The status screen is not available in LV mode DIRECT ACCESS Assign a menu function to the thumbwheel for extra quick operation Exp Compensation Exp Compensation or LV Zoom LV Zoom The setting has no impact on the function if focus assist tools are in use Select Customize Control Customize Control in the...

Страница 56: ...ear Month Day Year Month Day Year Year Month Day Year Month Day Set the date TIME Select Date Time Date Time in the main menu Select Time Setting Time Setting Select the desired brightness 12 Hours 12 Hours 24 Hours 24 Hours Set the time Select am am or pm pm for the 12 hour format AUTOMATIC TIME VIA GPS Select GPS GPS in the main menu Select On On Select Date Time Date Time in the main menu Selec...

Страница 57: ...PANEL VIEWFINDER EVF SETTINGS The camera comes equipped with a 3 liquid crystal color panel which is protected by a glass cover made of extremely hard and scratch resistant Gorilla glass In picture mode and with active Live View function the screen displays the image captured by the sensor via the attached lens In review mode the images saved on the memory card are displayed on the screen In both ...

Страница 58: ...In Live View mode the LCD panel can be used for displaying a range of settings Various information is displayed in the header and or footer line 22 45PM 22 02 2012 999 9000 8234 9999 12MP 2 8 F 1 8000 12500 ISO EV INFO 22 45PM 22 02 2012 999 9000 8234 9999 12MP 2 8 F 1 8000 12500 ISO EV INFO Press the center button The display toggles between a visualization with or without information displays Sh...

Страница 59: ...er of other displays in addition to the standard information contained in the header and footer to adapt the image in picture and review mode to your needs These include assist functions for exposure settings picture composition and focusing see p 83 ...

Страница 60: ...hat JPG JPG setting is selected The remaining number of pictures shown in the LCD panel will not necessarily change after every picture taken A counter change depends on the subject very fine image structures result in higher data quantities while homogeneous surfaces mean less data JPG SETTINGS The functions and settings described in this section apply for pictures taken in JPG JPG format only RE...

Страница 61: ...dard Standard High High SHARPNESS The impression of sharpness in a picture is largely determined by edge sharpness i e by how slight the transition area between light and dark is at edges in the picture Expanding or reducing these areas will therefore change the impression of sharpness Factory setting Standard Standard Select JPG Settings JPG Settings in the main menu Select Sharpness Sharpness Se...

Страница 62: ...Drive Mode Drive Mode in the main menu Select the desired function options Mode Setting options Variants Single frame exposure Single Single Serial exposures see p 79 Speed Continuous Low Speed Continuous Low Speed Continuous High Speed Continuous High Speed Self timer see p 82 Delay time Self Timer 2 s Self Timer 2 s Self Timer 12 s Self Timer 12 s Interval shooting see p 80 Frames Frames Interva...

Страница 63: ...cusing due to the changing draw out i e the distance of the lens system to the sensor level When the set distance is below infinity and the draw out accordingly greater the actual view angle also decreases the lens captures less of the image object The view angle differences at greater focal lengths tend to be larger due to the greater draw out 22 45PM 22 02 2012 999 9000 8234 9999 12MP 2 8 F 1 80...

Страница 64: ...ocal length of 28 Elmarit as of serial number 2 411 001 35 50 75 90 and 135 mm are used 35 mm 135 mm 22 45PM 22 02 2012 999 9000 8234 9999 12MP 2 8 F 1 8000 12500 ISO EV INFO 50 mm 75 mm 22 45PM 22 02 2012 999 9000 8234 9999 12MP 2 8 F 1 8000 12500 ISO EV INFO 28 mm 90 mm 22 45PM 22 02 2012 999 9000 8234 9999 12MP 2 8 F 1 8000 12500 ISO EV INFO ...

Страница 65: ... is show exactly as it is rendered by the attached lens LIVE VIEW MODE ON OFF Press the LV button Notes Live View mode is based on the image captured by the sensor The camera must control the shutter Shutter control is audible and may result in a slight delay in shutter release The camera will warm up when Live View mode is used for an extended period of time Power consumption will simultaneously ...

Страница 66: ...tly inside the metering field out of focus in focus SPLIT IMAGE METHOD For an architectural photograph you might aim the metering field of the rangefinder at e g the vertical edge or any other clearly defined vertical line and keep turning the focus ring on the lens until the edge contour or the line is visible at the outer edges of the metering field without any offset out of focus in focus Notes...

Страница 67: ...is assist function highlights the edges of in focus subject elements in color The color can be user specified 1 8000 2 8 F 12500 ISO EV 3 2 1 0 2 1 3 8234 12MP Select Capture Assistants Capture Assistants in the main menu Select Focus Peaking Focus Peaking Select the desired setting Off Off Red Red Blue Blue Green Green White White Select an image section Turn the focus ring to mark the desired su...

Страница 68: ...IST FUNCTIONS In the image at the bottom left the position and zoom level of the displayed cropped section is shown The cropped section displayed can also be unenlarged The most recently used zoom level is used each time assist functions are accessed When Focus Peaking is activated will appear to the right of the frame with a display of the color used appears if Focus Peaking is off The assist fun...

Страница 69: ...Assistants Capture Assistants in the main menu Select Focus Assist Focus Assist Select Manual Manual Note The assist functions deactivate automatically about 5 s after the last turn of the focus ring That does not apply if the zoom level was changed VIA THE THUMBWHEEL The assist functions can additionally be accessed via the thumbwheel Select Customize Control Customize Control in the main menu Se...

Страница 70: ...ues between ISO 200 and 100000 will be used M for intermediate values as well as for higher or lower values FIXED ISO VALUES VALUES ENGRAVED ON THE ISO SETTING WHEEL Turn the ISO setting wheel to the desired value 160 400 800 1600 3200 6400 12 5K ALL AVAILABLE SETTINGS Values between ISO 160 and ISO 100000 can be selected in 29 increments Factory setting ISO 160 ISO 160 Set the ISO setting wheel t...

Страница 71: ...reshold due to low light for example with a 50 mm lens at speeds slower than 1 60 s at 1 f 1 f 1 125 s at 1 2f 1 2f or 1 250 s at 1 4f 1 4f Separate settings are available for flash photography 1 This function requires the use of encoded lenses or the setting of the lens type used in the menu LIMITING ISO VALUES All values from ISO 200 are available Factory setting 3200 3200 Select ISO Setup ISO S...

Страница 72: ...sumed main subject WHEN USING THE RANGEFINDER Mostly center weighted metering The light reflected by the light colored shutter blades is captured and measured by a photodiode When the measuring range of the exposure meter is undercut in a manual setting and very low light density then the triangular LED in the viewfinder on the left will flash as a warning the LED on the right will flash when the ...

Страница 73: ... be switched off during that time The remaining exposure time after shutter release is counted down in seconds on the display for shutter speeds greater than 2 s SELECTING A MODE Set the shutter speed setting wheel A Aperture priority or select the desired shutter speed Manual setting M APERTURE PRIORITY A Aperture priority mode sets the exposure automatically according to the manually selected ap...

Страница 74: ...ers the exposure metering may generate a shutter speed that is outside the focus range i e brightness values that would require shorter exposures than 1 4000 s or longer than 4 min The camera will use the stated min or max shutter speeds and these values will flash as a warning in the viewfinder if that is the case MANUAL EXPOSURE SETTING M The following manual settings for shutter speed and apert...

Страница 75: ...erexposure by more than 3 EV Exposure Value LONG TERM EXPOSURE B B FUNCTION In setting B the shutter remains open as long as the shutter button is held down up to max 16 min depending on ISO setting T FUNCTION When the B function is selected in conjunction with the self timer see 82 then the shutter button doesn t have to be held down The shutter will remain open until the shutter button is presse...

Страница 76: ...er release Notes In each of these cases the exposure meter remains deactivated after shutter release however the digital number display in the viewfinder counts the elapsed exposure time in seconds Long exposure times may cause severe image noise In order to reduce this annoying phenomenon the camera will take a second black picture taken with the shutter closed automati cally after pictures taken...

Страница 77: ...these elements may sometimes be very bright or very dark Cen ter weighted metering and spot metering however mainly capture an area in the center of the image and are calibrated to an average gray scale value In that case the metering memory lock initially allows a metering of the main object and to store the relevant settings until the final image section is set Aim at the important image compone...

Страница 78: ...e main menu Select Customize Wheel Customize Wheel Select Exposure Compensation Exposure Compensation Set the desired value using the thumbwheel Using menu control Select Exposure Compensation Exposure Compensation in the main menu A scale appears as a submenu item Set the value on the scale Notes The following applies for set compensation values no matter how they were initially set They remain e...

Страница 79: ...ence stated in the technical informa tion refers to a default setting ISO 200 ISO 200 JPG format L JPG L JPG Regardless of how many pictures were taken in a series the last picture in the series or the last picture saved on the memory card while the save process is ongoing will be displayed first in both review modes Serial exposures with Continuous High Speed Continuous High Speed set are taken a...

Страница 80: ... of the image To cancel a running serial exposure Press the MENU button Notes Interval shooting over an extended period of time in a cold location or in a place with high temperature and humidity may result in malfunctions Interval shooting will be interrupted or canceled in the following situations if the battery is depleted if the camera is switched off Make sure to check the battery for suffici...

Страница 81: ...mpensation D Light value scale E Exposure values of the images marked in red The scale will be offset by the relevant value if exposure compensation is set concurrently You can select the desired number of exposures 3 or 5 The exposure difference which can be set via F Stops F Stops can be up to 3 EV Select Drive Mode Drive Mode in the main menu Select Exposure Bracketing Exposure Bracketing Selec...

Страница 82: ...es in a series may consequently be taken with the same exposure values The function remains active until another function is selected in the Drive Mode Drive Mode sub menu If no other function is selected another series of pictures is taken each time the shutter button is pressed SELF TIMER The self timer function allows taking pictures with a preset time delay We recommend that the camera is plac...

Страница 83: ...the image lacking definition bright areas flash in red dark areas flash in blue To adjust these displays to specific conditions or your compositional ideas you can specify limit values i e the level of over underexposure at which they appear The Clipping display therefore offers a very simple and exact means for checking and adjusting your exposure settings 1 8000 2 8 F 12500 ISO EV 3 2 1 0 2 1 3 ...

Страница 84: ... ideas Select Capture Assistants Capture Assistants in the main menu Select Exposure Clipping Exposure Clipping Select Lower Limit Lower Limit Select the desired value 0 0 to 20 20 Select Upper Limit Upper Limit Select the desired value 200 200 to 255 255 LEVEL GAUGE The integrated sensors of the camera show its orientation These indicators ensure exact camera orientation along the longitudinal an...

Страница 85: ...brightness distribution in the picture The horizontal axis shows the graduated values from black left through gray to white right The vertical axis corresponds to the number of pixels at each brightness level This type of rendering allows an additional quick and easy assessment of the exposure setting Tap and hold the shutter button The histogram appears Notes The histogram is always based on the ...

Страница 86: ...afely fired via the Leica M10 Monochrom but cannot be controlled via the camera Correct function cannot be guaranteed when using any other flash unit Important The use of incompatible flash units with your Leica M10 Monochrom may result in irreparable damage to the camera and or the flash unit ATTACHING THE FLASH UNIT Switch off the camera and flash unit Slide the foot of the flash unit all the wa...

Страница 87: ...d on the lens is also entered manually on the flash unit The ISO sensitivity setting cannot be altered via the flash unit on system compatible units because the information is received from the camera SETTINGS ON THE FLASH UNIT Operating mode TTL Automatic camera control A Aperture priority M The flash exposure must be set to an output level to match the aperture and shutter speed settings determi...

Страница 88: ...able in this camera and in system compatible flash units SYNC POINT Flash exposures are lit by two light sources ambient light Flash Any subject elements lit primarily by the flash will almost always be rendered in perfect focus by the short burst of light provided the focus is set correctly All other subject elements in the same frame lit by ambient light or lit from within will be rendered with ...

Страница 89: ...Do not use synch cables that are longer than 3 m 10 feet When using the flash with faster shutter speeds a difference between the two flash times will be barely discernible or only noticeable for very fast movements FLASH RANGE The usable flash range depends on the aperture and sensitivity values set manually or calculated by the camera It is important to ensure that the subject is within the rele...

Страница 90: ...on is not available if flash units with an integrated compensation function are used e g Leica SF 58 A compensation value configured on the camera will be overruled when a relevantly equipped flash unit is attached e g a Leica SF 60 and a compensation value is entered on that flash unit The menu item Flash Exposure Compensation Flash Exposure Compensation can only be used in conjunction with flash...

Страница 91: ...or so called off camera flashes as the transmission time may cause a delay Serial exposures and automatic bracketing with flash are not available Use a tripod to prevent blurring at slow shutter speeds Alternatively you can select a higher sensitivity FLASH EXPOSURE DISPLAYS IN THE VIEWFINDER with system compatible flash units The flash icon in the viewfinder display of the Leica M10 Mono chrom gi...

Страница 92: ...ea It may not be possible to render files with this camera that were not recorded with this device In some cases the screen image may not have the expected quality or the LCD panel will remain blank and only display the file name You can toggle back from playback mode to recording mode at any time by tapping the shutter button CONTROL ELEMENTS IN REVIEW MODE 22 45PM 22 02 2012 999 9000 8234 9999 1...

Страница 93: ...the PLAY button Full screen display of a recording Picture mode Display of an enlarged cropped section or several thumbnails Full screen display of the recording SELECTING SCROLLING THROUGH RECORDINGS The recordings are visually arranged in a horizontal reel When the end of an image series is reached the display automatically jumps back to the first image in the series All recordings can therefore...

Страница 94: ... 12MP 2 8 F 1 8000 12500 ISO EV INFO The configured displays can be accessed at any time The displays for Histogram Histogram and Clipping Clipping will appear if these functions are activated 22 45PM 22 02 2012 999 9000 8234 9999 12MP 2 8 F 1 8000 12500 ISO EV INFO Using touch control Briefly tap the LCD panel Using button control Press the center button Note The histogram and clipping displays a...

Страница 95: ...e touch control Using touch control Two finger pinch spread The central cropped section of the picture is enlarged Swiping will allow you to move the position of an enlarged cropped section The rectangle within the frame in the bottom left corner represents the currently magnified section as well as its position in the image Double tap Toggles between max zoom at the tap position and full screen v...

Страница 96: ... in magnification mode which will then also be displayed with the same magnifica tion Press and hold the PLAY button while pressing the directional pad left right Note It may not be possible to enlarge pictures taken with other camera types DISPLAYING MULTIPLE RECORDINGS AT ONCE The camera offers an overview function in which several thumbnail images can be viewed on one screen which makes it easi...

Страница 97: ...e currently selected recording C Scrollbar The currently viewed recording is framed in red and can be selected for a closer look Navigating between recordings Press the directional pad left or right as needed DISPLAYING RECORDINGS IN BLOCKS OF 20 In this view you can browse through the blocks easily 936 954 Reduce the size of the images until the entire field is framed in red Press the directional...

Страница 98: ...TING OF RECORDINGS Recordings can be tagged as favorites to find them quicker or to simplify the later deletion of multiple recordings Notes Other recordings can be selected while the Review menu is active You can exit the Review menu at any time by pressing the MENU button TAGGING RECORDINGS Press the directional pad up The recording is tagged with or Press the MENU button Select Rate Rate The re...

Страница 99: ...LED will flash during this operation DELETING RECORDINGS There are several methods available to delete recordings deleting individual recordings deleting all recordings without a tag ranking deleting all recordings Important Once deleted recordings are no longer retrievable Notes Other recordings can be selected while the Review menu is active You can exit the Review menu at any time by pressing t...

Страница 100: ...he delete process The process may take a few seconds The next recording will be displayed once deletion is complete The message No media file to display No media file to display appears if no other recordings are saved on the card To cancel deletion and return to the normal Review mode Press the PLAY button Note The Scroll and Magnify functions continue to be available when the Delete screen is ac...

Страница 101: ...e Multi in the Review menu Select ALL ALL The prompt Really delete all Really delete all appears Select Yes Yes Note The LED will flash during the delete process The process may take a few seconds The message No media file to display No media file to display appears after successful deletion ...

Страница 102: ...nrated The prompt Really delete all unrated Really delete all unrated appears Select Yes Yes The LED will flash during the delete process The process may take a few seconds The next marked recording appears once deletion is complete The message No media file to display No media file to display appears if no other recordings are saved on the card ...

Страница 103: ...pping the shutter button Notes Various control elements change back to regular Review mode to execute their normal functions while automatic review is selected The camera will remain in Review mode until it is exited Tagging and deleting can only be done in regular Review mode and not during automatic review When pictures were taken with the functions Serial exposures or Interval shooting then the...

Страница 104: ...ETTINGS AS A USER PROFILE CREATING PROFILES Saving settings Creating a profile Create custom settings for the desired functions via menu control Select User Profiles User Profiles in the main menu Select Save as User Profile Save as User Profile Select a memory slot Confirm the selection Notes Existing profiles are overwritten with the latest settings A memory slot can only be deleted via the func...

Страница 105: ...e profile currently in use EXPORTING IMPORTING PROFILES TO FROM THE MEMORY CARD Select User Profiles User Profiles in the main menu Select Export to Card Export to Card or Import from Card Import from Card in the submenu Confirm the selection Notes When importing and exporting all profile slots are transferred to the card i e including any empty slots Any existing profiles stored in the camera wil...

Страница 106: ...rom the factory settings denotes the camera brand The first three characters signify the folder number numerals The next four digits denote the sequential file number Once file number 9999 is reached then a new folder will be automatically created in which the file numbering begins at 0001 again The last three places after the dot denote the file format DNG or JPG Notes When using memory cards tha...

Страница 107: ... Folder A keyboard submenu is displayed The input line contains the full folder name The five white characters can be modified Delete the five selected characters Enter a name of your choice Confirm A prompt appears Here you decide if you want the file numbers in the new folder to start at 0001 again Yes Yes or if the numbering should continue No No Notes A file name change also applies to all sub...

Страница 108: ...Confirm RECORDING THE IMAGE LOCATION USING GPS ONLY IN CONJUNCTION WITH LEICA VISOFLEX The GPS global positioning system allows the pinpointing of a receiver anywhere in the world This function is available only with Leica Visoflex attached The camera will then continuously receive the current GPS data latitude and longitude elevation above sea level and writes this information into the Exif data ...

Страница 109: ...ill be lost during formatting Formatting will not be prevented by the deletion protection set for individual pictures All images should therefore be regularly transferred to a safe mass storage medium e g the hard disk of a computer A simple formatting process will initially not irretrievably destroy existing data on the card Only the directory will be deleted which means the data will no longer b...

Страница 110: ...e of this membership club leica camera com RESETTING THE CAMERA TO FACTORY SETTINGS This function allows you to reset all your custom menu settings back to the factory settings You can optionally exclude the user profiles WLAN settings and image numbering from the reset individually Select Reset Camera Reset Camera in the main menu The prompt Reset camera to basic settings Reset camera to basic se...

Страница 111: ...ents and additions to this manual can be found in the customer area of our website at club leica camera com UPDATING THE CAMERA FIRMWARE Download the latest firmware version Save the download to the memory card Insert the memory card into the camera Switching the camera on Select Camera Information Camera Information in the main menu Select Camera Firmware Camera Firmware This menu item is availab...

Страница 112: ...ple App Store Google Play Store CONNECTION FIRST TIME CONNECTION TO A MOBILE DEVICE The connection is established via WLAN A pairing of the camera and the mobile device is required for a first time connection to a mobile device IN THE CAMERA Select Leica FOTOS Leica FOTOS in the main menu The camera will start automatically once a WLAN network becomes available The process may take a few minutes t...

Страница 113: ...he prompt The camera connects to the mobile device automatically Notes Should there be more than one known device in the vicinity of the camera then it will automatically connect to the first device responding A favorite mobile device cannot be specified We recommend removing rarely used devices from the list of known devices to prevent unwanted connections Disconnect and reconnect if the wrong de...

Страница 114: ... otherwise be subjected to moisture and tanning residue released by the moist leather All mechanical bearings and sliding surfaces on your camera are lubricated Remember to press the shutter button several times every three months to prevent the lubrication points hardening if the camera will not be used for an extended period of time We also recommend repeated adjustment and use of all the other ...

Страница 115: ... on or in the camera The condensation will disappear once the camera temperature has reached room temperature RECHARGEABLE BATTERY Lithium ion rechargeable batteries should only be stored partially charged i e not fully depleted or fully charged The camera LCD panel will show the current charge level of the battery Charge the battery twice a year for around 15 minutes to avoid deep discharge in ca...

Страница 116: ...sage will be displayed if dust detection is not available The display will return to the previous screen after a few seconds Repeat the process as needed SENSOR CLEANING You can send your camera to the Leica Customer Care department for sensor cleaning see p 138 This service is not part of the warranty offering and will therefore incur charges Use the Open Shutter Open Shutter menu function if you...

Страница 117: ...ensor cleaning immediately Important Any inspection or cleaning of the sensor should be done in an environment that is as much as possible dust free to prevent further contamination A message will appear on the LCD panel once the capacity of the rechargeable battery falls below 40 with the lens aperture fully open Please stop sensor cleaning immediately Please stop sensor cleaning immediately The ...

Страница 118: ...oo cold Charge the battery at room temperature Charging pilot light is on but battery isn t charging The battery contacts are dirty Clean the contacts with a soft dry cloth Battery has been recharged too many times The battery has reached the end of its operating time Replace battery Camera problems The camera suddenly switches itself off Battery is depleted Charge or replace the battery The camer...

Страница 119: ...space This is not a fault the number of remaining exposures is calculated as approximations Recording The camera won t take a picture shutter button is deactivated Memory card is full Replace the memory card The memory card is not formated Reformat the memory card Caution Loss of data The memory card is write protected Deactivate the write protection on the memory card small lever on the side of t...

Страница 120: ...isabled to protect the camera Allow camera to cool down The image on the LCD panel displays lots of noise Light enhancement function of the LCD panel in dark surroundings Not a fault picture quality will not be impacted Image storage takes a long time Noise Suppression is activated for long term exposures Deactivate the function Electronic viewfinder is dark Switchover between EVF and LCD incorrec...

Страница 121: ...ing exposure Use flash or mount camera on a tripod The desired subject elements were not congruent in the rangefinder Ensure perfect congruence of the superimposed images in the split image rangefinder Images are overexposed Flash is activated in bright surroundings Change the flash mode Strong light source in the image Avoid strong light sources in picture composition Half backlight falling into ...

Страница 122: ...working The mobile device is too far away Bring the devices closer to each other Interference from other devices in the vicinity e g other smartphones or a microwave oven Increase distance to interfering devices Interference from multiple mobile devices in the vicinity Re establish the connection remove other mobile devices Mobile device is currently connected to another device Check connection Ca...

Страница 123: ...EN FAQ 123 ...

Страница 124: ...posure Metering l Exp Compensation Exp Compensation l l Flash Settings Flash Settings l l Flash Sync Mode Flash Sync Mode Max Flash Sync Time Max Flash Sync Time Flash Exposure Compensation Flash Exposure Compensation ISO Setup ISO Setup l l M ISO M ISO l Maximum Auto ISO Maximum Auto ISO Maximum Exposure Time Maximum Exposure Time File Format File Format l l JPG Settings JPG Settings l l JPG Reso...

Страница 125: ... Grids Exposure Simulation Exposure Simulation Focus Aid Focus Aid Level Gauge Level Gauge EVF Display Control EVF Display Control l Play Screen Target Play Screen Target LV Screen Target LV Screen Target Auto Review Screen Target Auto Review Screen Target User Profiles User Profiles l Load Profile Load Profile l Save as User Profile Save as User Profile Rename User Profile Rename User Profile Exp...

Страница 126: ...ness l Menu page 3 Auto Power Saving Auto Power Saving l Leica FOTOS Leica FOTOS l l GPS GPS1 1 l Date Time Date Time l Auto GPS Time Auto GPS Time1 1 Time Zone Time Zone Daylight Saving Time Daylight Saving Time Date Setting Date Setting Time Setting Time Setting Language Language l Reset Camera Reset Camera l Format SD Format SD l Image Numbering Image Numbering l New Folder New Folder Change Fi...

Страница 127: ...aning l Open Shutter Open Shutter Dust Detection Dust Detection Camera Information Camera Information l Camera Firmware Camera Firmware Regulatory Information Regulatory Information Copyright Information Copyright Information 1 This menu item is only available if the Leica Visoflex viewfinder is attached available as an accessory ...

Страница 128: ...rger 9 30 Charge status charger 31 Charge status LCD panel 29 Charging the battery 31 Clipping 85 96 Connection mobile devices 114 Contact Leica 140 Contrast image properties 63 Copyright 110 Customer service 140 D Data management 108 Data structure 108 Data transfer 112 Date 55 58 Deletion recordings 101 Deletion user profiles 106 Direct access 57 Directional pad 47 Display settings 59 Disposal 6...

Страница 129: ...range 91 Flash setting 89 Flash synchronization 90 Flash units compatible 88 Focus button 47 70 Focusing 68 Focus metering methods via rangefinder 68 Focus peaking 69 Folders 108 Folder structure 108 Format 62 Formatting memory card 111 G General information 12 GPS 4 58 Grid 85 H HDR 83 Histogram 87 Horizon 86 HSS 90 I Image field 65 Image numbering 108 Image properties 63 Information display 60 I...

Страница 130: ... Menu navigation 52 Menu screen 50 Metering method exposure 74 M Manual exposure setting 76 Multi field metering exposure 74 N Name file 108 109 Name folder 108 Navigation menu 52 Noise reduction 77 Notes legal 4 Number pad 53 O Operating mode exposure 75 P Part Designations 22 Parts overview 22 Picture interval 82 Picture mode 64 Picture series 81 82 83 Picture series 81 Review automatic 105 Revi...

Страница 131: ... 106 Sharpness image properties 63 Shutter button 45 Shutter release 45 Shutter speed aperture combination 75 Shutter speed setting dial 46 Smartphone 114 Split image method 68 Spot metering exposure 74 Standby mode 59 Status screen 57 Storage 116 Submenu 51 Superimposed image method 68 Switching mode 95 Switching off camera 44 Switching on camera 44 Sync point 90 T Tagging recordings 100 Technica...

Страница 132: ...Index EN 132 W Warranty 15 Wi Fi WLAN 7 WLAN 7 ...

Страница 133: ...EN Index 133 ...

Страница 134: ...ns Operating conditions 0 to 40 C Interfaces Interfaces ISO accessory shoe with additional control contacts for Leica flash units and Leica Visoflex viewfinder optional accessory Tripod thread Tripod thread A 1 4 DIN 4503 1 4 with stainless steel in the base Dimensions WxHxD Dimensions WxHxD 139 x 38 5 x 80 mm Weight Weight approx 675 g with battery SENSOR Sensor size Sensor size Monochrome CMOS c...

Страница 135: ...m mechanical metering basis x x0 73 viewfinder magnification LCD panel LCD panel 3 TFT LCD 1 036 800 dots touch control available SHUTTER Shutter type Shutter type Metal blade focal plane shutter with vertical movement Shutter speeds Shutter speeds With aperture priority set A continuous between 16 min and 1 4000 s with manual setting between 8 s and 1 4000 s in half increments between 8 s and 16 ...

Страница 136: ...ion Synchronization Optionally at the 1 or 2 shutter curtain Flash sync time Flash sync time 1 180 s slower shutter speeds available automatic changeover to TTL linear flash mode with HSS compatible Leica system flash units if sync time is undercut Flash exposure metering Flash exposure metering Using center weighted TTL pre flash metering with Leica flash units SF 40 SF 64 SF 26 or flash units co...

Страница 137: ...ge current 1000 mADC 7 4 V operating conditions in the camera 0 to 40 C manufacturer PT VARTA Microbattery Made in Indonesia Charger Leica BC SCL5 Charger Leica BC SCL5 Inputs 100 240 VAC 50 60 Hz 300 mA with automatic switch over or 12 VDC 1 3 A output DC rated voltage 7 4 V 1000 mA max 8 25 V 1100 mA operating conditions 10 to 35 C manufacturer Guangdong PISEN Electronics Co Ltd Made in China ...

Страница 138: ...re department or the repair service provided by your regional Leica subsidiary for repairs or warranty claims Leica Camera AG Leica Customer Care Am Leitz Park 5 35578 Wetzlar Germany Phone 49 0 6441 2080 189 Fax 49 0 6441 2080 339 Email customer care leica camera com www leica camera com LEICA ACADEMY Have a look at our full seminar program with many interesting workshops on the topic of photogra...

Отзывы: