


7
R & R AXLE SEAL
REMOVAL
1. Place trike on lift.
2. Loosen lug nuts with 11/16” shallow socket.
3. Lift trike using a jack under differential carrier
housing and two safety jack stands under left
and right rear axles.
4. Remove lug nuts.
5. Remove left and right rear wheels by sliding
them out and away from body.
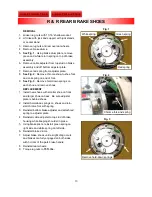
6. Remove brake drum.
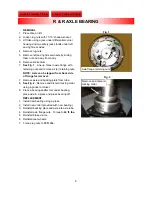
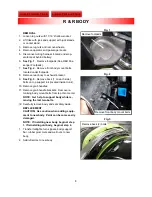
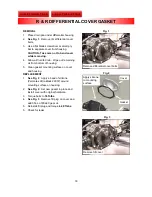
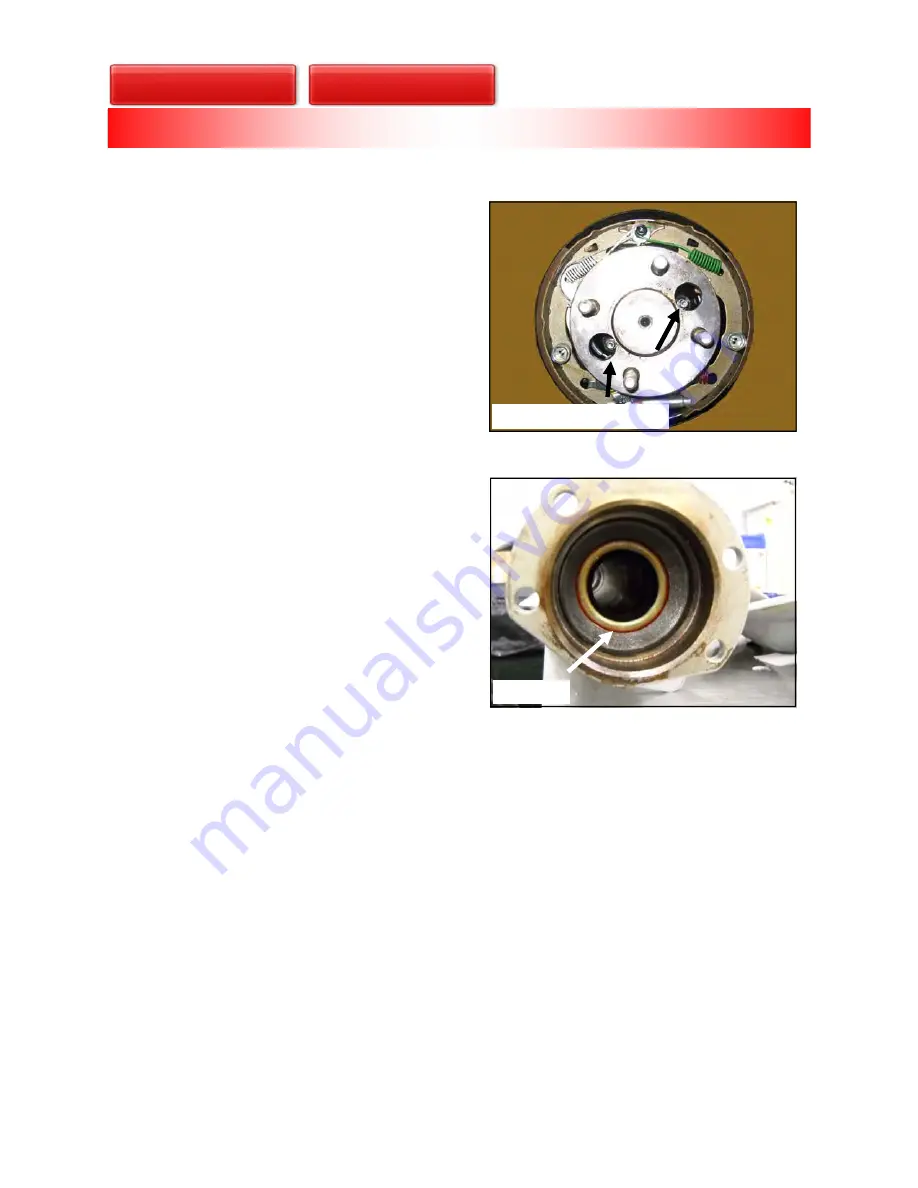
7.
See Fig. 1
. Line up holes in axle flange with
retaining nuts and remove all (4) retaining nuts.
NOTE: Axle can be tapped from other side
of flange for removal.
7. Remove axle and backing plate from tube.
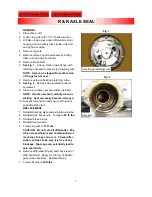
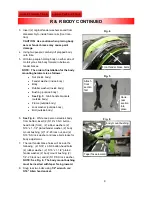
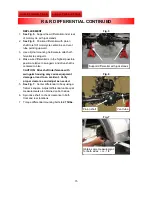
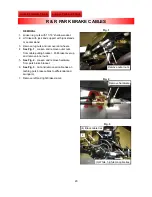
8.
See Fig. 2
. Remove axle seal with puller or
equivalent.
9. Clean area where new seal will be installed.
NOTE: Handle new seal carefully when in-
stalling. Seal can easily become damaged.
10. Set seal into position and secure with proper
seal installation tool.
REPLACEMENT
1. Reinstall backing plate and axle into axle tube.
2. Reinstall axle flange nuts. Torque to
44 ft. lbs.
3. Reinstall brake drums.
4. Reinstall
rear
wheels.
5. Torque lug nuts to
75 ft. lbs.
CAUTION: Do not over-fill differential. Pos-
sible axle seal failure and contamination of
rear brake linings can occur. Check differ-
ential vent tube to be sure it is free of any
blockage. Blockage can potentially lead to
axle seal failure.
6. Remove differential fill plug and check level of
differential fluid. Apply .9L (30 oz.) of 80w90
gear oil as necessary. Replace fill plug.
7. Torque fill plug to
40 ft-lbs
.
Fig. 1
Fig. 2
Axle seal
R & R AXLE SEAL
Axle flange retaining nuts
Содержание TRAMP 2009
Страница 44: ...u_joint_gu1072 jpg dust_shield_yoke_ls1420 jpg badge_tramp_gb1322 jpg grab handle_lh6202 jpg ...
Страница 46: ...swingarm_ls6200 jpg heat_shield_ls6209 jpg bracket_parkbrake_exhaust_s001361 jpg bracket_muffler_s001362 jpg ...
Страница 49: ...debris_shield_differential_ls1018 jpg shaft_drive_ls1404 jpg yoke_ly1002 jpg cable_park_brake_GB1115_16 jpg ...
Страница 50: ...badge_25year_s001532_REV_00 jpg latch_striker_ls6208 jpg ...