2
The QIS system consists of the Power/Communications Panel (PCP) and hardwired shades. The PCP handles communication
with the InFusion controller for configuration. The shades are hardwired for both power and RS-485 communication using RJ-45
connectors and CAT5e (or better) network wire.
DESIGN CENTER QIS SHADES
Make sure the following steps have been completed before you begin:
1.
Shades installed
2.
Power/Communication Panel(s) (PCP) units installed and powered
3.
InFusion system installed
4.
PCP wired to shades and RS-485
SERIAL INTEGRATION: VANTAGE AND QIS SHADES
DESIGN CENTER SOFTWARE SETUP
1.
Confirm all shades are setup and paired
2.
In the Design Center
Object Explorer> Enclosure view> Object Editor
, click on:
A.
Add QIS Bus
; then switch to
Bus View
, right-click on
QIS Bus Port Object
B.
Discover shades
C.
Name shades
D.
Set other
Object Editor
items
NOTE:
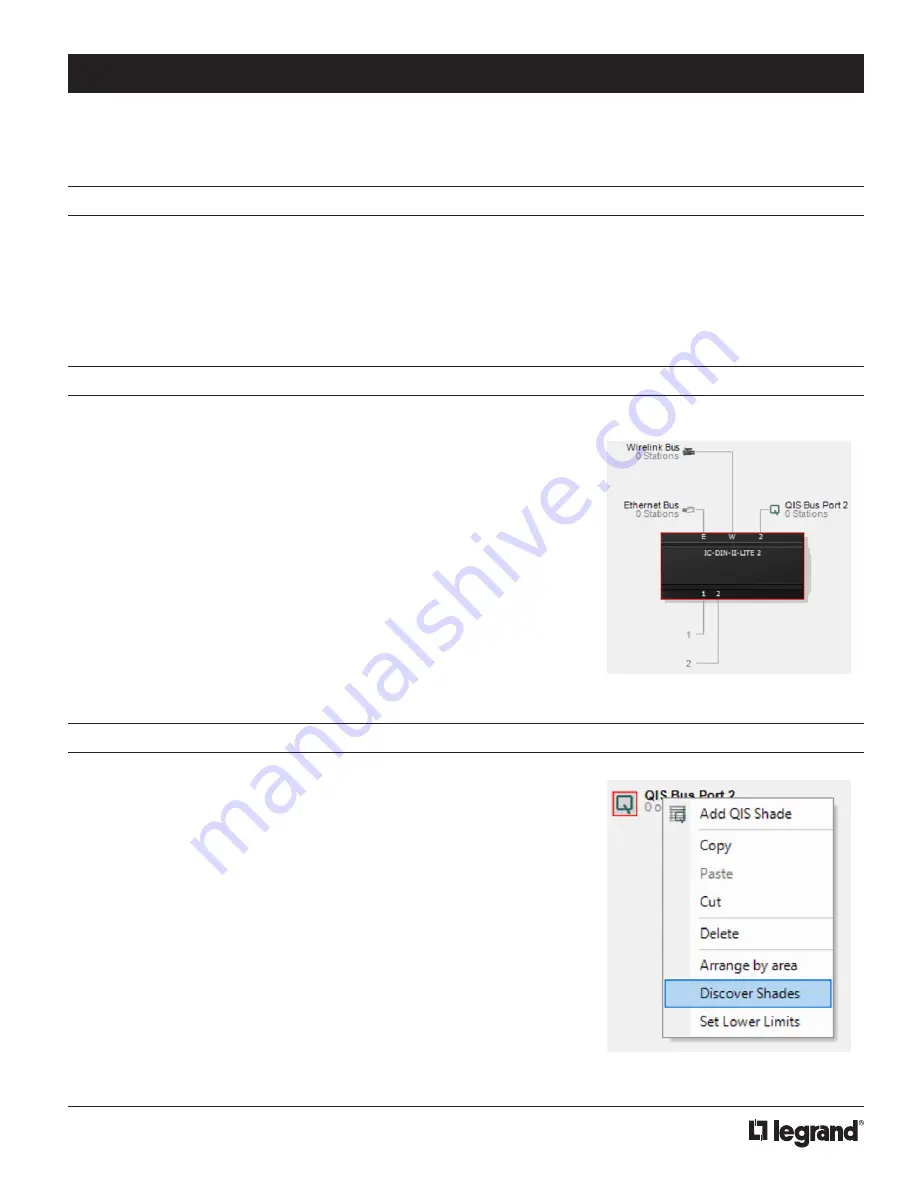
If a Din Lite II Controller is being used to connect to the Power Panel, then
the RS-485 Port needs to be set to Port 2 on the QIS Bus.
3.
Create shade groups and assign individual shades to each group - see Creating
Shade Groups on last page.
4.
Program the InFusion System Controller
(F5)
.
Program the InFusion System Controller. This method 1) auto-discovers all the
shades connected to a QIS Bus, 2) creates the appropriate shade objects in the
Design Center project file, and 3) imports their Serial Numbers.
For this method:
1.
Right-click on the
QIS Bus
in
Bus View
and select
Discover Shades
.
2.
Name each shade, and assign each shade to proper areas/rooms in the Design
Center project.
NOTE:
Shades can be easily identified using the
Jog Shade
button found at the
bottom of the
Object Editor
when online with controller.
DESIGN CENTER QIS SHADES - SOFTWARE SETUP
CONFIGURE SHADES


