39
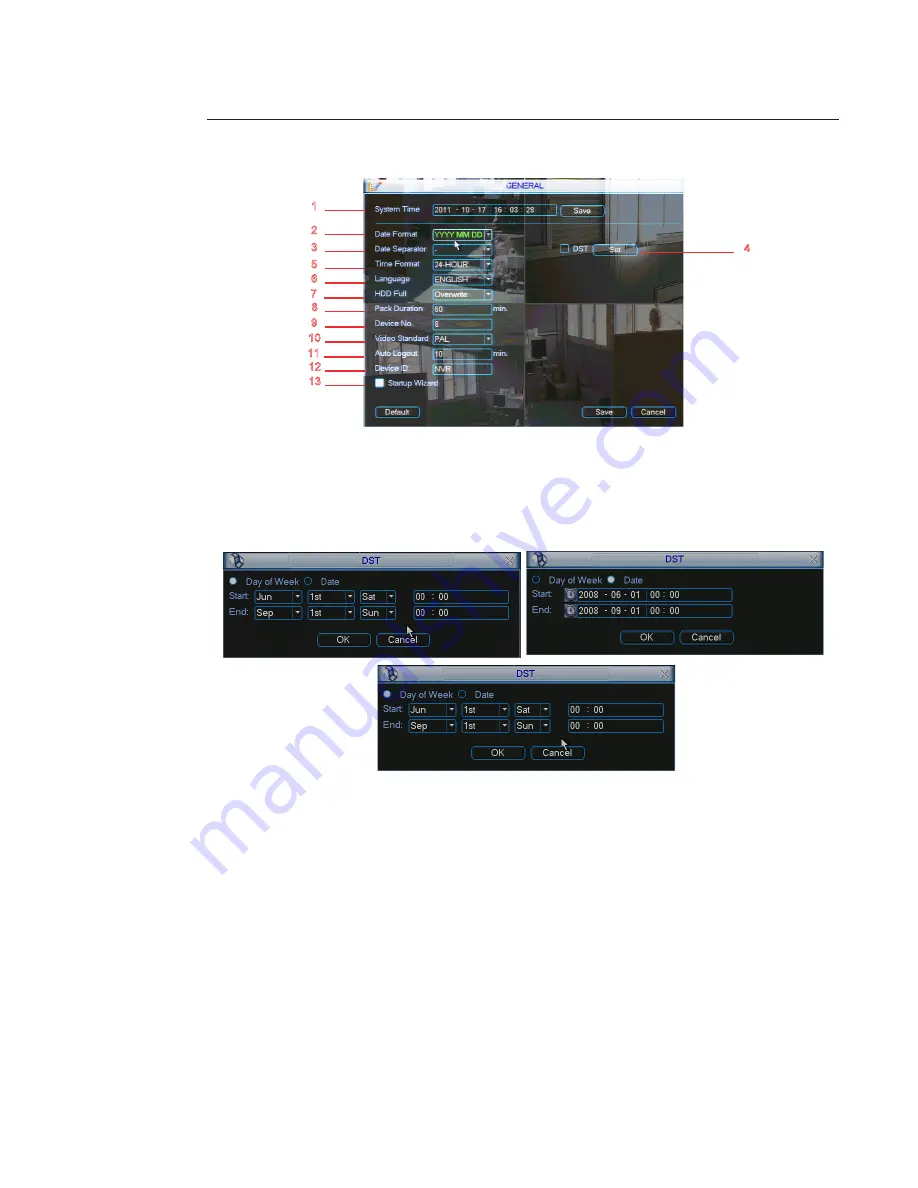
1 - System time:
Here is for you to set system time
2 - Date format:
There are three types: YYYYY-MM-DD: MM-DD-YYYYY or DD-MM-YYYY.
3 - Date separator:
There are three denotations to separate date: dot, beeline and solidus.
4 - DST:
Here you can set DST time and date.
(Daylight saving time) Please enable DST function and then click on the “Set” button.
You can see an interface is shown below.
Here you can set start time and end time by setting corresponding
week setup or date setup.
5 - Time format:
There are two types: 24-hour mode or 12-hour mode.
6 - Language:
System supports various languages.
7 - HDD full:
Here you can select working mode when the hard disk is full.
There are two options: “Stop Record” or “Overwrite”. If current working HDD is overwritten
or the current HDD is full while the next HDD is no empty, the system stops recording.
If the current HDD is full and the next HDD is empty, the system overwrites the previous files.
8 - Pack duration: You can specify the record duration. The value ranges from 60 to 120 minutes.
Default value is 60 minutes.
9 - DVR No:
When you are using one remote control to control several DVRs,
you can give a number to each DVR for your management.
Use the “Add” button on the remote control
10 - Video standard: PAL.
11 - Auto logout:
You can set auto logout interval once login user remains inactive for a specified time.
Value ranges from 0 to 60 minutes.
12 - Device ID
You can give a name to NVR.
13 - Startup Wizard Enable/Disable Startup Wizard .
Note:
Since system time is very important, do not modify time casually unless there is a must!
Before the time modification, please stop record operation first!
After completing all the setups click on the “Save” button, system goes back to the previous menu.
1
2
3
5
6
7
8
9
10
11
4
12
13


