background image

Owner’s Manual of DA1104 


-102- 

Appendix A: Legrand Smart Discovery Utility 

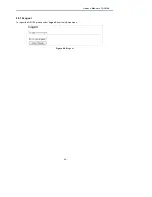
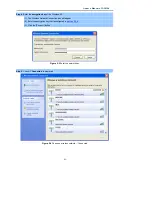
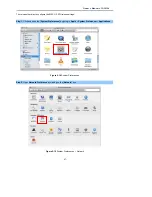
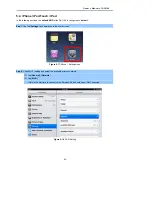
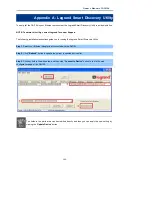
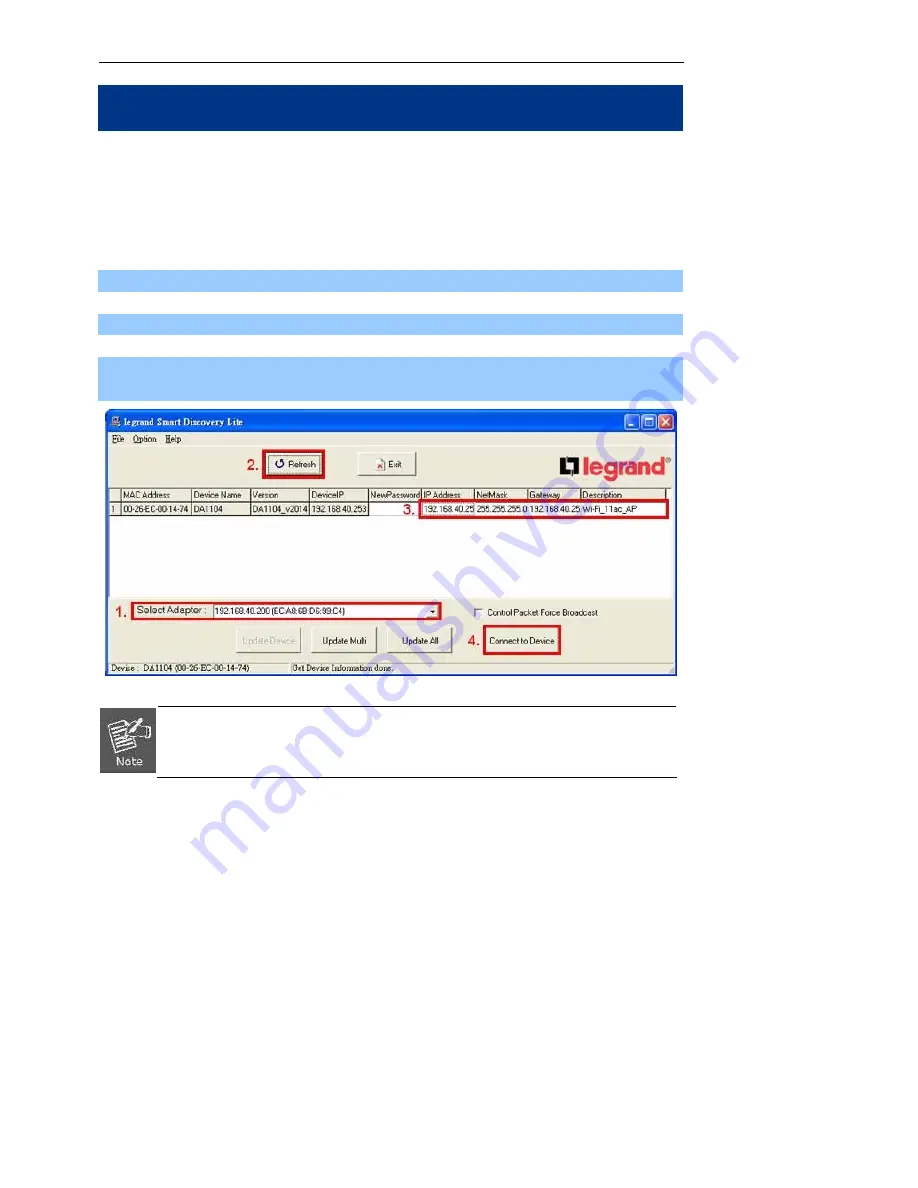
To easily list the DA1104 in your Ethernet environment, the Legrand Smart Discovery Utility is an ideal solution. 


NOTE: To obtain this utility, contact Legrand Technical Support.     


The following installation instructions guide you to running the Legrand Smart Discovery Utility. 


Step 1

: Select your Ethernet Adapter that connected with the DA1104. 


Step 2

: Click 

“Refresh” 

button to update the current connected devices list. 


Step 3

: Click any field in the white area, and then click 

“Connect to Device” 

button to link to the web   

configuration page of the DA1104. 


The fields in the white area can be modified directly and then you can apply the new setting by 

clicking the “

Update Device

” button. 


Содержание DA1104

Страница 1: ...802 11ac Dual Band Ceiling Mount Wireless Access Point P N DA1104 Owner s Manual P N 1308237 Rev A ...

Страница 2: ...oes not exceed the Class B limits for radio noise emissions from digital apparatus set out in the Radio Interference Regulations of the Canadian Department of Communications This Class B digital apparatus complies with Canadian ICES 003 Cet appareil numérique de la classe B est conforme à la norme NMB 003 du Canada Le manuel d utilisation des appareils radio exempts de licence doit contenir l énon...

Страница 3: ...TO QUALIFIED SERVICE PERSONNEL CAUTION THIS DEVICE MUST BE INSTALLED AND USED IN STRICT ACCORDANCE WITH THE MANUFACTURER S INSTRUCTIONS AS DESCRIBED IN THE USER DOCUMENTATION THAT COMES WITH THE PRODUCT WARNING POSTPONE INSTALLATION UNTIL THERE IS NO RISK OF THUNDERSTORM OR LIGHTNING ACTIVITY IN THE AREA When using this device basic safety precautions should always be followed to reduce the risk o...

Страница 4: ...local regulations Place POE Inserter to allow for easy access when disconnecting the power cord adapter of the device from the AC wall outlet Wipe the unit with a clean dry cloth Never use cleaning fluid or similar chemicals Do not spray cleaners directly on the unit or use forced air to remove dust When not utilizing the recommended 3 gang plastic switch outlet box do not directly cover the devic...

Страница 5: ...2 1 Configuring the IP Address Manually 10 3 2 2 Starting Setup in the Web UI 13 Chapter 4 Configuring the AP 15 4 1 Setup Wizard 15 4 2 TCP IP Settings 22 4 2 1 LAN Settings 22 4 3 WLAN1 5GHz 24 4 3 1 Basic Settings 24 4 3 2 Advanced Settings 38 4 3 3 RF Output Power 39 4 3 4 Security 40 4 3 5 Access Control 41 4 3 6 WDS 43 4 3 7 Site Survey 45 4 3 8 WPS 46 4 3 9 Schedule 49 4 4 WLAN2 2 4GHz 50 4...

Страница 6: ...ade Firmware 86 4 5 8 Reload Settings 86 4 5 9 Password 88 4 5 10 Logout 89 Chapter 5 Quick Connection to a Wireless Network 90 5 1 Windows XP Wireless Zero Configuration 90 5 2 Windows 7 WLAN AutoConfig 92 5 3 Mac OS X 10 x 95 5 4 iPhone iPod Touch iPad 99 Appendix A Legrand Smart Discovery Utility 102 Appendix B Troubleshooting 103 Appendix C Glossary 105 ...

Страница 7: ...CURITY SETUP 20 FIGURE 4 11 2 4GHZ WIRELESS SECURITY SETUP WEP SETTING 20 FIGURE 4 12 2 4GHZ WIRELESS SECURITY SETUP WPASETTING 21 FIGURE 4 13 SETUP WIZARD FINISHED 21 FIGURE 4 14 LAN SETTING 22 FIGURE 4 15 5GHZ WIRELESS MAIN MENU 24 FIGURE 4 16 5GHZ WIRELESS BASIC SETTINGS OF AP 25 FIGURE 4 17 5GHZ WIRELESS BASIC SETTINGS MULTIPLE AP 27 FIGURE 4 18 5GHZ MULTIPLE SSID 27 FIGURE 4 19 5GHZ UNIVERSAL...

Страница 8: ...GHZ UNIVERSAL REPEATER 5 56 FIGURE 4 54 2 4GHZ WIRELESS BASIC SETTINGS CLIENT 57 FIGURE 4 55 CLIENT AP LIST 59 FIGURE 4 56 CLIENT SECURITY 60 FIGURE 4 57 CLIENT STATUS 60 FIGURE 4 58 2 4GHZ WIRELESS BASIC SETTINGS WDS 61 FIGURE 4 59 2 4GHZ WIRELESS BASIC SETTINGS WDS AP 63 FIGURE 4 60 WIRELESS ADVANCED SETTINGS 2 4GHZ 65 FIGURE 4 61 RF OUTPUT POWER 2 4GHZ 67 FIGURE 4 62 WIRELESS SECURITY SETTINGS ...

Страница 9: ...2 FIGURE 5 6 WLAN AUTOCONFIG 92 FIGURE 5 7 TYPE THE NETWORK KEY 93 FIGURE 5 8 CONNECTING TO A NETWORK 93 FIGURE 5 9 CONNECTED TO A NETWORK 94 FIGURE 5 10 MAC OS NETWORK ICON 95 FIGURE 5 11 HIGHLIGHT AND SELECT THE WIRELESS NETWORK 95 FIGURE 5 12 ENTER THE PASSWORD 96 FIGURE 5 13 CONNECTED TO THE NETWORK 96 FIGURE 5 14 SYSTEM PREFERENCES 97 FIGURE 5 15 SYSTEM PREFERENCES NETWORK 97 FIGURE 5 16 SELE...

Страница 10: ...oduct Introduction 1 1 Package Contents The contents of your product package should include the following items DA1104 802 11ac Wireless Access Point POE Module with AC adapter Installation Bracket Round Cover Installation Instruction Sheet ...

Страница 11: ...pplications and less interference to enhance data throughput The incredible wireless speed makes it ideal for handling multiple HD movies streams high resolution on line gaming stereo music VoIP and data streams at the same time in a stable and smooth fashion Full Support of Wireless Security Encryption Besides 64 128 bit WEP encryption the DA1104 integrates WPA WPA2 WPA PSK WPA2 PSK and 802 1x Ra...

Страница 12: ...face Characteristics 2 4GHz 802 11b g n 5GHz 802 11ac Dual Band concurrent which is more efficiently carries high load traffic 2T2R MIMO technology for enhanced throughput and coverage Provides multiple adjustable transmit power control High Speed 300Mbps for 2 4GHz 867Mbps for 5GHz wireless data rate Secure Network Connection Advanced security 64 128 bit WEP WPA WPA2 WPA PSK WPA2 PSK TKIP AES enc...

Страница 13: ... Band 2 4G 2 412 2 462GHz 5G 5 180 5 240GHz 5 725 5 850GHz Extend Frequency DSSS Modulation Type 802 11b DSSS DBPSK DQPSK CCK 802 11a g n OFDM BPSK QPSK 16QAM 64QAM 802 11ac OFDM BPSK QPSK 16QAM 64QAM 256QAM 802 11ac VHT20 Nss2 MCS8 Up to 173 3Mbps 802 11ac VHT40 Nss2 MCS9 Up to 400Mbps 802 11ac VHT80 Nss2 MCS9 Up to 867Mbps 802 11n HT40 270 243 216 162 108 81 54 27Mbps 135 121 5 108 81 54 40 5 27...

Страница 14: ...Bm Nss2 MCS8 802 11ac VHT40 89dBm Nss1 MCS0 59dBm Nss2 MCS9 802 11ac VHT80 86dBm Nss1 MCS0 56dBm Nss2 MCS9 Receive Sensitivity 2 4GHz 802 11b 11Mbps 88dBm 10 PER 802 11g 54Mbps 74dBm 10 PER 802 11n 20MHz MCS7 69dBm 10 PER 802 11n 40MHz MCS15 66dBm 10 PER Transmit Power Adjustment 15 35 50 70 100 5 level adjustment Software Features Wireless Mode Access Point Client Repeater WDS AP WDS PTP Point to...

Страница 15: ...orts UPnP LAN Supports IGMP Proxy Web Based HTTP management interface SNTP time synchronize Easy firmware upgrade Supports Scheduling Reboot System Management Supports Smart Discovery Utility Standards Conformance IEEE Standards IEEE 802 11ac 2T2R up to 867Mbps IEEE 802 11n 2T2R up to 300Mbps IEEE 802 11g IEEE 802 11b IEEE 802 11i IEEE 802 3 10Base T IEEE 802 3u 100Base TX IEEE 802 3ab 1000Base T ...

Страница 16: ...w to connect DA1104 to the existing network devices and your computers 2 1 Product Installation Overview Installation Drawing Figu re 2 1 DA1104 Product Installation Drawing Reset Button Dual Band WAP LEDs From Internet AC Adapter PoE Injector Cat 5 cable MR1 Drawing labels need to be cleaned up ...

Страница 17: ...A1104 8 2 1 1 Panel Layout The front and rear panel provide a simple interface monitoring the AP LED Interface Figure 2 2 DA1104 Panel Layout LED Button definition Figure 2 3 DA1104 Panel Layout Reset Button Reset Button ...

Страница 18: ...Hz WiFi is activated WLAN Orange Blinking The 5GHz WiFi is streaming in session Green On Power Present Ethernet Green Blinking Ethernet active Button definition Object Description Reset Press and hold the Reset button about 10 seconds and then release it The system restores to the factory default settings Port definition Object Description PoE Port 802 3af at PoE 10 100 1000Mbps RJ45 port Auto MDI...

Страница 19: ... PC by an Ethernet cable plugging into the Data In port of the WAP connected PoEn and into the Ethernet port of PC Power on the DA1104 by plugging in the AC adapter of the PoE Injector In the following sections we ll introduce how to install and configure TCP IP correctly in Windows 7 other operating systems are similar First make sure your Ethernet Adapter is working and refer to the Ethernet ada...

Страница 20: ... 1 TCP IP Setting Now click OK to save your settings Now you can run the Ping command in the command prompt to verify the network connection between your PC and the AP The following example is in Windows 7 OS Please follow the steps below 1 Click on Start Run 2 Type cmd in the Search box ...

Страница 21: ...53 and then press Enter If the result displayed is similar to Figure 3 3 it means the connection between your PC and the AP has been established well Figure 3 3 Successful result of Ping command If the result displayed is similar to Figure 3 4 it means the connection between your PC and the AP has failed ...

Страница 22: ...eb UI It is easy to configure and manage the AP with the web browser Step 1 To access the configuration utility open a web browser and enter the default IP address http 192 168 40 253 in the web address field of the browser Figure 3 5 Login by default IP address After a moment a login window will appear Enter admin for the User Name and Password both in lower case letters Then click the OK button ...

Страница 23: ...3 Default User name admin Default Password admin If the above screen does not pop up it may mean that your web browser has been set to a proxy Go to Tools menu Internet Options Connections LAN Settings on the screen that appears cancel the Using Proxy checkbox and click OK to finish it ...

Страница 24: ...ion if you are not clear about a certain feature you can refer to the Help section in the right side of the screen to read all related helpful info 4 1 Setup Wizard The Setup Wizard will guide the user to configure the DA1104 easily and quickly Select the Setup Wizard on the left side of the screen and by clicking on Next on the Setup Wizard screen shown below you will then name your DA1104 and se...

Страница 25: ...ubnet Mask Displays LAN mask of the AP Default 255 255 255 0 Default Gateway IP address of the associated router Default 192 168 40 254 Step 2 Time Zone Setting Figure 4 4 Wizard Time Zone Setup The page includes the following fields Object Description Enable NTP client update Check this box to connect NTP Server and synchronize internet time Automatically adjust Check this box and system will adj...

Страница 26: ...rts 802 11a 802 11n 802 11ac and mixed Please choose its band according to your clients Mode Supports AP Client WDS and AP WDS mode SSID Service Set Identifier identifies your wireless network Channel Width Select 80MHz if you use 802 11ac select 40MHz if you use 802 11n otherwise 20MHz for the 802 11a mode Control Sideband It is only valid when you choose channel width 40MHz Channel Number Indica...

Страница 27: ...p WEP Setting The page includes the following fields Object Description Key Length WEP supports 64 bit or 128 bit security key Key Format User can enter key in ASCII or Hex format Key Setting Enter the key whose format is limited by the Key format ASCII or Hex Encryption WPA PSK The following picture shows how to set up WPA PSK security You can select WPA TKIP WPA2 AES and Mixed mode ...

Страница 28: ...less 2 4GHz Basic Settings The page includes the following fields Object Description Band Supports 802 11b 802 11g 802 11n and mixed Please choose its band according to your clients Mode Supports AP Client WDS and AP WDS mode SSID Service Set Identifier it identifies your wireless network Channel Width Select 40MHz if you use 802 11n otherwise 20MHz for the 802 11b g mode Control Sideband It is on...

Страница 29: ...re shows how to set the WEP security Figure 4 11 2 4GHz Wireless Security Setup WEP Setting The page includes the following fields Object Description Key Length WEP supports 64 bit or 128 bit security key Key Format User can enter key in ASCII or Hex format Key Setting Enter the key whose format is limited by the Key format ASCII or Hex Encryption WPA PSK The following picture shows how to set WPA...

Страница 30: ... Format Specify the format of the key pass phrase or hex Pre Shared Key Enter the key whose format is limited by the key format Click the Finished button to make your wireless configuration to take effect and finish the Setup Wizard Figure 4 13 Setup Wizard Finished After rebooting please check whether you can access the Internet or not on the Status page ...

Страница 31: ...owing fields Object Description IP Address The default LAN IP address of the DA1104 is 192 168 40 253 You can change it at your request Subnet Mask Default is 255 255 255 0 You can change it at your request Default Gateway Default is 192 168 40 254 You can change it at your request DHCP You can select Disabled Client or Server Default is Disabled meaning the DA1104 must connect to a router to assi...

Страница 32: ...The UPnP feature allows the devices such as Internet computers to access the local host resources or devices as needed UPnP devices can be automatically discovered by the UPnP service application on the LAN If you change the IP address of LAN you must use the new IP address to login the AP When the IP address of the DA1104 is changed the clients on the network often need to wait for a while or eve...

Страница 33: ... configure the 5GHz basic settings for the wireless network on this page After the configuration is done please click the Apply Changes button to save the settings First of all the wireless AP supports multiple wireless modes for different network applications which include AP Multiple SSIDs Universal Repeater Client WDS AP WDS It is easy to combine the DA1104 with an existing wired network The DA...

Страница 34: ...fields Object Description Disable Wireless LAN Interface Check the box to disable the wireless function Band Select the desired mode Default is 5GHz A N AC It is strongly recommended that you set the Band to 5GHz A N AC and then all of 802 11a 802 11n and 802 11ac wireless stations can connect to the DA1104 ...

Страница 35: ... Number You can select the operating frequency of wireless network Default 149 Broadcast SSID If you enable Broadcast SSID every wireless station located within the coverage of the AP can discover its signal easily If you are building a public wireless network enabling this feature is recommended In private network disabling Broadcast SSID can provide better wireless network security Default is En...

Страница 36: ... device as a general wireless access point with multiple SSIDs Figure 4 17 5GHz Wireless Basic Settings Multiple AP The device supports up to four multiple Service Set Identifiers You can go back to the Basic Settings page to set the Primary SSID The SSID s factory default setting is Legrand 5G VAP1 4 Multiple SSID 1 4 The SSID can be easily changed to connect to an existing wireless network or to...

Страница 37: ...its stations and the root AP for greater wireless range Here is the example of how to configure Universal Repeater Mode Please take the following steps To configure each wireless parameter please go to the WLAN1 5GHz Basic Settings page Step 1 Configure wireless mode to AP and then check Enable Universal Repeater Mode Acting as AP and client simultaneously Click Apply Changes to take effect Figure...

Страница 38: ... Universal Repeater 2 Step 3 Select the correct encryption method and enter the security key Then click Connect Figure 4 21 5GHz Universal Repeater 3 Step 4 Check Add to Wireless Profile and click Reboot Now Figure 4 22 5GHz Universal Repeater 4 ...

Страница 39: ...r interface should be Connected Figure 4 23 5GHz Universal Repeater 5 Client Infrastructure Combine the Wireless Router to the Ethernet devices such as TV game player or HDD and DVD to make them be wireless stations Figure 4 24 5GHz Wireless Basic Settings Client The page includes the following fields ...

Страница 40: ...he related configuration Furthermore click the Multiple AP button to enable multiple SSID function Network Type In Infrastructure the wireless LAN serves as a wireless station And the user can use the PC equipped with the DA1104 to access the wireless network via other access points In Ad hoc the wireless LAN will use the Ad hoc mode to operate Default is Infrastructure Note Only while the wireles...

Страница 41: ... Default is Auto Enable Mac Clone Single Ethernet Client Enable Mac Clone Example of how to configure Client Mode Please take the following steps To configure each wireless parameter please go to the WLAN1 5GHz Basic Settings page Step 1 Go to WLAN1 5GHz Site Survey page and click Site Survey button Step 2 Choose the root AP from the list If the root AP is not listed in the table re click Site Sur...

Страница 42: ...lient Security Step 4 Wait until the connection established Check the Add to Wireless Profile option and then reboot it Figure 4 27 Client Status WDS Connect this Wireless AP with up to 8 WDS capable wireless APs to expand the scope of network ...

Страница 43: ...e box to disable the wireless function Band Select the desired mode Default is 5GHz A N AC It is strongly recommended that you set the Band to 5GHz A N AC and all of 802 11a 802 11n and 802 11ac wireless stations can connect to the DA1104 5 GHz A 802 11a mode rate is up to 54Mbps 5 GHz N 802 11n mode rate is up to 300Mbps 5 GHz AC 802 11n mode rate is up to 867Mbps 2T2R ...

Страница 44: ...related configuration Furthermore click the Multiple AP button to enable multiple SSID function Channel Width You can select 20MHz 40MHz or 80MHz Control Sideband You can select Upper or Lower Channel Number You can select the operating frequency of wireless network Data Rate Set the wireless data transfer rate to a certain value Since most of wireless devices will negotiate with each other and pi...

Страница 45: ...e Figure 4 29 5GHz Wireless Basic Settings WDS AP The page includes the following fields Object Description Disable Wireless LAN Interface Check the box to disable the wireless function Country Select your region from the pull down list This field specifies the region where the wireless function of the Router can be used It may be illegal to use the wireless function of the Router in ...

Страница 46: ...lick the Multiple AP button to enable multiple SSID functions SSID The ID of the wireless network User can access the wireless network via its ID only However if you switch to Client Mode this field becomes the SSID of the AP you want to connect with Default SSID Legrand AP 5G Channel Width You can select 20MHz 40MHz or 80MHz Control Sideband You can select Upper or Lower Channel Number You can se...

Страница 47: ...to connect with 4 3 2 Advanced Settings Choose menu WLAN1 5GHz Advanced Settings and you can configure the 5GHz advanced settings for the wireless network on this page After the configuration please click the Apply button to save the settings Figure 4 30 Wireless Advanced Settings 5GHz The page includes the following fields Object Description Fragment Threshold You can specify the maximum size of ...

Страница 48: ...s cannot exchange data through the DA1104 Default is Disabled STBC Activate Space Time Blocking Code STBC which does not need channel statement information CSI Default Setting Enabled LDPC Low density Parity check Code is wireless data transmit algorithm Default Setting Enabled TX Beamforming It is a technique that focuses the APs transmit energy of the MIMO spatial streams towards the target STAs...

Страница 49: ...ge includes the following fields Object Description Select SSID Select the SSID you want to configure the wireless security function which includes the root one and the client one Disable No security setup for wireless connection WEP It is based on the IEEE 802 11 standard And the default setting of authentication is Automatic which can select Open System or Shared Key authentication type automati...

Страница 50: ... Key please enter at least 8 ASCII characters Passphrase or 64 Hexadecimal characters All of the Cipher Suites support TKIP and AES 802 1x Authentication Enable 802 1x authentication function and then please enter the IP Address Port and Password of the Radius Server 4 3 5 Access Control Choose menu WLAN1 5GHz Access Control to allow or deny the computer of specified MAC address to connect with th...

Страница 51: ...lete MAC addresses with the Delete Selected button To deny a MAC address of 00 26 EC 00 00 01 for example from connecting to your wireless network do as follows Step 1 Select Deny from MAC Address Filter drop down menu Step 2 Enter 0026EC000001 in the MAC address box and click Add Step 3 Click the OK button to save your settings and you can add more MAC addresses if you like simply repeat the abov...

Страница 52: ...es to 2 4GHz Before configuring the WDS Setting page you have to select the wireless mode to WDS on the WLAN1 5GHz Basic Settings web page Figure 4 35 WDS Mode 5GHz Choose menu WLAN1 5GHz WDS Settings to configure WDS to connect the DA1104 with another AP on this page To configure the security of the WDS connection click the Set Security button After finishing the configuration click the Apply Cha...

Страница 53: ...Manual of DA1104 44 Figure 4 36 WDS Settings 5GHz Figure 4 37 WDS Set Security The page includes the following fields Object Description Enable WDS Check the box to enable the WDS function Please select WDS or ...

Страница 54: ...e AP and click the Delete Selected button to delete it The WDS feature can only be implemented between 2 wireless devices that both support the WDS feature Plus channel security settings and security key must be the same on both such devices Maximum 8 remote peers are supported To encrypt your wireless network click Set Security For the detail of wireless security see section 4 3 4 Remember to reb...

Страница 55: ...se this option you must know the PIN code from the wireless client and enter it in corresponding field on your device while using the same PIN code on client side for such connection The page includes the following fields Object Description Disable WPS You can check the box to disable the WPS function WPS Status Here you can check if the connection via WPS is established or not Self PIN Number It ...

Страница 56: ... WPS function A By Software Push Button Configuration PBC i Click the Start PBC Button on the WPS page of the AP Figure 4 39 WPS PBC 5GHz 1 Figure 4 40 WPS PBC 5GHz 2 ii The process must be finished within 2 minutes iii Wait for a while until the next screen appears Click OK to complete the WPS configuration B By PIN If the new device supports Wi Fi Protected Setup and the PIN method you can add i...

Страница 57: ...42 WPS PIN 5GHz 2 ii For the configuration of the wireless adapter please choose the option that you want to enter PIN into the AP Enrollee in the configuration utility of the WPS and click Next until the process finishes Method Two Enter the PIN of the AP into the configuration utility of your Wireless adapter i Click the Start PBC Button on the WPS page of the AP Get the Current PIN code of the ...

Страница 58: ...on your predefined schedule This feature is often used for restricting access to all users such as children employees and guests during specific times of the day for parental control or security reasons Choose menu WLAN1 5GHz Schedule to configure the schedule rule of enabling wireless function After the configuration please click the Apply Changes button to save the settings Figure 4 44 Schedule ...

Страница 59: ...enu 4 4 1 Basic Settings Choose menu WLAN2 2 4GHz Basic Settings to configure the 2 4GHz basic settings for the wireless network on this page After the configuration is done please click the Apply Changes button to save the settings The wireless AP supports multiple wireless modes for different network applications which include AP Multiple SSIDs Universal Repeater Client WDS AP WDS AP Standard Ac...

Страница 60: ...g fields Object Description Disable Wireless LAN Interface Check the box to disable the wireless function Band Select the desired mode Default is 2 4GHz B G N It is strongly recommended that you set the band to 2 4GHz B G N and all of 802 11b 802 11g and 802 11n wireless stations can connect to the DA1104 ...

Страница 61: ...rating frequency of wireless network Default 11 Broadcast SSID If you enable Broadcast SSID every wireless station located within the coverage of the AP can discover its signal easily If you are building a public wireless network enabling this feature is recommended In private network disabling Broadcast SSID can provide better wireless network security Default is Enabled Data Rate Set the wireles...

Страница 62: ...AP The device supports up to four multiple Service Set Identifiers You can go back to the Basic Settings page to set the Primary SSID The SSID s factory default setting is Legrand 2 4G VAP1 4 Multiple SSID 1 4 The SSID can be easily changed to connect to an existing wireless network or to establish a new wireless network When the information for the new SSID is finished click the Apply Changes but...

Страница 63: ...figure Universal Repeater Mode Use the following steps To configure each wireless parameter go to the WLAN2 2 4GHz Basic Settings page Step 1 Configure wireless mode to AP and then check Enable Universal Repeater Mode Acting as AP and client simultaneously Click Apply Changes to take effect Figure 4 49 2 4GHz Universal Repeater 1 Step 2 Go to 2 4GHz Site Survey page to find the root AP Select the ...

Страница 64: ...click Next Figure 4 50 2 4GHz Universal Repeater 2 Step 3 Select the correct encryption method and enter the security key Then click Connect Figure 4 51 2 4GHz Universal Repeater 3 Step 4 Check Add to Wireless Profile and click Reboot Now ...

Страница 65: ...p 5 Go to Management Status page to check whether the state of Repeater interface should be Connected Figure 4 53 2 4GHz Universal Repeater 5 Client Infrastructure Connect the wireless router with Ethernet devices such as TVs and game players to make them wireless stations ...

Страница 66: ...s Manual of DA1104 57 Figure 4 54 2 4GHz Wireless Basic Settings Client The page includes the following fields Object Description Disable Wireless LAN Interface Check the box to disable the wireless function ...

Страница 67: ... use the PC equipped with the DA1104 to access the wireless network via other access points In Ad hoc the wireless LAN will use the Ad hoc mode to operate Default is Infrastructure Note Only while the wireless mode is set to Client can the Network Type can be configured SSID The ID of the wireless network User can access the wireless network via the ID only However if you switch to Client Mode thi...

Страница 68: ...To configure each wireless parameter please go to the WLAN2 2 4GHz Basic Settings page Step 1 Go to WLAN2 2 4GHz Site Survey page and click Site Survey button Step 2 Choose the root AP from the list If the root AP is not listed in the table re click Site Survey to update the list Figure 4 55 Client AP List Step 3 Enter the Security Key of the root AP and then click Connect ...

Страница 69: ...lient Security Step 4 Wait until the connection established Check the Add to Wireless Profile option and then reboot it Figure 4 57 Client Status WDS Connect this Wireless AP with up to 8 WDS capable wireless APs to expand the scope of network ...

Страница 70: ...ption Disable Wireless LAN Interface Check the box to disable the wireless function Band Select the desired mode Default is 2 4GHz B G N It is strongly recommended that you set the Band to 2 4GHz B G N and all of 802 11b 802 11g and 802 11n wireless stations can connect to the DA1104 2 4 GHz B 802 11b mode rate is up to 11Mbps ...

Страница 71: ...rthermore click the Multiple AP button to enable multiple SSID function Channel Width You can select 20MHz or 40MHz Control Sideband You can select Upper or Lower Channel Number You can select the operating frequency of wireless network Data Rate Set the wireless data transfer rate to a certain value Since most of wireless devices will negotiate with each other and pick a proper data transfer rate...

Страница 72: ...try Select your region from the pull down list This field specifies the region where the wireless function of the Router can be used It may be illegal to use the wireless function of the Router in a region other than one of those specified in this field If your country or region is not listed please contact your local government agency for assistance Band Select the desired mode Default is 2 4GHz ...

Страница 73: ...However if you switch to Client Mode this field becomes the SSID of the AP you want to connect with Default SSID Legrand AP 2 4G Channel Width You can select 20MHz or 40MHz Control Sideband You can select Upper or Lower Channel Number You can select the operating frequency of wireless network Broadcast SSID If you enable Broadcast SSID every wireless station located within the coverage of the DA11...

Страница 74: ...anced Settings to configure the 2 4GHz advanced settings for the wireless network on this page After the configuration please click the Apply button to save the settings Figure 4 60 Wireless Advanced Settings 2 4GHz The page includes the following fields Object Description Fragment Threshold You can specify the maximum size of packet during the fragmentation of data to be transmitted If you set th...

Страница 75: ...gregation It is a function where the values of multiple rows are grouped together Default is Enabled Short GI It is used to set the time that the receiver waits for RF reflections to settle out before sampling data Default is Enabled WLAN Partition This feature also called WLAN isolation or Block Relay If this is enabled wireless clients cannot exchange data through the DA1104 Default is Disabled ...

Страница 76: ...n power to optimize the wireless range Power consumption can be reduced to up to 75 from peak power consumption to serve smaller homes The DA1104 supports 5 output power control levels You can change the RF output power level here in accordance with various environments and signal strengths 4 4 4 Security Choose menu WLAN2 2 4GHz Security to configure the settings of wireless security for the wire...

Страница 77: ...WPA is a medium level encryption and is supported by most wireless devices and operating systems WPA2 WPA2 is a high level encryption and is supported by most wireless devices and operating systems Encryption WPA WPA2 WPA Mixed WPA Mixed Mode allows the use of both WPA and WPA2 at the same time Enterprise RADIUS When you select the authentication mode based on Enterprise Radius Server please enter...

Страница 78: ...is function MAC Address Enter the MAC address you want to allow or deny connection to the DA1104 in the field Comment You can make some comments on each MAC address on the list Current Access Control List You can select MAC addresses and click Delete Selected button to delete it Wireless Access Control example To deny a PC at the MAC address of 00 26 EC 00 00 01 to connect to your wireless network...

Страница 79: ...Owner s Manual of DA1104 70 repeat the above steps Figure 4 64 Wireless Access Control Deny ...

Страница 80: ...n 2 4GHz which also applies to 5GHz Before configuring the WDS Setting page you have to set the wireless mode to WDS on the WLAN2 2 4GHz Basic Settings web page Figure 4 65 WDS Mode 2 4GHz Choose menu WLAN2 2 4GHz WDS Settings to configure WDS to connect the DA1104 with another AP on this page After the configuration please click the Apply Changes button to save the settings Figure 4 66 WDS Settin...

Страница 81: ...e the wireless security parameters of the AP you want to connect via WDS Show Statics Click the Show Statics button to show the WDS AP Current WDS AP List You can select some MAC addresses of the AP and click the Delete Selected button to delete it WDS feature can only be implemented between 2 wireless devices that both support the WDS feature Plus channel security settings and security key must b...

Страница 82: ... button to establish a secure wireless connection PBC If you find the WPS LED blinking for 2 minutes after you press the software PBC button it means that PBC encryption method is successfully enabled An authentication will be performed between your router and the WPS PBC enabled wireless client device during this time If it succeeds the wireless client device connects to your device and the WPS L...

Страница 83: ...utton The WPS encryption can be implemented only between your Router and another WPS capable device Example of how to establish wireless connection using WPS Please take the following steps Step 1 Choose menu WLAN2 2 4GHz WPS to configure the setting for WPS After the configuration please click the Apply Changes button to save the settings Step 2 Add a new device If the wireless adapter supports W...

Страница 84: ... WPS configuration B By PIN If the new device supports Wi Fi Protected Setup and the PIN method you can add it to the network by PIN with the following two methods Method One Enter the PIN of your wireless adapter into the configuration utility of the AP i Enter the PIN code of the wireless adapter in the field behind Client PIN Number in the following figure and then click Start PIN The PIN code ...

Страница 85: ...od Two Enter the PIN of the AP into the configuration utility of your wireless adapter i Click the Start PBC Button on the WPS page of the AP Get the current PIN code of the AP on the WPS page each AP has its unique PIN code Figure 4 73 WPS PIN 2 4GHz 3 ii For the configuration of the wireless adapter choose the option that you want to enter the PIN of the AP Registrar in the configuration utility...

Страница 86: ...u WLAN2 2 4GHz Schedule to configure the schedule rule of enabling wireless function After the configuration please click the Apply Changes button to save the settings Figure 4 74 Schedule 2 4GHz When setting the Wireless Schedule it is important to ensure that your System Clock settings have been configured If not your Wireless Schedule will not function correctly 4 5 Management This section focu...

Страница 87: ... Status You can use this function to display instantaneous information about the wireless access point The information displayed here may vary depending on the configuration Choose menu Management Status to show the current status and some basic settings of the DA1104 ...

Страница 88: ...Owner s Manual of DA1104 79 Figure 4 76 Status 4 5 2 Statistics Choose menu Management Statistics to show the packet counters for transmission and reception regarding wireless and Ethernet network ...

Страница 89: ...al count of sent packets on the Ethernet WAN interface Ethernet WAN Received Packets It shows the statistical count of received packets on the Ethernet WAN interface Refresh Click the refresh the statistic counters on the screen 4 5 3 SNMP Choose menu Management SNMP to allow the network management station to retrieve statistics and status from the SNMP agent in this AP Simple Network Management P...

Страница 90: ... community name for SNMP management Trap Receiver IP Address The IP address of SNMP Trap Server 4 5 4 NTP Settings This section assists you in setting the Wireless AP s system time You can either set the time and date manually or automatically obtain the time from the Internet Choose menu Management NTP Settings to configure the system time You can also maintain the system time by synchronizing wi...

Страница 91: ...just Daylight Saving Select if your location observes daylight savings time Enable NTP client update Check to enable NTP update Once this function is enabled AP will automatically update current time from NTP server NTP Server User may select prefer NTP sever or input address of NTP server manually If the AP loses power for any reason it cannot keep its clock running and will not have the correct ...

Страница 92: ...supported in the AP Weekday select this option to let the device reboot automatically according to the reserved time in one or more days of a week Every day select this option to let the device reboot automatically according to the reserved time every day Weekday Check one or more days to let the device auto reboot on schedule When choosing Every day as your reboot plan the Weekday will be grayed ...

Страница 93: ...hour format to enable this function to take effect For example if you want this function to work at 23 00 every Sunday choose Weekday in the Reboot Plan field Figure 4 81 Schedule Reboot Example Step 3 Click the Apply Changes button to take this function effect ...

Страница 94: ... fields Object Description Enable Log Check to enable log function System all Check this option to display all the system logs Wireless Check this option to display only the logs related to wireless module Enable Remote Log Enable this option if you have a syslog server currently running on the LAN and wish to send log messages to it Log Server IP Address Enter the LAN IP address of the syslog ser...

Страница 95: ...press Upload to perform upgrade Please wait till the related information is shown on the screen after upgrade is finished Do not disconnect the Wireless AP from your management PC the PC you use to configure the device or power it off during the upgrade process otherwise it may be permanently damaged The Wireless AP will restart automatically when the upgrade process completes 4 5 8 Reload Setting...

Страница 96: ...of the DA1104 and then click the Upload button to reload the configuration back into the DA1104 Reset Settings to Default Click the Reset button to reset all settings of the DA1104 to factory default Factory Default Settings User Name admin Password admin IP Address 192 168 40 253 Subnet Mask 255 255 255 0 Default Gateway 192 168 40 254 DHCP Disabled 5GHz SSID Legrand AP 5G 2 4GHz SSID Legrand AP ...

Страница 97: ...the user name and password Choose menu Management User Management to change the user name and password which is inputted to access the web UI of the DA1104 Figure 4 85 Password Setup The page includes the following fields Object Description User Name Enter user name New Password Input password for this user Confirmed Password Confirm password again For the sake of security it is highly recommended...

Страница 98: ...Owner s Manual of DA1104 89 4 5 10 Logout To logout the DA1104 please select Logout from the left side menu Figure 4 86 Logout ...

Страница 99: ... 1 Windows XP Wireless Zero Configuration Step 1 Right click on the wireless network icon displayed in the system tray Figure 5 1 System Tray Wireless Network Icon Step 2 Select View Available Wireless Networks Step 3 Highlight and select the wireless network SSID to connect 1 Select SSID default 2 Click the Connect button Figure 5 2 Choose a wireless network ...

Страница 100: ...ireless AP 1 The Wireless Network Connection box will appear 2 Enter the encryption key that is configured in section 4 3 4 3 Click the Connect button Figure 5 3 Enter the network key Step 5 Check if Connected is displayed Figure 5 4 Choose a wireless network Connected ...

Страница 101: ...fig service is built in to Windows 7 to detect and connect to wireless networks This built in wireless network connection tool is similar to the wireless zero configuration tool in Windows XP Step 1 Right click on the network icon displayed in the system tray Figure 5 5 Network icon Step 2 Highlight and select the wireless network SSID to connect 1 Select SSID default 2 Click the Connect button Fi...

Страница 102: ...ct automatically Step 4 Enter the encryption key of the Wireless AP 1 The Connect to a Network box will appear 2 Enter the encryption key that is configured in section 4 3 4 3 Click the OK button Figure 5 7 Type the network key Figure 5 8 Connecting to a Network Step 5 Check if Connected is displayed ...

Страница 103: ...Owner s Manual of DA1104 94 Figure 5 9 Connected to a Network ...

Страница 104: ... The AirPort Network Connection menu will appear Figure 5 10 Mac OS Network icon Step 2 Highlight and select the wireless network SSID to connect 1 Select and SSID default 2 Double click on the selected SSID Figure 5 11 Highlight and select the wireless network Step 4 Enter the encryption key of the Wireless AP 1 Enter the encryption key that is configured in section 4 3 4 2 Click the OK button ...

Страница 105: ... you will be connecting to this Wireless AP in the future check Remember this network Step 5 Check if the AirPort is connected to the selected wireless network If Yes then there will be a check symbol in the front of the SSID Figure 5 13 Connected to the network ...

Страница 106: ...e the MAC OS X Wireless settings Step 1 Click and open the System Preferences by going to Apple System Preference or Applications Figure 5 14 System Preferences Step 2 Open Network Preference by clicking on the Network icon Figure 5 15 System Preferences Network ...

Страница 107: ...select the available wireless network 1 Choose the AirPort on the left menu make sure it is ON 2 Select Network Name default here If this is the first time to connect to the Wireless AP it should show Not network selected Figure 5 16 Select the Wireless Network ...

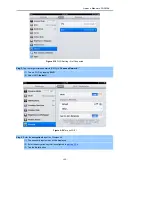
Страница 108: ...gured to default Step 1 Tap the Settings icon displayed in the home screen Figure 5 17 iPhone Settings icon Step 2 Check Wi Fi setting and select the available wireless network 3 Tap General Network 4 Tap Wi Fi If this is the first time to connect to the Wireless AP it should show Not Connected Figure 5 18 Wi Fi Setting ...

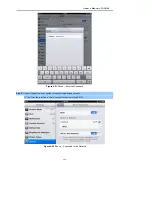
Страница 109: ...ss network SSID in Choose a Network 1 Turn on Wi Fi by tapping Wi Fi 2 Select SSID default Figure 5 20 Turn on Wi Fi Step 4 Enter the encryption key of the Wireless AP 1 The password input screen will be displayed 2 Enter the encryption key that is configured in section 4 3 4 3 Tap the Join button ...

Страница 110: ... 101 Figure 5 21 iPhone Enter the Password Step 5 Check if the device is connected to the selected wireless network If Yes then there will be a check symbol in the front of the SSID Figure 5 22 iPhone Connected to the Network ...

Страница 111: ... instructions guide you to running the Legrand Smart Discovery Utility Step 1 Select your Ethernet Adapter that connected with the DA1104 Step 2 Click Refresh button to update the current connected devices list Step 3 Click any field in the white area and then click Connect to Device button to link to the web configuration page of the DA1104 The fields in the white area can be modified directly an...

Страница 112: ...e the Legrand Smart Discovery Utility to see if you can find the AP or not f If you did a firmware upgrade and this happens contact your dealer of purchase for help g If all the solutions above don t work contact the dealer for help I can t get connected to the Internet a Go to Status Internet Connection menu on the router connected to the AP and check Internet connection status b Check if you can...

Страница 113: ... s transferring big files performance for others may be hindered d Call your Internet service provider to see if there is something wrong with their network I can t log into the web management interface the password is wrong a Make sure you re connecting to the correct IP address of the AP b Password is case sensitive Make sure the Caps Lock light is not illuminated c If you really forget the pass...

Страница 114: ... by the Code of Federal Regulations Title 47 Section 15 407 802 11b The 802 11b standard specifies a wireless networking at 11 Mbps using direct sequence spread spectrum DSSS technology and operating in the unlicensed radio spectrum at 2 4GHz and WEP encryption for security 802 11b networks are also referred to as Wi Fi networks 802 11g specification for wireless networking at 54 Mbps using direct...

Страница 115: ...twork to communicate with each other all devices must be configured with the same SSID This is typically the configuration parameter for a wireless PC card It corresponds to the SSID in the Wireless Access Point and to the wireless network name WEP Wired Equivalent Privacy A data privacy mechanism based on a 64 bit or 128 bit or 152 bit shared key algorithm as described in the IEEE 802 11 standard...

Отзывы: