


11
5.2.3
Configuring from the LV 7390
If the connection between this instrument and the LV 7390 is established, this instrument’s
IP address can be set from the LV 7390. However, if you do, the connection between them
will be disconnected as soon as you change the settings.
To set this instrument’s IP address from the LV 7390, follow the procedure below when this
instrument’s ETHERNET LED is lit.
1. Press SYS,
F•2
SYSTEM SETUP, and then
F•2
PREV TAB.
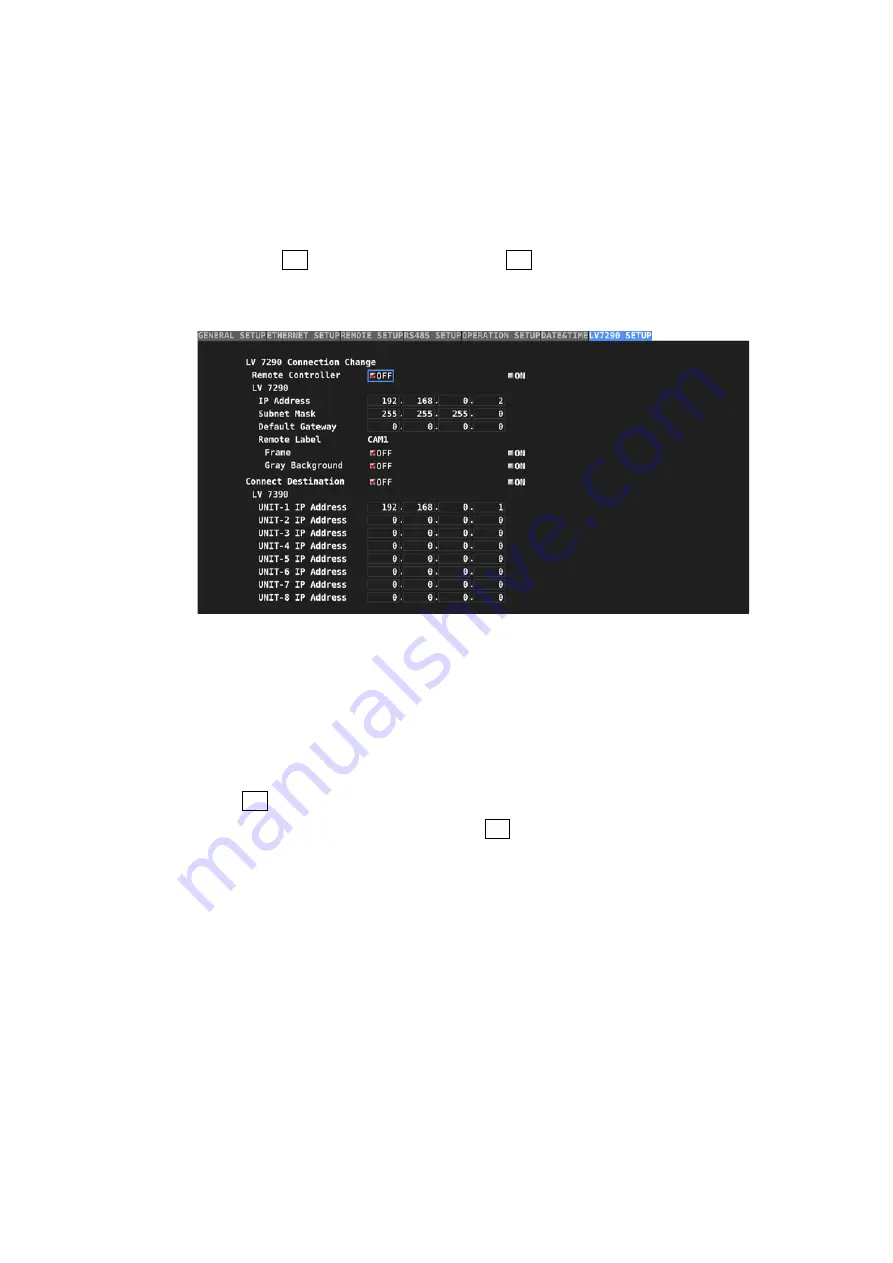
The LV7290 SETUP screen appears. This screen appears only when the connection
between this instrument and the LV 7390 is established.
Figure 5-5 LV7290 screen SETUP
2. Enter the values.
This instrument’s settings are shown under Remote Controller, and the connection
Destination (LV 7390) setting under Connect Destination 1 to 8 (LV 7390). If set to OFF,
data is not transmitted. If you want to change the settings of one side, set the other
side to OFF. By factory default, both sides are set to OFF.
3. Press
F•1
COMPLETE.
The settings are applied when you press
F•1
COMPLETE. You cannot change the
settings from the LV 7390 again if there is no LV 7290 that the LV 7390 to connect to at
the newly specified address. If you specify wrong values, you have to set the LV 7290
from a PC.


