LaserLine LA240 Скачать руководство пользователя страница 10

PROCEDURA DI PROGRAMMAZIONE DEL FILO GRIGIO

A seconda delle necessità della vettura e delle richieste del cliente, è’ possibile programmare il filo
grigio come:

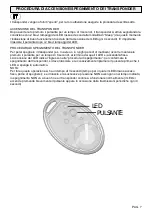
0) INPUT: per ingresso PULSANTE COFANO e per l’APPRENDIMENTO (

);

DEFAULT

1) USCITA PILOTAGGIO RELE’ BLOCCO MOTORE;
2) USCITA PILOTAGGIO ATTIVATORE SATELLITARE;
3) USCITA PILOTAGGIO DI UN LED DI STATO LAMPEGGIANTE;

PROCEDURA DI PROGRAMMAZIONE DEL FILO GRIGIO:


-  

l’allarme 

dall’alimentazione 

per 

;

Scollegare

almeno 5 secondi


Dopo 

aver 

ricollegato 

l’allarme 

all’alimentazione, 

bisogna  

tener 

premuto 

il

entro 20 secondi,

pulsante del transponder per un tempo di 3 second circai fino a quando il LED effettua 2 lampeggi
veloci.

E’ importante rilasciare il pulsante dopo i 2 brevi lampeggi del LED.

La conferma dell’ingresso in procedura di programmazione del filo grigio verrà segnalata tramite 3
beep brevi della sirena.
 3 - Solo ora 

a seconda del comportamento che si vuole

 eseguire “n” pressioni del transponder

ottenere (vedi tabella qui di seguito).
Ad ogni pressione del transponder la sirena emetterà un beep di conferma

PROGRAMMAZIONE

N° PRESSIONI DEL

TRANSPONDER

ALLARME

INSERITO

ALLARME

DISINSERITO

USCITA PILOTAGGIO

RELE’ BLOCCO MOTORE

0

INPUT per COFANO

\

\

OUT = FLOTTANTE

OUT = MASSA

USCITA PILOTAGGIO

ATTIVATORE SATELLITARE

OUT = MASSA

OUT = FLOTTANTE

USCITA PER PILOTAGGIO

 LED DI STATO

OUT = LAMPEGGIANTE

OUT = FLOTTANTE

2

1

3

ATTENZIONE:

Per evitare che si creino corto circuiti dovuti alla programmazione del filo grigio come uscita, è
necessario verificare che, prima di effettuare la programmazione,  il filo grigio non sia
collegato al pulsante cofano o ad un positivo fisso o ad una massa.

PAG. 10


-  

dalla 

programmazione  

da 

quando

L’uscita

avverrà in maniera automatica passati i 20 secondi

si è entrati in procedura e sarà segnalata da un beep lungo della sirena.

NOTA:

 ATTENZIONE: Per permettere la programmazione del filo grigio, ogni volta che l’allarme

viene scollegato dall’alimentazione per almeno 5 secondi, alla successiva alimentazione, per i
primi 20 secondi da quando è stato alimentato, l’allarme  ignorerà eventuali pressioni del
transponder.

Содержание LA240

Страница 1: ...o deve essere effettuata da personale competente e qualificato This product must be installed by skilled and qualified personnel LA251 LA250 LA240 LA241 MANUALE INSTALLATORE e UTENTE FITTING USER MANU...

Страница 2: ...TO DISINSERIMENTO MANUALE TRAMITE PULSANTE P 16 ESCLUSIONE DEI SENSORI ULTRASUONI P 16 CAUSE DI ALLARME P 16 TROUBLESHOOTING P 16 CARATTERISTICHE TECNICHE P 17 OMOLOGAZIONE P 17 NOTA P 17 SIREN AND US...

Страница 3: ...i ultrasuoni Ultrasonic sensors Pulsante cofano Bonnet push button Supporto plastico per sensori Plastic support for sensors Cablaggio modulo ultrasuoni Ultrasonic module harness DIFFERENZE FRA I KIT...

Страница 4: ...to alla vettura Possibilmente meglio installare la sirena il pi lontano possibile da parti metalliche telaio vettura motore etc per garantire cosi una pi ottimale ricezione del segnale trasmesso dal t...

Страница 5: ...INA DI ALLARME MODULO ULTRASUONI PAG 5 INGRESSO PULSANTE COFANO DEFAULT 12V POSITIVO MASSA USCITA BLOCCO MOTORE USCITA ATTIVATORE SATELLITARE USCITA LED LAMPEGGIANTE GRIGIO ROSSO NERO 30 87 87A 86 85...

Страница 6: ...il capitolo Range di funzionamento CONNESSIONI ELETTRICHE Prima di effettuare i collegamenti elettrici consultare attentamente il libretto d uso e manutenzione della vettura e scollegare il polo negat...

Страница 7: ...der es In aereo o in lunghi periodi di inutilizzo occorre mantenere premuto il pulsante per un tempo di 6 secondi al termine dei quali il LED si accender fisso L accensione del LED indica l ingresso n...

Страница 8: ...ENDIMENTO Per poter entrare nella procedura di autoapprendimento necessario 1A Premere 3 volte consecutivamente il pulsante cofano Come conferma la sirena emetter un beep breve 1B Nel caso in cui il p...

Страница 9: ...in cui il modulo ultrasuoni non fosse presente per uscire dalla procedura di autoapprendimento sufficiente attendere circa 30 secondi dopo aver autoappreso l ultimo transponder L uscita dalla procedur...

Страница 10: ...transponder ottenere vedi tabella qui di seguito Ad ogni pressione del transponder la sirena emetter un beep di conferma PROGRAMMAZIONE N PRESSIONI DEL TRANSPONDER ALLARME INSERITO ALLARME DISINSERITO...

Страница 11: ...O MOTORE 30 87 87A 86 85 DESCRIZIONE DEL RELE OPZIONALE PRECABLATO LASERLINE CODE 810 1 85 86 30 87 87A RELE 810 1 NOTA Usare un rel che abbia una portata in corrente di almeno 20 30A RELE 20 30A PAG...

Страница 12: ...sponder potrebbe essere rilevato dall allarme Ci dipende dal tipo di vettura dalla posizione in cui stata installata la sirena nella vettura dalla presenza o meno di ostacoli tra la vettura e il trans...

Страница 13: ...na quindi deve iniziare a suonare a pieno regime Se questo non si verificasse aumentare la sensibilit e ripetere l operazione In senso orario massima sensibilit In senso antiorario minima sensibilit I...

Страница 14: ...nza del transponder l utente ne col transponder quindi si allontanato dal veicolo la presenza di movimento in abitacolo ne L avvenuto inserimento non verr segnalato da alcun tono beep Se invece durant...

Страница 15: ...SERIMENTO MANUALE INSERIMENTO DISINSERIMENTO MANUALE TRAMITE PRESSIONE DEL PULSANTE Distanza inferiore a 15 metri in campo aperto senza ostacoli PAG 15 DISINSERIMENTO MANUALE Ad allrme inserito per ef...

Страница 16: ...TROUBLESHOOTING 1 Non suona per autoalimentazione La batteria interna della sirena pu essere scarica Per la completa ricarica occorrono almeno 15 ore di utilizzo della vettura 2 Aprendo una o pi porti...

Страница 17: ...ne del transponder e del modulo ultrasuoni 433 92MHz Tempo di preset 45 sec Tempo neutro entro il quale possibile effettuare la programmazione del filo grigio 20 sec Ritardo di allarme da ultrasuoni 2...

Страница 18: ...mpared to the vehicle Possibly is better to install the siren as far as possible from metal parts car chassis engine and so on to ensure so a better receiving of the signal transmitted from the transp...

Страница 19: ...SITIVE GROUND CENTRALINA DI ALLARME ALARM UNIT ULTRASONIC MODULE 12V POSITIVE GROUND BLACK RED PAG 19 INPUT BONNET CONTACT DEFAULT OUTPUT STOP ENGINE OUTPUT SATELLITE ACTIVATOR OUTPUT BLINKING LED 30...

Страница 20: ...unctioning range ELECTRIC CONNECTIONS Before completing the electrical connections carefully consult the car use and maintenance handbook and disconnect the negative pole of the battery paying particu...

Страница 21: ...cessary keep pressed the button for 6 seconds at the end of this time the LED will light fixed The LED lighting indicates the entrance into the switching OFF procedure to confirm the transponder switc...

Страница 22: ...DURE In order to enter the learning procedure is necessary 1A Press the bonnet contact 3 consecutive times As confirm the siren will emit a short beep 1B Where the bonnet contact is not present is nec...

Страница 23: ...e Ultrasonic Module is not present to exit from the procedure is necessary wait 30 seconds after the last transponder learning The exit from the learning procedure will be signalled by a long beep of...

Страница 24: ...havior to be obtained see execute n transponder pressure table below At every transponder pressure the siren will give out an acoustic tone beep as confirmation PROGRAMMATION N TRANSPONDER PRESSURE AL...

Страница 25: ...N 30 87 87A 86 85 DESCRIPTION OF THE PREWIRED OPTIONAL LASERLINE RELAY CODE 810 1 85 86 30 87 87A RELAY 810 1 NOTE Is necessary use a relay with a current carrying capacity of at least 20 30A RELAY 20...

Страница 26: ...e Inside of this zone the transponder could be detected from the alarm system It depends to the type of vehicle to the installation location of the siren into the vehicle to the presence or absence of...

Страница 27: ...bout 2 seconds siren then must start to play strong If this doesn t happen is necessary to increase the sensibility and repeat the operation Clockwise maximum sensibility Counterclockwise minimum sens...

Страница 28: ...the user with the transponder is sent away from the vehicle and the movement presence inside the vehicle The arming will not be signalled by noone tone beep If instead during the first 45 seconds the...

Страница 29: ...R PUSH BUTTON Closer than 15 meters in open field without obstacles PAG 29 MANUAL DISARMING With armed alarm system to make the disarming is necessary press the transponder button The disarming of the...

Страница 30: ...ort acoustic tones beep PAG 30 TROUBLESHOOTING 1 The siren doesn t sound by self powered The internal battery can be flat Will be necessary about 15 hours of car using to obtain a full charge of inter...

Страница 31: ...Ah r Transmission frequency about the ultrasonic module and the transponder 433 92MHz Preset time 45 sec Neutral time within which is possible make the grey wire programming 20 sec Delay of alarm gene...

Страница 32: ......

Отзывы: