Lagoon 440 Скачать руководство пользователя страница 18

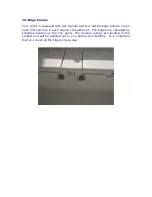
11. Anchoring & the windlass 
 

Setting your anchor: 
Preparation: 


Establish a non verbal communication system from bow to stern, as with 
the noise of the engine and wind, verbal communication proves difficult.  


Tie the dinghy painter close to the boat at the bow or amidships to avoid 
wrapping it around the prop. 

Location: 


Choose a clear area to anchor in, normally in 12 to 25 feet. A white 
bottom is sand and perfect for anchoring. A brown or green bottom will be 
grass, rock or coral. Only anchor in sand


Make sure that you are not on a lee shore; i.e. that the land mass is 
protecting you from the elements and that you are not being pushed onto 
the shore.  A lee shore is the most dangerous place to anchor your 
yacht.
 

Action: 


Manually lift  the anchor over the bow roller and feed the chain so the 
anchor is just above the water surface.   


Use the elements; approach from down wind or current, whichever 
prevails. 


Once the yacht is stationary use the electric windlass to drop the anchor. 

The elements will push you back and away from the anchor. 


Minimum scope is 5:1.  In heavy weather you may want to increase that, 
always ensuring your swing area is clear of any obstacles. 


Engage reverse, slowly building up to 1500 rpm to really drive your hook 

into the sand. 


Once set, put the engine in neutral and allow the yacht to settle, take 
transits around the bay to ensure you are not dragging, it is always 

advisable to snorkel the anchor and ensure it is bedded in correctly and 
not just lying on its side. 

Attaching the snubbing line: 


Once you are happy that the anchor is set you must attach the snubbing 
line.  The snubbing line protects the windlass and it is important that you 
attach the snubber every time you set the anchor. 


Attach the hook around the chain link (the hook is too big to go though 

the link) and cleat off the bitter end of the line to a bow cleat.  Pay out 
enough chain so that the snubbing line becomes taut.   


If the hook falls of the chain it means that there is not enough tension on 

the line. In this case re-attach the hook and pay out more chain until the 
line is once again taut. 

Setting a secondary anchor: 


If a second anchor is required, e.g. you are anchoring in a mooring field 

and need to control your swing room, deploy the primary as above and 
attach the secondary at the bow.  Drive the boat forward at a 45 degree 
angle to the primary. Once in line with the primary deploy the secondary 

and allow the elements to push you back.  Increase astern to 1500 rpm to 
drive in the secondary.  Snorkel over the anchor to ensure a good hold. 

Содержание 440

Страница 1: ...Information operations manual for Lagoon 440 Catamaran 2008 Larimar...

Страница 2: ...and don t hesitate to ask any of our professional friendly staff if you have any questions All of the yachts in the Horizon fleet are maintained to the highest standards so that you may enjoy a troubl...

Страница 3: ...Daily engine checks 6 The generator 7 Air conditioning 8 Instruments 9 VHF radio 10 Batteries 11 Anchoring and using the windlass 12 Picking up a mooring buoy 13 Bilge pumps 14 Fresh water systems 15...

Страница 4: ...g Manual bilge pump in cockpit Propane tank beneath cockpit seating Water tank refill port side of the bow seating area Electric winch breakers in saloon next to the 12v panel Windlass breaker forward...

Страница 5: ...switches on the shower drains Navigation instruments VHF Port bilge pump Not used The water gauge checks the amount of water in your tanks There are 3 tanks on board but they are all interconnected To...

Страница 6: ...selection panel 110v panel A Port air conditioning pump Port air conditioning unit Port air conditioning unit Saloon air conditioning unit Stateroom air conditioning The 110 panels will operate when...

Страница 7: ...rboard and port aft berths The electric winch breakers are located in the saloon beneath the generator start up To reset the breakers simply flick the yellow lever to it s down position The windlass b...

Страница 8: ...as the breaker on the dock power outlet Do this process in reverse when plugging into dock power To use the inverter 1 Start the engines bring the rpm up to 1400 2 Press the invert button under the co...

Страница 9: ...arm should come on and then turn the key further to the right to switch the engine on Once the engines are running check you have water coming out of the exhausts To stop the engines press the stop bu...

Страница 10: ...en the empty and full marks To add oil open the yellow oil filler cap on the top of the engine To the back left of the engine is the engine coolant reservoir hidden from view on the picture The coolan...

Страница 11: ...e The reset breaker for the generator is located to the left of the generator towards the back Make sure the battery charger switch is on so that the batteries are charging To use the 110v sockets you...

Страница 12: ...ou will hear the generator start Allow the generator to warm up for 5 minutes and then gradually load up the system adding one load every 5 minutes Stopping the generator Press the bottom of the switc...

Страница 13: ...s Select fan strength using the fan speed control To switch the units off press the mode button repeatedly 4 times to run through all the modes until off is selected Load up the generator with one air...

Страница 14: ...elm are the following Raymarine instruments Also located at the helm is a Standard Horizon GPS chart plotter CP120 At the chart table is a Raymarine ST60 Multi Graphic Display ST6002 Smart Pilot ST60...

Страница 15: ...it is very important to switch to a working channel after the contact is established Do no use Channel 16 for your conversations this channel is for hailing and distress only Channels to use 16 Haili...

Страница 16: ...emergency PAN PAN MEDICO PAN PAN MEDICO PAN PAN MEDICO Pronounced med ick oh This is an International Urgency Signal that should be used when medical advice is needed Safety SECURITE SECURITE SECURIT...

Страница 17: ...gines at 1400rpms or more for 1 1 1 2hrs Shut the motor off Wait 5 minutes before checking the battery levels directly after turning off the motor they will remain in an excited state for about 10 min...

Страница 18: ...verse slowly building up to 1500 rpm to really drive your hook into the sand Once set put the engine in neutral and allow the yacht to settle take transits around the bay to ensure you are not draggin...

Страница 19: ...Control the rate the chain pays out by tightening or loosening the gypsy with the windlass handle When you have paid out sufficient chain between 5 to 8 times the water depth tighten the windlass back...

Страница 20: ...e ever unsure about a mooring buoy s integrity choose another location to moor up Attach the bridle to the pennant using the attached clip Once set you will have a bridle around the bow of the boat ho...

Страница 21: ...ge pumps one in each hull and one in each engine compartment The bilges are operated by switches located on the 12v panel The manual pumps are located in the cockpit and will be pointed out to you dur...

Страница 22: ...o use the fresh water system turn on the fresh water breaker on the 12v panel and open a faucet When the tanks runs out of water the pump will run at high speed and the faucet will start to cough air...

Страница 23: ...yards off shore Move lever to wet bowl to flush the pan and pipes 20 25 pulls will keep your heads smelling fresh Move lever back to dry bowl and pump the pan and pipes dry the lever must be left in...

Страница 24: ...ns are operated by float switches which will automatically start to pump when water enters the drain Transom Shower The valves below the shower head will switch the water on and also control the tempe...

Страница 25: ...r switching off fans Light the oven in the same way pressing the knob in whilst holding your match to either the top or bottom burner The stove is also equipped with a timer If you cannot get it to li...

Страница 26: ...e Each unit can be individually controlled using the thermostats located in each unit On your arrival the dials will all be set to their coolest setting Keep it on this setting until all you food has...

Страница 27: ...off at the side of the yacht not off the stern Never use the BBQ while sailing Never use the BBQ on a dock Never change propane tanks when using the BBQ Make sure someone is always tending the BBQ wh...

Страница 28: ...compartment even if you think the fire has been extinguished dying embers can easily be re ignited by a fresh supply of oxygen air Open fire Pull out the yellow safety tab Point the extinguisher at t...

Страница 29: ...rting an engine that has been at rest for 3 or more hrs use the choke Pull the choke out and set a few revs with the throttle Do not twist the throttle trying to prime the engine You will only flood i...

Страница 30: ...Gear Shift Choke Throttle Stop button Lever to lower and raise the outboard Kill Cord Fuel tank Fuel vent make sure this is slightly open at all times Fuel line connection make sure this is securely...

Отзывы: