


20
21
SETUP
SETUP
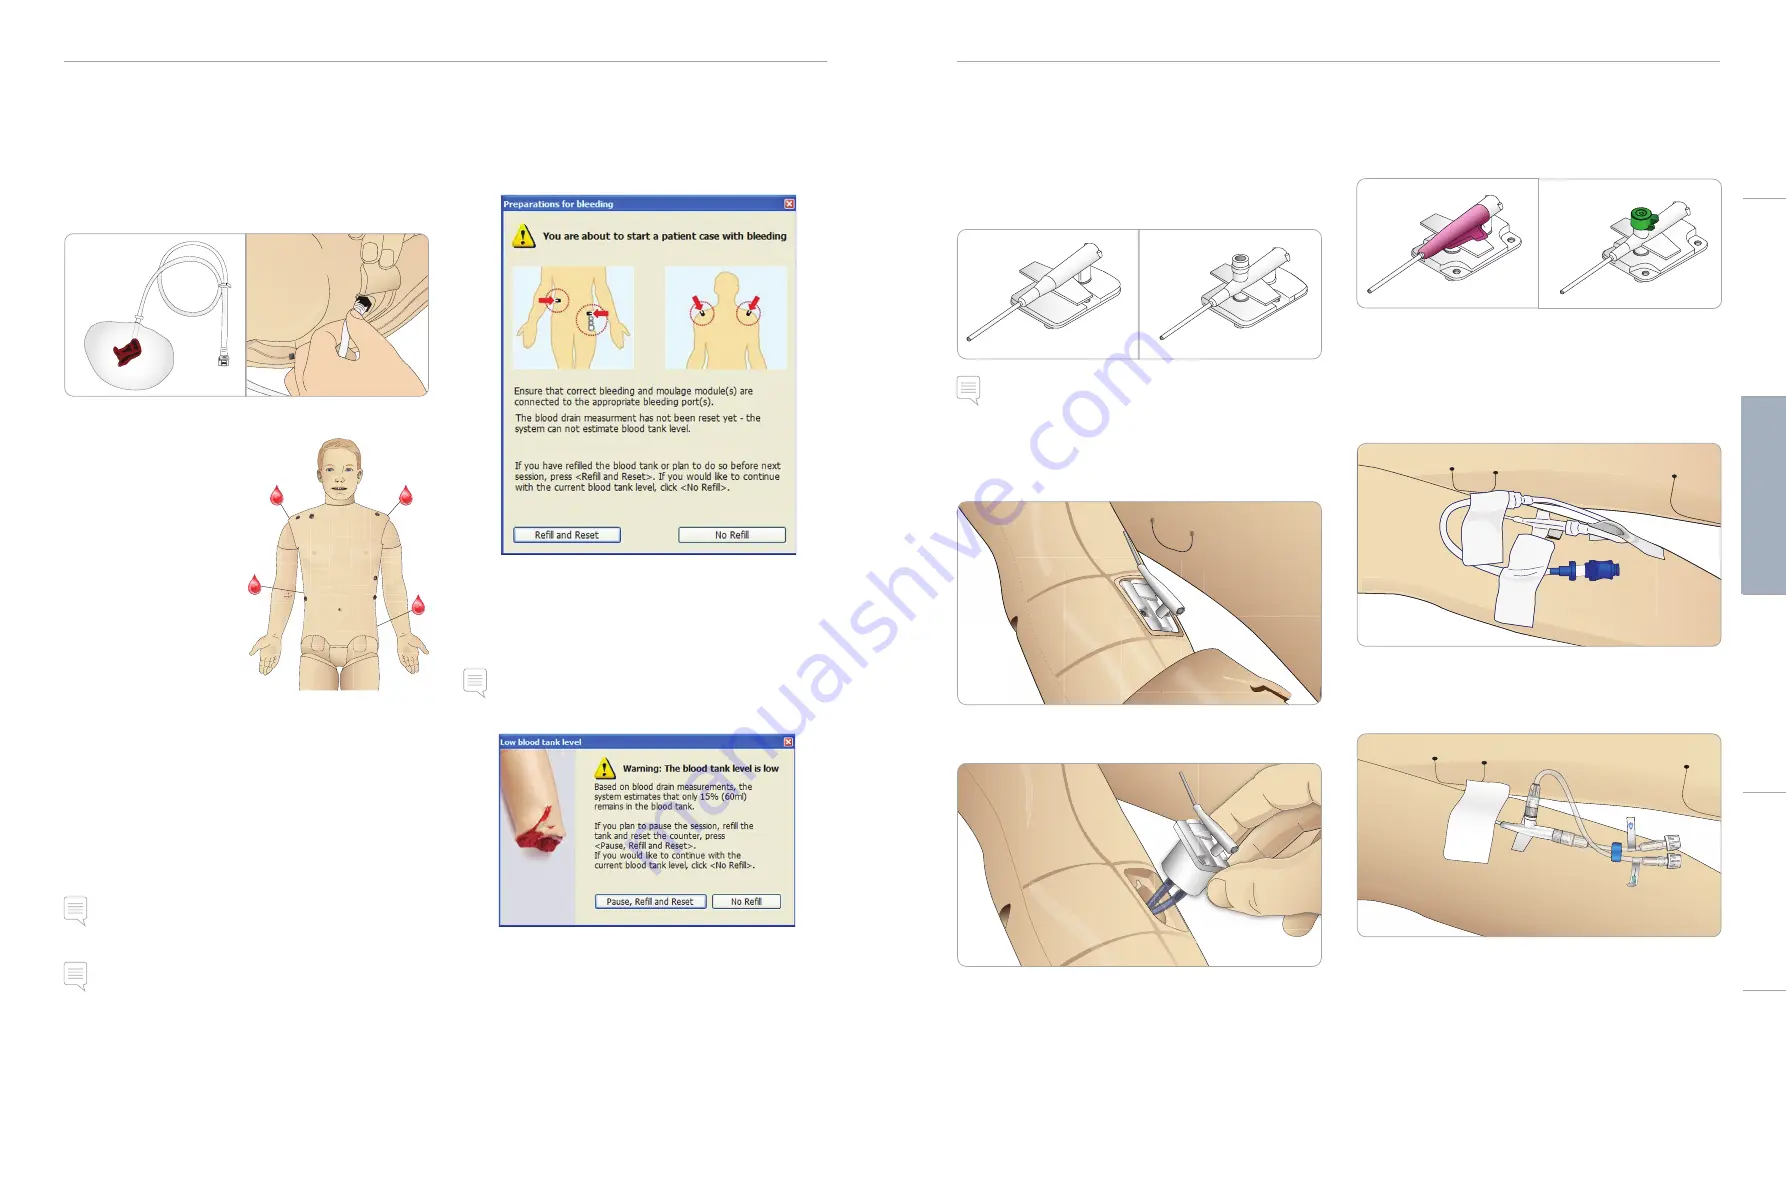
Connecting Wounds Kit
SimMan3G comes with a wounds kit that includes 2 wounds and
double-sided tape to attach wounds to the Patient Simulator skin.
Connect wounds to the bleeding ports on the Patient Simulator
torso to simulate a bleeding patient.
1 Select a wound from the wounds kit.
2 Connect the tube from the wound, to the nearest blood port.
There are four blood ports with
twist and lock connectors, as
illustrated on the right.
−
Ensure the area to which
the wound will be attached
is clean and dry.
−
Apply adhesive tape to the
back side of the wound.
−
Remove the protective
liner from the adhesive
tape on the wound and fix
it in the desired position on
the skin.
Removing Wounds
Flush all blood ports and tubes with distilled or de-ionized water
while the wounds are still attached. When the fluid runs clear,
disconnect the tube from the fluid outlet. After the wound is
removed, any tape residue can be cleaned from the Patient Simulator
skin with Laerdal Manikin Wipes.
Note: When removing wounds from the blood ports, cover the
Patient Simulator skin with a cloth to prevent staining.
Note: Trauma modules can be purchased separately to replace
default limbs to add realism to simulation.
Simulate Severe Bleeding Using
LLEAP
Start a Bleeding patient case from LLEAP
To extend bleeding patient simulations, a scale factor can be used.
Ensure, when the external Blood fill Unit is empty; replace it with
another Blood fill Unit filled with simulated blood. Repeat this
process for as many times as is necessary.
Note: If the external fill unit runs empty, during a bleeding
scenarios, air will be introduced to the blood system, causing
inaccurate reading.
The IV Catheters
The right IV arm comes with a US catheter type as default. This can
be replaced with an international catheter type (commonly used in
Europe) with an extra flush port.
US Catheter
International Catheter
Note: remove arm skin before changing the catheter. Use caution
when handling the Patient Simulator skins.
Changing IV Catheters
1 Unzip and fold down the IV arm skin to expose the IV catheter
module.
2 Using a #4 Phillips screwdriver; unscrew the two screws of the
module and pull the IV module out of the arm.
3 Disconnect the two fluid tubes from the IV module
4 Discard the old module and insert it into the IV arm.
5 Fasten the two screws and zip the skin back into place.
Identifying IV Catheter Sizes
The IV modules come with colored IV caps for US and International
IV modules. This simulates different catheter sizes.
US IV Caps / International IV Caps
US IV Catheter Setup
Setup for drug administration
To administer simulated drugs using the RFID system, the SimMan
3G US IV catheter comes with one inlet for drug administration.
Setup for IV drip and drug administration
To simulate an IV drip, connect the international catheter and tube
setup as shown.
The drip port may also be used with fluids other than distilled water
while only purified water should be used in the injection port.
For more information on connecting the US IV drip catheter, contact your
local Laerdal service centre.
Cautions
and
W
arnings
Featur
es
Setup
Maintenance
Spar
e Par
ts
Tr
oubleshooting
Содержание SimMan 3G
Страница 1: ...SimMan 3G User Guide www laerdal com EN...


