LaCie 2big Network 2
• DESIGN BY NEIL POULTON
Administering Your LaCie 2big Network 2
User Manual
page 45
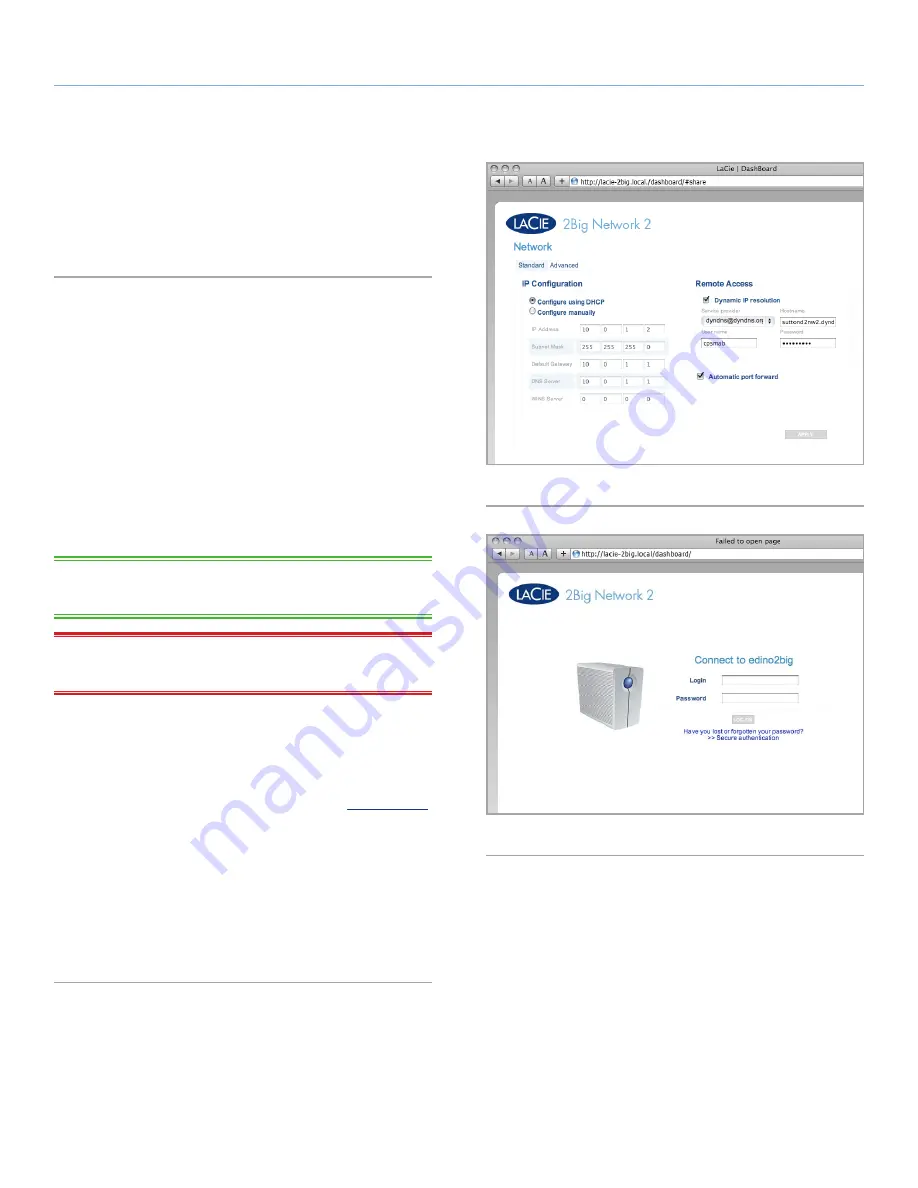
4.10. Dashboard: Network
This page allows you to modify your 2big Network 2’s network set-
tings. Note that there are two tabs to the page, standard and ad-
vanced.
4.10.1. Standard Settings
Configure using DHCP or manually:
If your network is DHCP-en-
abled, as are most consumer networks, the 2big Network 2 will au-
tomatically be assigned an IP address and other values. As a result,
most users will see that the table has been filled in with values. If
you select
Configure Manually
, you will be able to modify the table
values.
Automatic port forward:
If you want your 2big Network 2 to be ac-
cessible via the internet for remote access, you need certain ports to
be open in your router to allow proper communication. Check this
box to enable port forwarding, which uses UPnP-IGD/NAT-PMP to
automate port forwarding (if your router is compatible).
TECHNICAL NOTE:
The following ports need to be forwarded to
ensure proper communication: 21 (FTP) and 80 (HTTP).
IMPORTANT INFO:
If you activate automatic port forward, public
shares will become accessible (read/write) through FTP.
Dynamic IP Resolution:
You can use a third party Dynamic DNS
service to create an easy-to-remember URL for accessing your 2big
Network 2 remotely. This service is free and no subscription is re-
quired. Follow these steps:
1. Go to a Dynamic DNS service provider such as
DYNDNS.com
.
2. Create an account.
3. Input the 2big Network 2’s IP address and create a hostname
(ex.
smithfamily.dyndns.org
).
4. On the Dashboard, open the
Network
page and enter the ser-
vice provider, username, hostname and password you set up.
5. Click
Apply
.
6. From any internet connection, open a web browser and type the
hostname (
Fig. 60
). Your 2big Network 2 login page will open.
Fig. 59
Fig. 60


