background image

34

Induction plates

IGNITION – ADJUSTMENTS

To turn on the Grand WOK, simply turn the dial clockwise to positions 1-6. To turn off
your WOK, turn the dial to position 0. The indicator light will turn off.

To use the 

“booster” function

, it is necessary to first find the maximum position. An

additional clockwise turn will start this function. The heat selector will then return itself
to the maximum heating position without stopping the “booster” mode.
There are 3 ways to stop the “booster” function:
- Turn it the same way as you did to start the function.
- Reduce the heating power by turning the selector anti-clockwise.
- Wait for the function to stop automatically. For safety reasons, the system automatically
switches off the “booster” function after 10 minutes.

The indicator light

gives 4 types of notification:

1. Normal operation: steady light
2. No pan or saucepan: slow blinking
3. “Booster” mode: blinking with a long lit period and a short unlit period.
4. Induction generator fault: very fast blinking

When the temperature in the heating area is greater than 60°C, an “H” symbol appears on
the surface when the cooker is off; this symbol disappears when the temperature in the
heating area drops below 60°C.

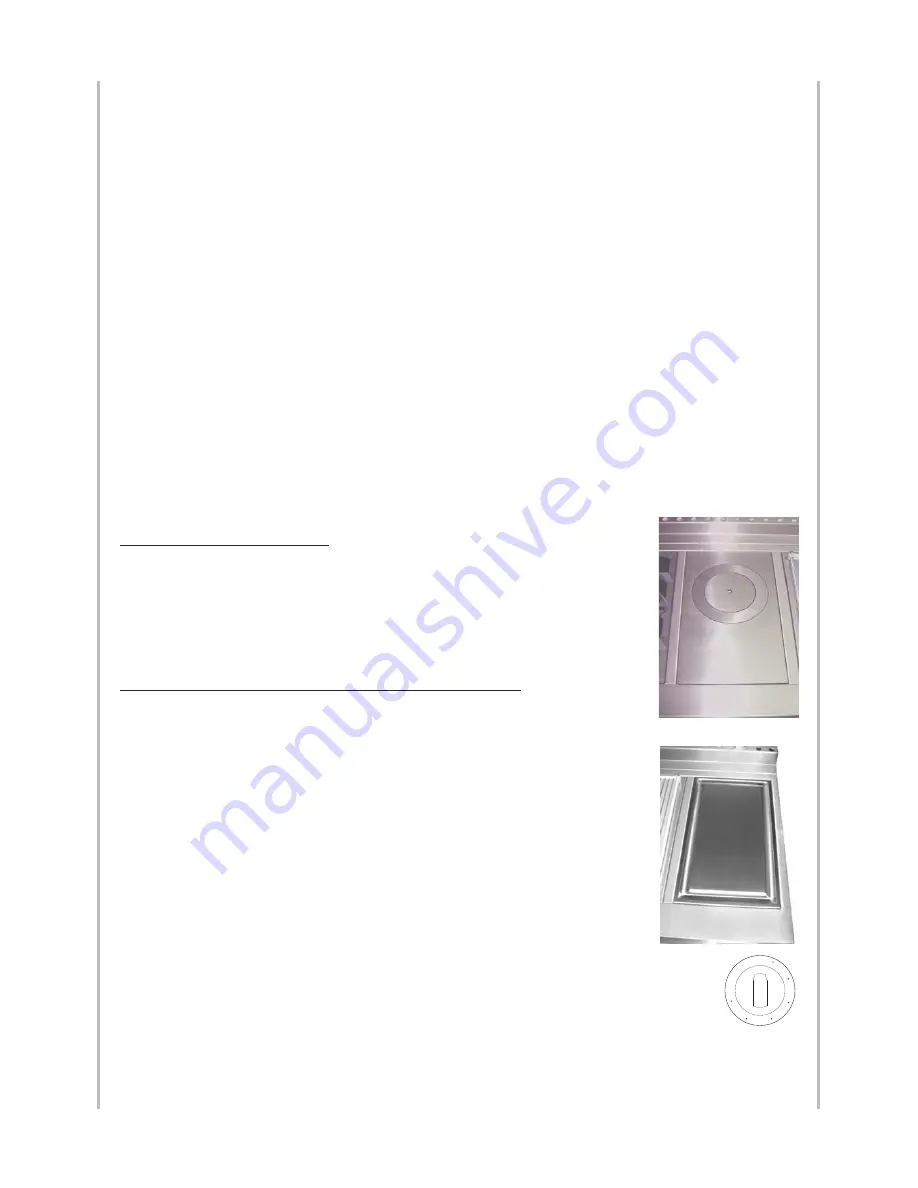
1.5. Electric hotplate 

To heat the electric hotplate, turn the control knob towards the right
or towards the left to the desired position:  
- MAX, corresponds to the highest power,  
- 0, corresponds to the shutoff position.

1.6. Electric Teppan-Yaki (Japanese grill)

- Small model: 284 x 478 mm, power: 1 600 W
- Large model: 419 x 478 mm, power: 2 200 W

The electric Teppan-Yaki is equipped with thermostat-controlled
heating elements; the control knob allows you to adjust the
temperature from 50°C (position 1) to 250°C (position 6).

Turn the thermostat knob to the desired temperature; the green light
indicates that the appliance is heating. 
The green indicator light is turned off when the desired temperature
is reached; you can then add the food that you want to grill. 
After use, return the thermostat knob to the position “0” (shutoff)

Position 1 of the knob correspond to 50°C, Position 2 to 90°C, Position 3 to
130°C, Position 4 to 170°C, position 5 to 210°C and position 6 to 250°C. Those
temperatures are given as an indication, and are relating to the center of the
grill.
The grilling surface is warmer in the middle than along the edges. Use the edges to keep
food warm or to heat it through.

Notice d’installation ligne “Cornuchef” Centenaire - GB

08NOTINSTGSC100/GB-4

0

3

1

2

4

5

6

Содержание GMC-E0 M00

Страница 1: ...components such as brass for the burners and cast iron for the hotplate correspond to technicality and professional performance requirements which are not attainable with other materials or protective treatments We are very much attached to the authenticity of our cookers and we are convinced that you will appreciate them even more as you use them We recommend you follow the advice provided in the...

Страница 2: ...ave a problem In the unlikely event that you have a problem with your appliance please refer to the rest of this booklet and Instructions for Use to check that you are using the appliance correctly If you are still having difficulty contact your retailer HEADQUARTERS AND WORKSHOP 14 rue du Bois du Pont Z I Les Béthunes 95310 SAINT OUEN L AUMONE POSTAL ADDRESS BP 99006 95070 Cergy Pontoise Cedex FR...

Страница 3: ...c cookers 17 4 Power for gas and electric cooktops 18 5 Cooker connections 19 6 Cooktop connections 19 COOKER AND COOKTOP GRAND PAPA 180 20 1 Dimensions 20 2 Hob configurations 20 3 Power for gas and electric cookers 21 4 Power for gas and electric cooktops 22 5 Cooker connections 23 6 Cooktop connections 23 BEFORE DELIVERY 24 1 Safety requirements 24 2 Electrical supply 25 3 Gas supply 26 4 Insta...

Страница 4: ...liance are indicated on the label at the back of the hob and on the test certificate Make sure that the gas supply is turned on and that the cooker is wired in and switched on The cooker needs electricity This appliance is not intended to be connected to a ventilation system or a ventilation shaft for combustion products It should be installed and connected in accordance with the current regulatio...

Страница 5: ... carrying out any maintenance work unless specified otherwise in this guide or in an Instructions for use guide All parts of the cooker become hot with use and will retain heat even after you have stopped cooking Take care when touching cooker to minimize the possibility of burns always be certain that the controls are in the OFF position and that it is cool before attempting to clean the cooker C...

Страница 6: ...stic bags after unpacking the range Never allow children to play with packaging material NEVER leave any items on the range cooktop The hot air from an oven vent may ignite flammable items and may increase pressure in closed containers which may cause them to burst Many aerosol type spray cans are EXPLOSIVE when exposed to heat and may be highly flammable Avoid their use or storage near an applian...

Страница 7: ...roducts can ignite on contact with a burner flame or a warm surface leading to serious burns Use only oven gloves or kitchen gloves that are dry Using wet gloves on warm surfaces can lead to burns caused by the vapor Avoid all contact between oven gloves and warm heating elements Never use a towel thick cloth or similar instead of an insulating glove they may catch fire on contact with a hot surfa...

Страница 8: ...arranty shall be considered void This appliance is not intended for use by persons including children with redu ced physical sensory or mental capabilities or lack of experience and knowled ge unless they have been given supervision or instruction concerning use of the appliance by a person responsible for their safety All of our cooking appliance belong to Class 1 and Class 2 Sub Class 1 They mee...

Страница 9: ... COOKTOPS Grand Maman 90 Model TCM Width 90 cm Grand Papa 135 Model TCC Width 135 cm Grand Papa 180 Model TCS Width 180 cm The range of CORNUCHEF cooking appliances consists of 6 models Each of the cooker or hot top models includes several sub models depending on the chosen hot top and its combination with the oven The cookers in the CORNUCHEF range consist of a thermostatically controlled electri...

Страница 10: ...ural gas propane or butane depending on availability Refer to pages 37 39 for information about adapting your cooker or your hob to the various types of gas The tables below summarise for each gas type and for each burner the heat flow rate energy power in kW Gross Calorific Value and the volume flow rate in m3 hour or the mass flow rate in kg hour of useful gas NOMINAL HEAT INPUT REDUCED HEAT INP...

Страница 11: ...mall dimensions 284 x 476 mm Small La Cornue Teppan Yaki 1 600 W dimensions 284 x 478 mm Large La Cornue Teppan Yaki 2 000 W dimensions 419 x 478 mm Large induction plate burner Ø 280 mm 3 700 W Large induction Wok burner Ø 300 mm 3 000 W The rating plate of your appliance is on inside the spill tray To see this rating plate pull out the spill tray You will find on this plate the name and address ...

Страница 12: ...ing on the model 2 HOB CONFIGURATIONS 2 gas burners small burner at the rear 1 single gas burner 2 gas burners small burner in front 2 gas burners small burner at the rear 1 gas hotplate 2 gas burners small burner in front 2 gas burners small burner at the rear 1 single gas burner 2 electric induction plates 2 gas burners small burner at the rear 1 gas hotplate 2 electric induction plates 2 gas bu...

Страница 13: ...13 Notice d installation ligne Cornuchef Centenaire GB 08NOTINSTGSC100 GB 4 DESCRIPTION Grand Maman 90 3 POWER FOR GAS AND ELECTRIC COOKERS COOKER GRAND MAMAN 90 ...

Страница 14: ...4 POWER FOR GAS AND ELECTRIC COOKTOPS GRAND MAMAN 90 DESCRIPTION Grand Maman 90 Notice d installation ligne Cornuchef Centenaire GB 08NOTINSTGSC100 GB 4 14 ...

Страница 15: ...nuchef Centenaire GB 08NOTINSTGSC100 GB 4 DESCRIPTION Grand Maman 90 GRAND MAMAN 90 Rear view Rear view Rear view Rear view TERMINAL BLOCK 2 TERMINAL BLOCK 1 GAS INLET MALE G 1 2 CONNECTION GAS INLET MALE G 1 2 CONNECTION TERMINAL BLOCK 2 TERMINAL BLOCK 1 TERMINAL BLOCK 1 TERMINAL BLOCK 1 TERMINAL BLOCK 2 GAS INLET MALE G 1 2 CONNECTION GAS INLET MALE G 1 2 CONNECTION ...

Страница 16: ...burner at the rear 1 single gas burner 2 electric induction plates option 2 gas burners small burner at the rear 1 gas hotplate 2 electric induction plates option 2 electric induction plates 1 electric hotplate 2 electric induction plates option 2 gas burners small burner at the rear 1 single gas burner 1 small electric teppan yaki option 2 electric induction plates 1 small electric teppan yaki 2 ...

Страница 17: ...tion Plate 17 Notice d installation ligne Cornuchef Centenaire GB 08NOTINSTGSC100 GB 4 DESCRIPTION Grand Papa 135 3 POWER FOR GAS AND ELECTRIC COOKERS Cooker GRAND PAPA 135 PLEASE NOTE For 2 cables and a 400 V a c 3N power supply 3 Ph N T 1 cable is 400 V a c 3 PHASE 1 cable is 230 V a c SINGLE PHASE ...

Страница 18: ...tion Plate 18 Notice d installation ligne Cornuchef Centenaire GB 08NOTINSTGSC100 GB 4 DESCRIPTION 4 POWER FOR GAS AND ELECTRIC COOKTOPS Grand Papa 135 Cooktop GRAND PAPA 135 PLEASE NOTE For 2 cables and a 400 V a c 3N power supply 3 Ph N T 1 cable is 400 V a c 3 PHASE 1 cable is 230 V a c SINGLE PHASE ...

Страница 19: ... GB 08NOTINSTGSC100 GB 4 DESCRIPTION Rear view Rear view Rear view Rear view TERMINAL BLOCK 3 TERMINAL BLOCK 1 TERMINAL BLOCK 2 TERMINAL BLOCK 3 TERMINAL BLOCK 2 TERMINAL BLOCK 1 GAS INLET MALE G 1 2 CONNECTION TERMINAL BLOCK 1 TERMINAL BLOCK 1 GAS INLET MALE G 1 2 CONNECTION GAS INLET MALE G 1 2 CONNECTION Grand Papa 135 GRAND PAPA 135 GAS INLET MALE G 1 2 CONNECTION TERMINAL BLOCK 2 ...

Страница 20: ...1 single gas burner 2 electric induction plates option 2 gas burners small burner at the rear 1 gas hotplate 2 electric induction plates option 2 electric induction plates 1 electric hotplate 2 electric induction plates option S0 S1 S2 S3 S4 SA SB 2 gas burners small burner at the rear 1 single gas burner 1 small electric teppan yaki option OPTIONS GRAND PAPA 180 2 electric induction plates 1 smal...

Страница 21: ...2 cables and a 400 V a c 3N power supply 3 Ph N T 1 cable is 400 V a c 3 PHASE 1 cable is 230 V a c SINGLE PHASE Cooker GRAND PAPA 180 21 Notice d installation ligne Cornuchef Centenaire GB 08NOTINSTGSC100 GB 4 DESCRIPTION 3 POWER FOR GAS AND ELECTRIC COOKERS Grand Papa 180 ...

Страница 22: ...4 DESCRIPTION 4 POWER FOR GAS AND ELECTRIC COOKTOPS Cooktop Grand Papa 180 with option Large Induction Plate PLEASE NOTE For 2 cables and a 400 V a c 3N power supply 3 Ph N T 1 cable is 400 V a c 3 PHASE 1 cable is 230 V a c SINGLE PHASE Grand Papa 180 Cooktop GRAND PAPA 180 ...

Страница 23: ...TINSTGSC100 GB 4 DESCRIPTION TERMINAL BLOCK 3 TERMINAL BLOCK 3 TERMINAL BLOCK 4 Rear view Rear view Rear view Rear view TERMINAL BLOCK 1 TERMINAL BLOCK 2 TERMINAL BLOCK 1 TERMINAL BLOCK 2 GAS INLET MALE G 1 2 CONNECTION GAS INLET MALE G 1 2 CONNECTION Grand Papa 180 GRAND PAPA 180 TERMINAL BLOCK 1 GAS INLET MALE G 1 2 CONNECTION GAS INLET MALE G 1 2 CONNECTION TERMINAL BLOCK 1 TERMINAL BLOCK 2 ...

Страница 24: ...ooms where gas appliances are installed should be respected It is essential that the room where the La Cornue cooker or hob will be installed has excellent ventilation i e to the outside for vapour and burnt gases and a fresh air inlet Do not use an air recycling system A flow rate of at least 4 cubic metres per hour of fresh air per kW of gas heat power is necessary to ensure the supply of combus...

Страница 25: ...ss steel plate at dimensions according to your stove Ceramic cardboard with a minimum thickness of 20 mm must be installed under the cooktop to insulate the units placed underneath MINIMUM DISTANCE FROM THE KITCHEN UNITS in mm Voltage 220 240 V a c single phase neutral ground 400 V a c 3N three phase neutral ground Safety The electrical supply must necessarily be grounded and must be equipped with...

Страница 26: ...ccessible manual shutoff valve This valve must be positioned taking into account that the gas inlet on the appliance is situated on the left of the cooker or the cooktop at the level of the work area on the bottom left for cooktop See the drawings on the specific presentation pages for each model for details about the connections When your cooker or your cooktop is built in between two kitchen uni...

Страница 27: ...nection terminal boxes REMINDER the appliance should be connected to the main power supply via terminal blocks and not by means of simple plugs Insert the cable below the hot air outlets at the back of the oven never in front of them Should your appliance be connected to a different type of power supply at a later date in some cases please contact our technical department before it will be possibl...

Страница 28: ...uipped is indicated on a label at the rear of the appliance near the gas supply pipe The gas connection must be done in keeping with the installation rules in force in the country where the appliance is to be used Connection to the previously installed shut off valve must be made using a flexible hose with screwable connectors approved The characteristics of this hose must be tailored to the natur...

Страница 29: ...y intended to detect leaks Sealing must be ensured by tightening 2 sealing surfaces beyond the threading with an appropriate sealing joint between them To ensure the correct level of sealing along the threading a sealing compound or joining compound should be applied to the threading If a sealing compound has to be used we recommend LOCTITE 542 To locate the gas and electric supply on your applian...

Страница 30: ...ouple may take longer to react the first time without however exceeding 15 seconds The sparking noise means that the ignition system is operating normally Low setting this is achieved by rotating the knob fully to the left or to the bottom Shutoff bring the knob back to its vertical position by rotating it to the right In case the burner flame is accidentally turned off close the burner control kn...

Страница 31: ...outer burner The vitroceramic plates have 3 indicator lights one at the bottom left these come on when a hob control is turned on and two indicator lights of residual heat one for each cooking areas in the bottom right As long as the symbol of residual heat is on do not touch the cooking areas and do not place anything sensitive to heat on the ceramic glass 1 4 Induction ceramic Hob Induction heat...

Страница 32: ...diameter or 2500 Watts for the large burner 180 mm diameter The maximum power for the two burners is 3 700 Watts To start the induction hob turn the knob clockwise to the desired position the indicator 1 to 9 appears To increase the power turn the knob clockwise and to decrease turn the knob anti clockwise To switch off your cooking area turn the knob back to the vertical position by turning anti ...

Страница 33: ...pears when the temperature in the heating area drops below 60 C 1 4 3 Grand WOK induction Grand Papa 135 and 180 The Wok induction cooker is made of ceramic glass a material that cannot be deformed when heated and is easy to clean with the simple wipe of a sponge The principle of induction cooking is based on the creation of a magnetic field between the recipients and the inductors The ceramic gla...

Страница 34: ...sappears when the temperature in the heating area drops below 60 C 1 5 Electric hotplate To heat the electric hotplate turn the control knob towards the right or towards the left to the desired position MAX corresponds to the highest power 0 corresponds to the shutoff position 1 6 Electric Teppan Yaki Japanese grill Small model 284 x 478 mm power 1 600 W Large model 419 x 478 mm power 2 200 W The ...

Страница 35: ... long period of time you have to press this button several times to defuse any trapped air from the gas circuit If this phenomenon persists contact our after sales department or your dealer 2 2 Electric oven The simmerstat C activates the heating element in the vault of the oven grill the thermostat B activates the heating element under the oven floor The simmerstat and the thermostat are both equ...

Страница 36: ...D to the baking stone position on the right and the thermostat B to the desired temperature After preheating between 10 and 15 minutes depending on the desired temperature you can then place your food to cook in the oven The baking stone can also be preheated by setting the selector switch D to the oven floor position on the left and the thermostat B to about 220 C After preheating between 15 and ...

Страница 37: ...s on the photographs below differ depending on the type of gas used and the country of installation GAS BURNER AND HOTPLATE The replacement of the burner and cast iron solid top injectors has to be done as follow u Remove the pan support or the solid top v Remove the burner cap w Unscrew the injector with 7 mm standard wrench Place the new injector and screw it x Replace the burner capon the burne...

Страница 38: ...for the gas hob burners the hotplate the snack griddle and the lava rock grill can be adjusted with the following procedure u Ignite the burner to be adjusted and then turn the control knob to the low position v Dismantle the control knobs by unscrewing from each knob the screw holding it in place w Turn the split screw on the body of the gas tap towards the left to increase the flow or towards th...

Страница 39: ...the type of gas is changed or if you move Injectors table Country CAUTION the BY PASS screws are adjusted for natural gas G20 20 mbar and G25 20 25 mbar For BUTANE PROPANE gas G30 G31 28 30 37 mbar Screw the by pass to the maximum For BUTANE PROPANE gas G30 G31 50 mbar Change the by pass screws and screw to the maximum 6 INJECTORS TABLE AT Austria BE Belgium CH Switzerland CY Cyprus CZ Czech Repub...

Страница 40: ...ling of the materials they contain and thus reduce their impact on human health and the envi ronment Consumers should contact their local authorities or their dealer with regard to the procedure to be followed for the collection of their old appliance Please comply with local regulations for disposal of the packaging material The packaging can thus be recy cled This crossed out bin logo found on a...

Страница 41: ...pletely even and slight variations in shade may occur This is a guarantee of quality and is linked to the nature of our three layer enamelling process This warranty shall cease to apply l If the operational defect is the result of an unauthorized intervention on the appliance l If the faulty operation is due to normal wear and tear of the appliance or from negligence or insufficient maintenance by...

Страница 42: ...OTINSTGSC100 GB 4 HEADQUARTERS AND WORKSHOP 14 rue du Bois du Pont Z I Les Béthunes 95310 SAINT OUEN L AUMONE POSTAL ADDRESS BP 99006 95070 Cergy Pontoise Cedex FRANCE Tel 33 0 1 34 48 36 36 Fax 33 0 1 34 64 32 65 www la cornue com e mail a table la cornue com ...

Отзывы: