3-14
Preparation before Use > Energy Saver function
Energy Saver function
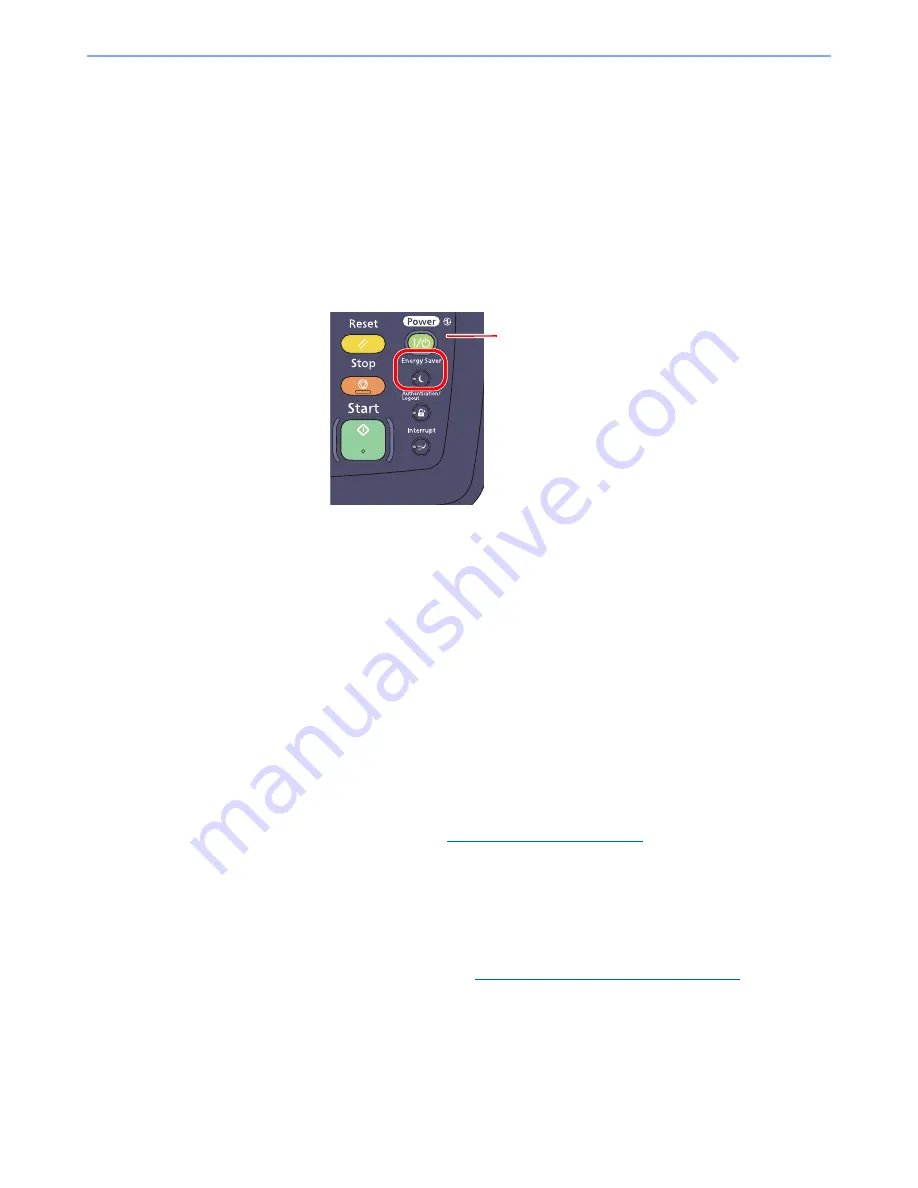
Low Power Mode and Auto Low Power Mode
Low Power Mode
To activate Low Power Mode, press the [
Energy Saver
] key. Touch panel and all indicators on the operation panel will
go out to save power except the [
Energy Saver
], [
Power
], and Main Power indicators. This status is referred to as Low
Power Mode.
When the [
Power
] key is pressed in low power mode, the machine enters the sleep state.
If print data is received during Low Power Mode, the machine automatically wakes up and starts printing. Also when fax
data arrives while the machine is in Low Power Mode when using the optional fax, the machine automatically wakes up
and starts printing.
To resume, perform one of the following actions.
• Press the touch panel or any key other than the [
Power
] key.
• Open the document processor.
• Place originals in the document processor.
The machine will be ready to operate within 30 seconds.
Note that ambient environmental conditions, such as ventilation, may cause the machine to respond more slowly.
Auto Low Power Mode
Auto Low Power Mode automatically switches the machine into Low Power Mode if left idle for a preset time.
The default preset time is 5 minutes.
For information on the Low Power Mode settings, refer to
Low Power Timer on page 8-54
.
Energy Saver Recovery Level
This machine can reduce power consumption when recovering from Energy Saver Mode.
For EnergySaver RecoveryLevel, "Full Recovery", "Normal Recovery" or "Power Saving Recovery" can be selected.
The factory default is "Normal Recovery".
For more information on Energy Saver Mode settings, refer to
EnergySaver RecoveryLevel on page 8-56
.
Main Power
indicator
Содержание TASKalfa 6551ci
Страница 1: ...OPERATION GUIDE 6551ci 7551ci ...
Страница 17: ...xvi About the Operation Guide this Guide ...
Страница 44: ...xliii Menu Map ...
Страница 62: ...1 18 Legal and Safety Information Notice ...
Страница 112: ...2 50 Installing and Setting up the Machine Transferring data from our other products ...
Страница 184: ...4 18 Printing from PC Printing Data Saved on the Printer ...
Страница 461: ...10 7 Troubleshooting Regular Maintenance 3 4 5 6 CLICK ...
Страница 500: ...10 46 Troubleshooting Troubleshooting Cassettes 3 and 4 1 2 3 4 2 1 B1 B2 ...
Страница 501: ...10 47 Troubleshooting Troubleshooting Multi Purpose Tray 1 2 3 4 ...
Страница 503: ...10 49 Troubleshooting Troubleshooting Duplex unit 1 2 ...
Страница 504: ...10 50 Troubleshooting Troubleshooting Duplex Unit and Cassette 1 1 2 3 CLICK ...
Страница 506: ...10 52 Troubleshooting Troubleshooting Fixing unit 1 2 A1 ...
Страница 508: ...10 54 Troubleshooting Troubleshooting Right tray 1 2 3 A1 ...
Страница 509: ...10 55 Troubleshooting Troubleshooting Bridge Unit 1 2 ...
Страница 510: ...10 56 Troubleshooting Troubleshooting 4 000 Sheet Finisher Option Coupling Section 1 2 Tray A 1 2 D1 D6 ...
Страница 512: ...10 58 Troubleshooting Troubleshooting Tray B 1 2 3 Tray C 1 D2 D3 ...
Страница 513: ...10 59 Troubleshooting Troubleshooting Conveyor 1 2 Mailbox Option 1 D2 D3 1 2 ...
Страница 514: ...10 60 Troubleshooting Troubleshooting Center Folding Unit Option Ejection Section 1 2 3 2 1 2 1 2 1 D9 D9 ...
Страница 516: ...10 62 Troubleshooting Troubleshooting 5 Cassette 5 Option Side Feeder 3 000 sheet 1 2 2 1 ...
Страница 521: ...10 67 Troubleshooting Troubleshooting Clearing a Staple Jam Staple cartridge holder A 1 2 3 2 1 CLICK ...
Страница 522: ...10 68 Troubleshooting Troubleshooting Staple cartridge holder B C 1 2 3 4 2 1 CLICK ...
Страница 556: ...11 34 Appendix Glossary ...
Страница 566: ...Index 10 ...
Страница 567: ......
Страница 570: ...Rev 3 2014 1 2N2KDEN103 ...


