6
18
19
20
3
20
21
20
D
D
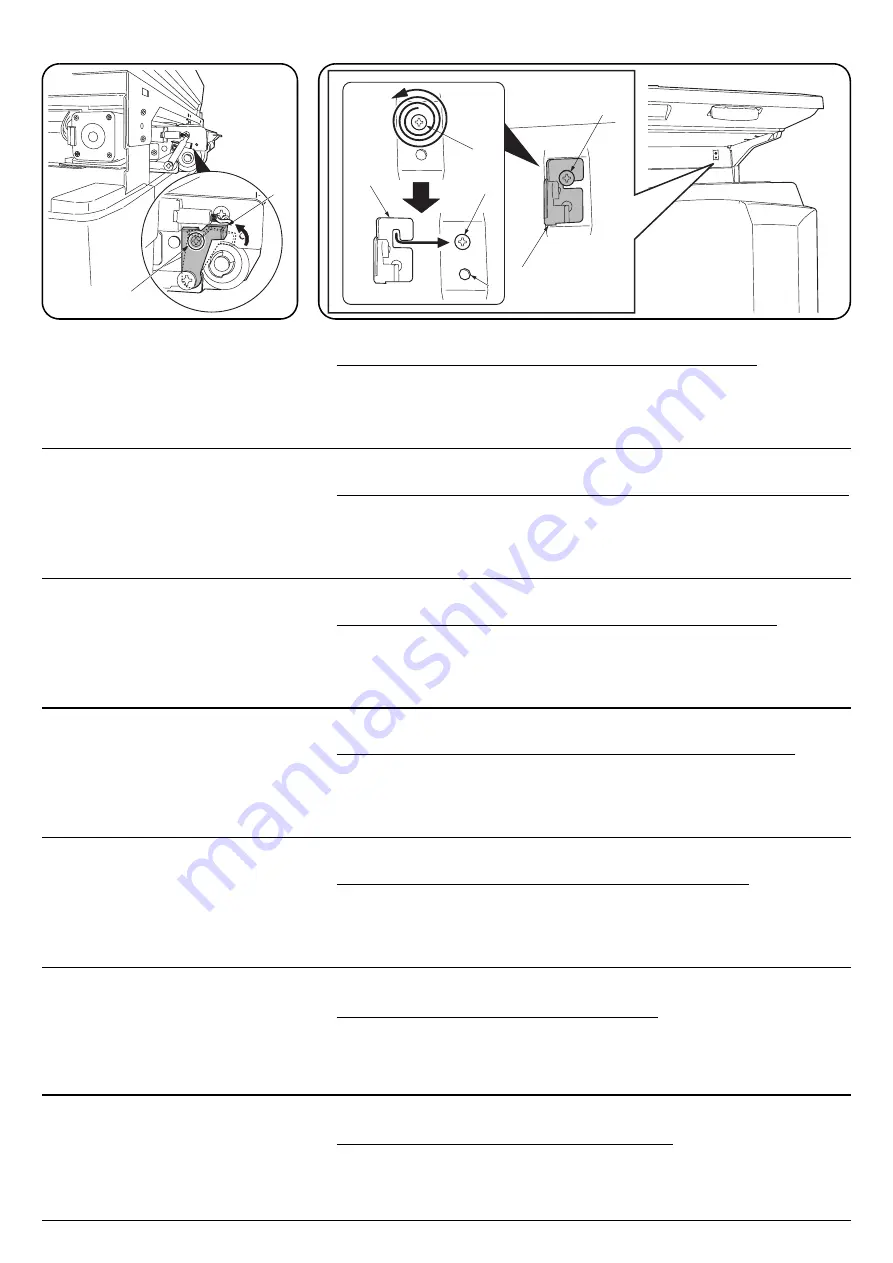
Installing the finisher process table
14.
Loosen the screw (20) approx. 3 turns.
Do not turn the screw (20) too far, otherwise it may drop into the machine.
15.
Fit the hook holder (D) to the screw (20).
16.
Fit the hole of the hook holder (D) to the positioning projection (21) and then tighten the screw
(20) to fix the hook holder (D).
Installation de la table de processus du module de finition
14.
Desserrez la vis (20) d’environ trois tours.
Ne pas tourner la vis (20) excessivement, sinon elle risquerait de tomber dans la machine.
15.
Placez le support de crochet (D) sur la vis (20).
16.
Faites coïncider l’orifice du support de crochet (D) avec la saillie de positionnement (21), puis
serrez la vis (20) pour fixer le support de crochet (D).
Instalación de la tabla de proceso de finalizador
14.
Afloje el tornillo (20) aprox. 3 giros.
No gire demasiado el tornillo (20) porque puede caerse dentro de la máquina.
15.
Encaje el soporte de gancho (D) en el tornillo (20).
16.
Encaje el orificio del soporte de gancho (D) en la saliente de proyección (21) y apriete el tornillo
(20) para fijar el soporte de gancho (D).
Installieren der Finisher-Druckablage
14.
Die Schraube (20) um etwa 3 Umdrehungen lösen.
Die Schraube (20) nicht zu weit lösen, weil sie sonst in die Maschine fallen kann.
15.
Den Hakenhalter (D) an der Schraube (20) anbringen.
16.
Das Loch des Hakenhalters (D) auf den Positioniervorsprung (21) ausrichten, und dann die
Schraube (20) zur Befestigung des Hakenhalters (D) festziehen.
Installazione del tabella di elaborazione del finitore.
14.
Allentate di 3 giri circa la la vite (20).
Non girate troppo la vite (20), altrimenti potrebbe cadere nella macchina.
15.
Montate il supporto a gancio (D) sulla vite (20).
16.
Montate il foro del supporto a gancio (D) sulla posizione (21) e poi stringete la vite (20) per fissare
il supporto a gancio (D).
安装装订分页器处理托盘
14.松弛 1 个螺丝 (20)( 约 3 圈 )。
不可过度松弛 1 个螺丝 (20),否则会导致螺丝掉落机器内部。
15.将钩夹 (D) 插入 1 个螺丝 (20)。
16.将定位突起部 (21) 对准钩夹 (D) 孔的位置,用 1 个螺丝 (20) 紧固。
フィニッシャ処理トレイの取り付け
14.
ビス (20)1 本を緩める(約 3 回転)。
ビス (20)1 本を緩めすぎると、機械内部に落下する恐れがある。
15.
フックホルダ (D) をビス (20)1 本に挿入する。
16.
位置決めの突起 (21) とフックホルダ (D) の穴の位置を合わせて、ビス (20)1 本を締めて固定す
る。
Freigeben der Hebelhalteplatte
12.
Die Schraube (18) der Papierfördereinheit
(A) lösen, und die Hebelhalteplatte (19) in
Pfeilrichtung freigeben.
13.
Die Schraube (18) festziehen.
Aflojado de la placa de soporte de palanca
12.
Afloje el tornillo (18) de la unidad de
transporte de papel (A) y suelte la placa de
soporte de la palanca (19) en el sentido de la
flecha.
13.
Apriete el tornillo (18).
Libération de la plaque de support de levier
12.
Desserrez la vis (18) de l’unité de transport
du papier (A) et libérez la plaque de support
de levier (19) dans le sens de la flèche.
13.
Resserrez la vis (18).
Releasing the lever holding plate
12.
Loosen the screw (18) of the paper
conveying unit (A) and release the lever
holding plate (19) in the direction of arrow.
13.
Tighten the screw (18).
Rilascio della leva che fissa la piastra
12.
Allentate la vite (18) dell’unità di trasporto
della carta (A) e rilasciate la leva che fissa la
piastra (19) nella direzione della freccia.
13.
Stringete la vite (18).
松解固定金属柄
12.松弛输送组件 (A) 的 1 个螺丝 (18),朝箭头
方向松解固定金属柄 (19)。
13.然后,紧固 1 个螺丝 (18)。
レバー固定金具の解除
12.
搬送ユニット (A) のビス (18)1 本をゆるめ、
レバー固定金具 (19) を矢印方向に解除す
る。
13.
ビス (18)1 本を締める。
Содержание KM-2560
Страница 1: ...SERVICE MANUAL Published in April 2008 842H0112 2H0SM062 Rev 2 KM 2560 KM 3060 ...
Страница 4: ...This page is intentionally left blank ...
Страница 10: ...This page is intentionally left blank ...
Страница 14: ...2H0 2HZ This page is intentionally left blank ...
Страница 20: ...2H0 2HZ 1 1 6 This page is intentionally left blank ...
Страница 36: ...2H0 2HZ 2 1 2 16 This page is intentionally left blank ...
Страница 202: ...2H0 2HZ 1 5 22 16 Remove four pins 17 Remove the scanner unit Figure 1 5 41 Pin Pin Scanner unit Pin Pin ...
Страница 262: ...2H0 2HZ 2 1 20 This page is intentionally left blank ...
Страница 323: ...INSTALLATION GUIDE FOR PAPER FEEDER ...
Страница 324: ...CAUTION 注 意 2007 6 303K656810 注 意 PRECAUCION VORSICHT ATTENZIONE ATTENTION ...
Страница 347: ...INSTALLATION GUIDE FOR BUILT IN FINISHER ...
Страница 359: ...INSTALLATION GUIDE FOR JOB SEPARATOR ...
Страница 369: ...INSTALLATION GUIDE FOR FAX System M ...
Страница 385: ...INSTALLATION GUIDE FOR Data Security Kit C ...
Страница 388: ...INSTALLATION GUIDE FOR UG 30 ...
Страница 391: ......
Страница 392: ......


