


| 37
TIG LA Method
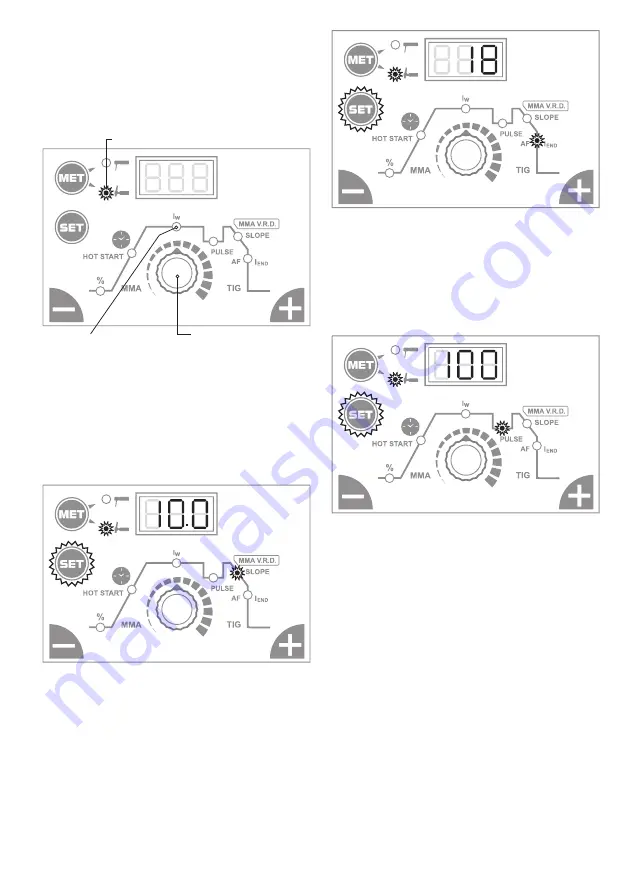
Setting the welding current
The welding current is set by the n-encoder. The main
welding current is set to position I
w
. The basic position
of the machine is always in position I
w
. When you finish
setting the other functions of the method, it automati
-
cally switches to the default position automatically.
TIG LA Method
ovládací kodér
nastavení
svařovacího proudu
Setting the DOWN SLOPE function
The function is for the smooth end of the welding pro
-
cess. Together with the END CURRENT function, it pre
-
vents the creation of the crater at the end of the weld
when properly adjusted. For a set period, the welding
current is gradually decaying to the end current value.
Press the SET button repeatedly to select the DOWN
SLOPE icon and then set its value.
PRESS
Setting the END CURRENT function
The function indicates the current value at which the
welding process ends. Together with the DOWN SLOPE
function, it prevents the creation of the crater at the
end of the weld when properly adjusted. Press the SET
button repeatedly to select the end current icon I
END
and
then set its value.
PRESS
Setting the PULSE function
The function allows setting the frequency of the main
welding current and the pulse current I
2
. Increasing the
pulse frequency reduces thermal deformation of the
material and narrows the welding bath. Press the SET
button repeatedly to select the PULSE icon and then set
its value. If set to „0“ - the function is deactivated.
PRESS
Welding process at TIG LA
Starting the gas with a valve on the welding torch.
1. Approaching the tungsten electrode to the welded
material.
2. Light touch of tungsten electrode of welded material
(no need to cut).
3. Removal of tungsten electrode and arcing of welding
arc with LA - very low wear tungsten electrodes by
touch.
4. Welding process.
5. Finishing the welding process and activating the
DOWN SLOPE (crater filling) is performed by removing
tungsten-electrodes to about 8 - 10 mm from the wel
-
ded material.
6. Re-approach - Welding current decreases after the set
time to the end value set current (eg 10 A) - filling the
crater.
7. End of the welding process. The digital control auto
-
matically switches off the welding process.
Switch off the gas with a valve on the welding torch.
EN


