EN
-2-
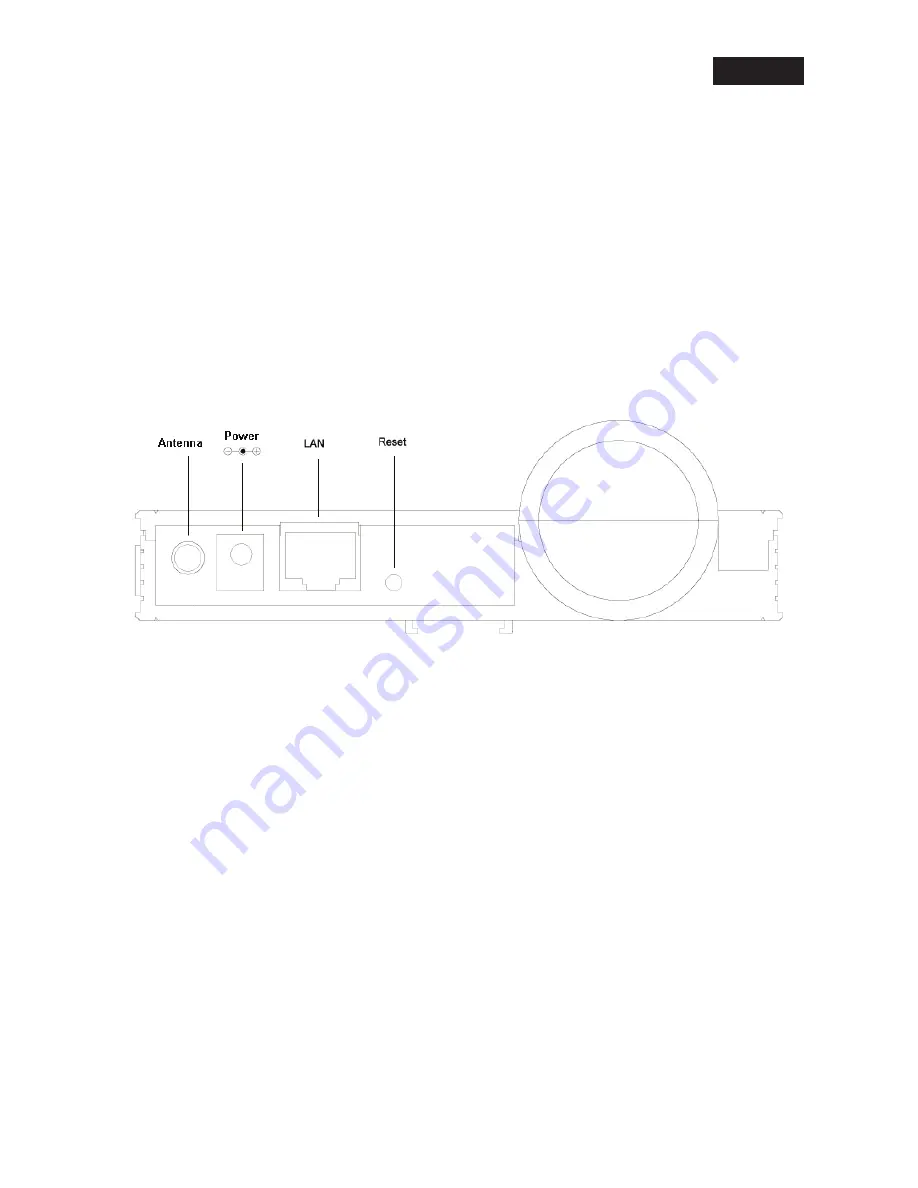
3.2 Camera Ports
The camera features three ports and a reset button.
Antenna
Standard port with reverse SMA connector.
Power
Connection for power adapter.
LAN
Connection for Ethernet network cable.
Reset button
1.
If a problem occurs with your camera, press the reset button with a pencil tip (for less
than 2 seconds) and the camera will reboot itself with your confi guration.
2.
If the problem persists or you experience extreme problems or you forgot your
password, press the reset button for longer than 5 seconds. The camera will reset
itself to the factory default settings (warning: your original confi gurations will be
replaced with the factory default settings).
4. Installation Procedure
- Connect the camera to your network with the attached the network cable from the switch/router
to the LAN port of the camera.
- Connect the power adapter to the camera and plug the power adapter to a power outlet. The
camera will be powered on. When the camera is ready, the Ready LED will be on.
5. Software Installation
Follow the steps below to run the Install Wizard to guide you quickly through the Installation process.
The following installation is implemented in Windows XP. The installation procedures in Windows
2000/XP/Server 2003 are similar.
Insert the CD shipped along with the camera into your CD-ROM drive. The “Autorun.exe” program
should be executed automatically. If not, run “Autorun.exe” manually from “Autorun” folder in the
CD.


