E-8
15. Performing Non-Image Area Erase
Check
Note:
Perform the below at the site where customer
uses the machine.
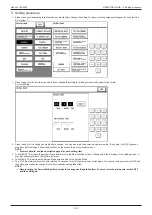
(1) Select the Non-Image Area Erase Check func-
tion as follows:
Machine
o
Non-Image Area Erase Check.
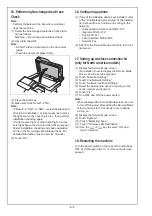
(2) Open fully the ADF.
Note:
• Do NOT place a document on the document
glass.
• Clean the document glass if dirty.
(3) Press the Start key.
(4) Make sure that “Result” is “OK.”
Note:
If “Result” is “NG1” or “NG2”, review the place and
direction of installation, or take measures to block
the light source (by covering it, etc.), then perform
installation checking again.
(If a fluorescent light or other bright light sources
exist right above the machine, the light source can
hinder installation checking and cause operation
errors in the Non-Image Area Erase Check. For
detailed information, see the service manual.)
(5) Touch “OK.”
16. Configuring options
(1) If any of the following options are installed, refer
to the “Configuration procedures” of the installa-
tion manual for each option and configure the
option(s).
•
Authentication Unit AU-201S/AU-102
•
Upgrade Kit UK-216
•
Fax Kit FK-517
•
Local Interface Kit EK-P06
•
Network Fax
(2) Exit from the Service Mode and return to the ini-
tial screen.
17. Setting up wireless connection kit
(only for North America models)
(1) Display the Service Mode screen.
(For details of how to display the Service Mode
screen, see the service manual.)
(2) Touch “Network Settings.”
(3) Touch “2nd Network Setting.”
(4) Touch “Network Interface Settings.”
(5) Select the appropriate option according to the
user's network environment.
(6) Touch “Fix.”
(7) Turn OFF and ON the power switch.
Note:
When displayed the Service Mode screen, be sure
to turn off the power after exiting the Service Mode
screen and wait for 10 seconds or more before
turning on.
(8) Display the Service Mode screen.
(9) Touch “System 1.”
(10) Touch “Marketing Area.”
(11) Touch “Wireless LAN Destination.”
(12) Use the
or
key to select “US” and
touch “decision.”
18. Restarting the machine
Turn the power switch on the rear of the main body
OFF and ON again after 10 or more seconds have
passed.

