AccurioPress C3080/C3080P/C3070, AccurioPrint C3070L
2-5
2.1
Turning the Power ON/OFF
2
%
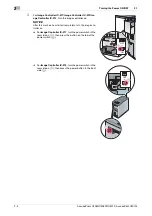
For
Image Controller IC-314
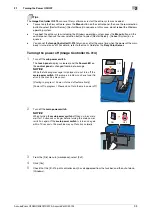
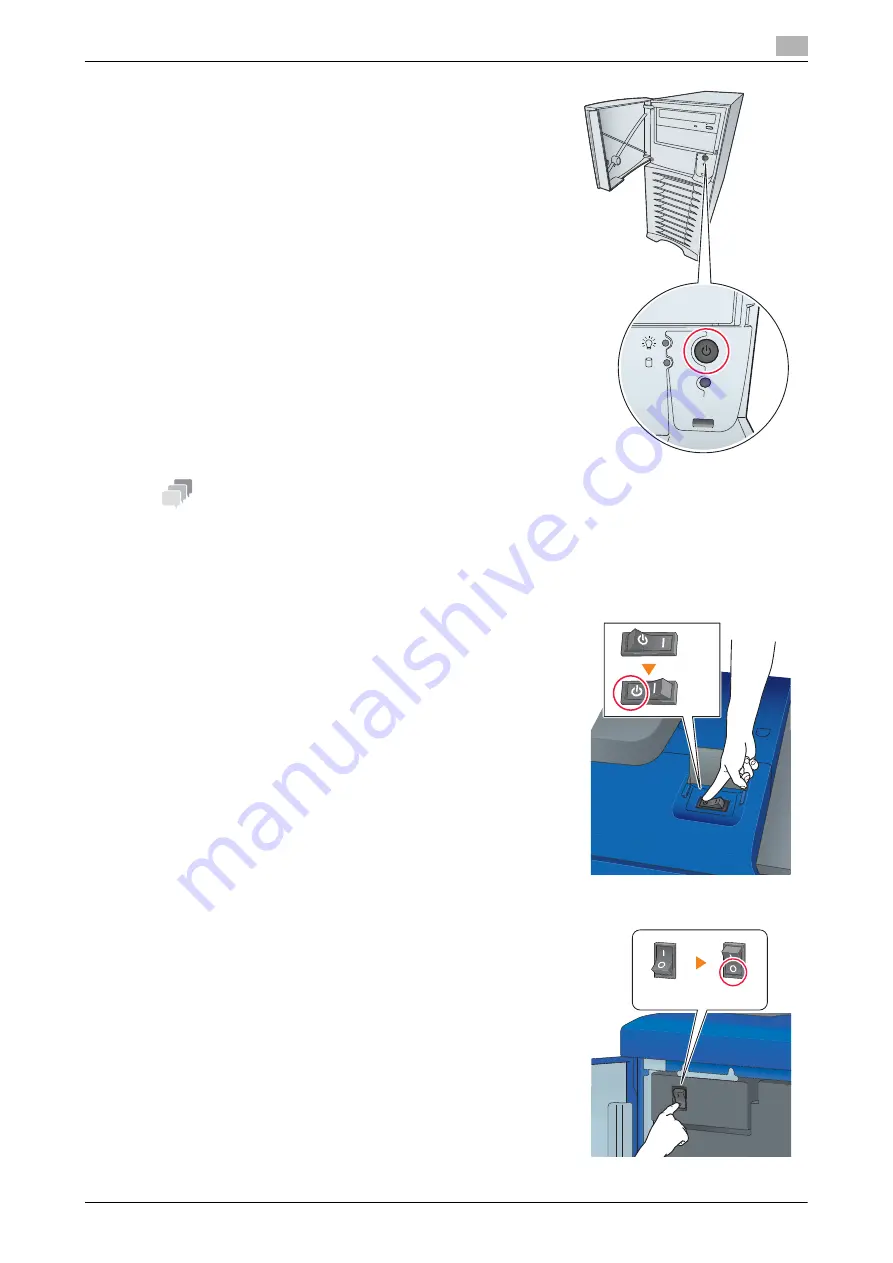
, open the
front door
and
press the
Power controller button
.
[Windows] starts, and after a while, the [workspace] screen is
displayed.
Wait until the [workspace] screen is displayed.
Tips
-
If [Machine is warming up] is displayed on the [MACHINE] screen, it indicates that this machine is in the
warm-up state. Warm-up processing takes approximately 6.5 minutes.
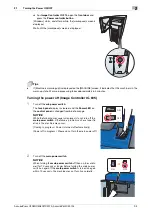
Turning the power off (Image Controller IC-605)
1
Turn off the
sub power switch
.
The
touch panel
display is cleared, and the
Power LED
on
the
control panel
is changed from blue to orange.
NOTICE
While the following message is displayed, do not turn off the
main power switch
. Otherwise, a problem such as a toner fix-
ation in the machine may occur.
[Cooling in progress / Power is turned off automatically]
[Power off in progress / Please do not turn the main power off]
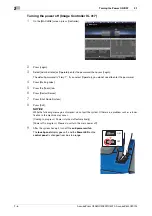
2
Turn off the
main power switch
.
NOTICE
When turning the
main power switch
off then on, be sure to
wait for 10 seconds or longer before turning the main power
switch on again. If the
main power switch
is turned on again
within 10 seconds, the machine may not function normally.
OFF
ON
OFF
ON
Содержание AccurioPress C3070
Страница 1: ...AccurioPress C3080 C3080P C3070 AccurioPrint C3070L Colour production printing system Quick GUIDE...
Страница 2: ......
Страница 5: ...1 Introduction...
Страница 6: ......
Страница 11: ...2 Before Getting Started...
Страница 12: ......
Страница 27: ...3 Let s Make Prints...
Страница 28: ......
Страница 31: ...4 Basic Operations...
Страница 32: ......
Страница 42: ...4 12 AccurioPress C3080 C3080P C3070 AccurioPrint C3070L Paper Setting 4 4 2...
Страница 43: ...5 Troubleshooting...
Страница 44: ......
Страница 60: ...5 18 AccurioPress C3080 C3080P C3070 AccurioPrint C3070L If you forget the administrator password 5 5 7...
Страница 61: ...6 Appendix...
Страница 62: ......
Страница 65: ...AccurioPress C3080 C3080P C3070 AccurioPrint C3070L 6 5 6 2 Name of each Component 6...


