18
Setting Servo IDs 3
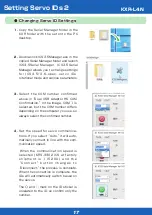
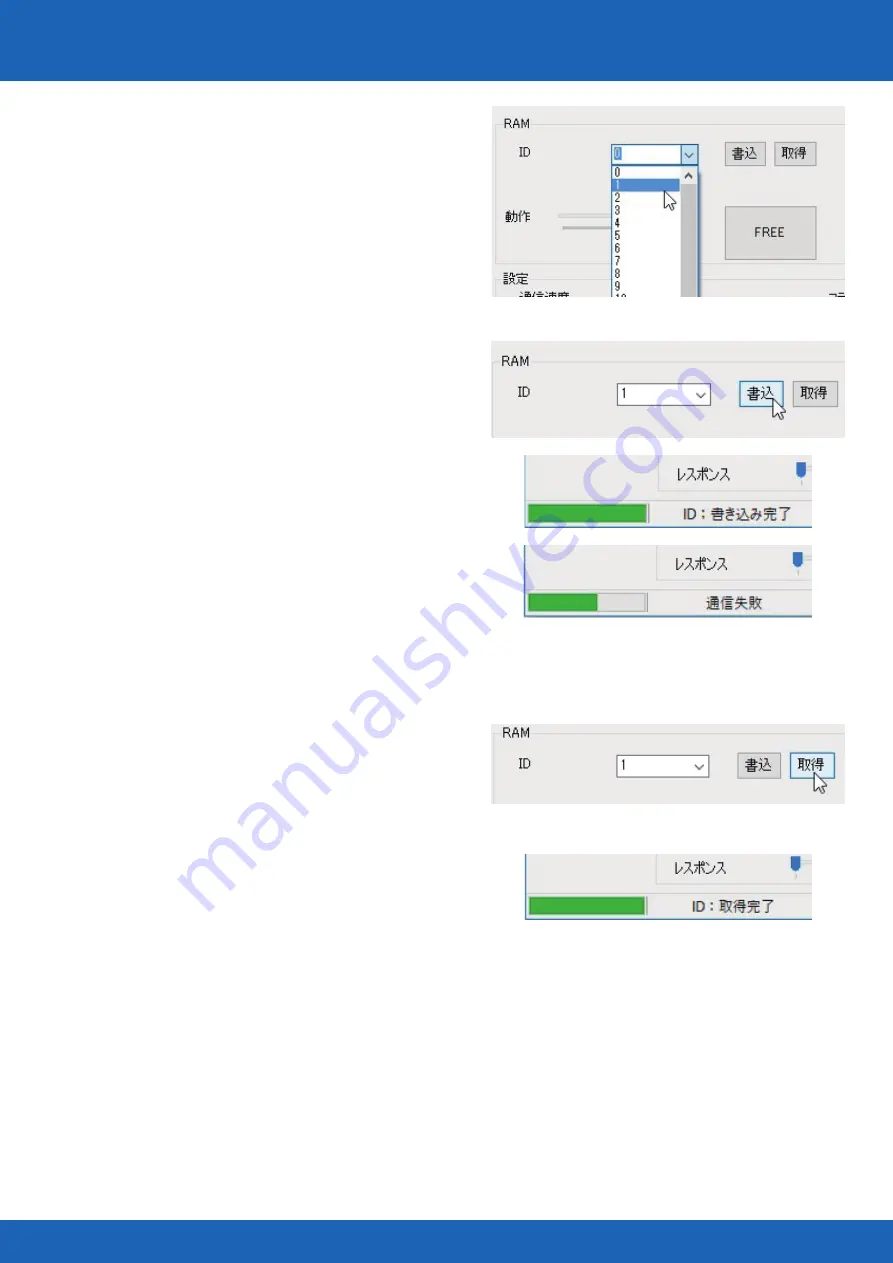
5. Select the set ID number from the ID
pull-down menu.
7. Just to be sure, confirm the ID. When
you press the Acquire button, the
written ID will be displayed in the
pull-down menu.
Confirm that ID: Acquire Complete is
displayed in the lower-left, and confirm
that the correct ID is displayed in the
pull-down menu.
The above is the method for changing Servo ID settings. When all of the processes
are completed, always remove the Dual USB Adaptor HS from the PC after closing the
software.
*This process is only for changing settings, so communications use the PC s bus
power, but when confirming operations, connect the battery. Refer to the manual
included with Servo Manager for information on the connection method and necessary
cable types.
6. Press the Write button on the ID
menu and write the ID onto the servo.
If successful, ID: Write Complete will
be displayed in the lower-left box.
If it fails, Communication Failed will be
displayed, so confirm the procedures
and press the Write button again. In
particular, be sure that Dual USB Adap-
tor HS is in Serial Mode.
KXR-L4N
Содержание KXR-L4N
Страница 34: ...34 Head Assembly 1 Gripper M2 6 ー 10 Joint frame 3300A Joint frame 3300A Gripper M2 6 ー 10 KXR L4N ...
Страница 36: ...36 Head Assembly 2 Join M2 6 ー 10 M2 ー 6 x4 Botom arm 3300 38 Cable guide X 2 6 ー 4 Head 200mm KXR L4N ...
Страница 42: ...42 Complete Assembly completed KXR L4N ...
Страница 65: ......


