Turn On Water Supply
Turn on supply stop and check for
leaks. Slightly re-tightening nuts
should stop any leaks. Over several days,
check all connections for leaks. Nuts under
bolt caps may also require re-tightening.
11
Adjust screw on top of float
valve to obtain correct water level in
tank. Turn screw counterclockwise to
raise water level; turn screw clock-
wise to lower water level.
NOTE: Windham toilets are
designed to operate without an
overflow tube. The barb for con-
necting an overflow tube to the
head of the float valve is visible,
but the water passage through the
barb is blocked. Overflow tube is
not supplied.
12
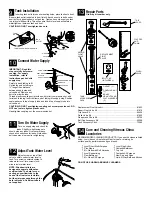
Tank Installation
Inserting tank bolts into bowl mounting holes, place tank onto bowl.
Be sure tank outlet is seated in bowl inlet. Attach hex nuts to bolts under
bowl by firmly pushing down on tank top. Tighten hex nuts evenly so tank
top is level with bowl top. This will ensure tank is level and will obtain a
watertight seal between tank and bowl.
CAUTION: DO NOT overtighten hex nuts.
9
(TANK IS SHOWN UPSIDE DOWN)
TANK
BOLT
TANK
OUTLET
BOLT
GASKET
BOWL INLET
HEX NUT
WASHER
Connect Water Supply
10
IMPORTANT: Read this
step carefully before pro-
ceeding. For supply
installation, refer to
instructions packed with
supply stop.
Carefully bend tubing to fit.
Cut tubing end so tubing is
¹⁄₄
" longer than distance
between supply stop and
valve shank. Remove any
burrs from inside tube.
Thread plastic coupling nut (provided with toilet), compression nut, and
ferrule onto tubing. Insert bottom end of tubing into supply stop. Position
seal washer onto top of supply tube and insert top of supply tube into
valve shank.
CAUTION: DO NOT overtighten coupling nut or compression nut. DO
NOT use tools to tighten plastic nuts.
Hand tighten coupling nut, then compression nut.
PLASTIC
COUPLING NUT
SEAL WASHER
VALVE SHANK
SUPPLY TUBE
COMPRESSION NUT
FERRULE
SUPPLY STOP
Repair Parts
Order by kit number only.
13
REPAIR
FLOAT
VALVE
TRIP
LEVER
FLUSH
VALVE
Replacement Float Valve kit ..............................................................81623
Repair Float Valve kit ........................................................................81619
Trip Lever Kit ....................................................................................84625
Flush Valve Kit ..................................................................................81620
Flapper and Chain Kit........................................................................52750
Bolt Cap Accessory Kit ......................................................................52048
Tank Accessory Pack ........................................................................73062
GASKET (1)
COUPLING NUT
(1)
BRASS
HEX NUTS AND
FLAT WASHERS
(3)
FLAPPER
AND
CHAIN
REPLACEMENT
FLOAT
VALVE
Care and Cleaning Vitreous China
Lavatories
RECOMMENDED CLEANING PRODUCTS. If you use the cleaners listed
below, your vitreous china toilet will last for years...retaining its
surface quality, performance and good looks.
•
Lysol Direct Multi-Purpose
•
Lysol Pine Action
•
Pine Magic
•
Fantastik Bathroom
•
Mr. Clean with Soft Abrasive
•
Top Job
•
Lysol Deodorizing
•
Fantastik All-Purpose
•
Dow Bathroom
•
New Spic and Span
•
Mr. Clean All-Purpose
•
Lime-A-Way Bath and Kitchen
DO NOT USE HARSH ABRASIVE CLEANERS.
BOLT CAP
(INCLUDES 2)
TANK
ACCESSORY
PACK
14
TANK IS SHOWN UPSIDE DOWN
Adjust Tank Water Level


