ttons
PROGRAM GUIDE (In DTV mode)
Channel List
Favorite List
Important Unique Buttons
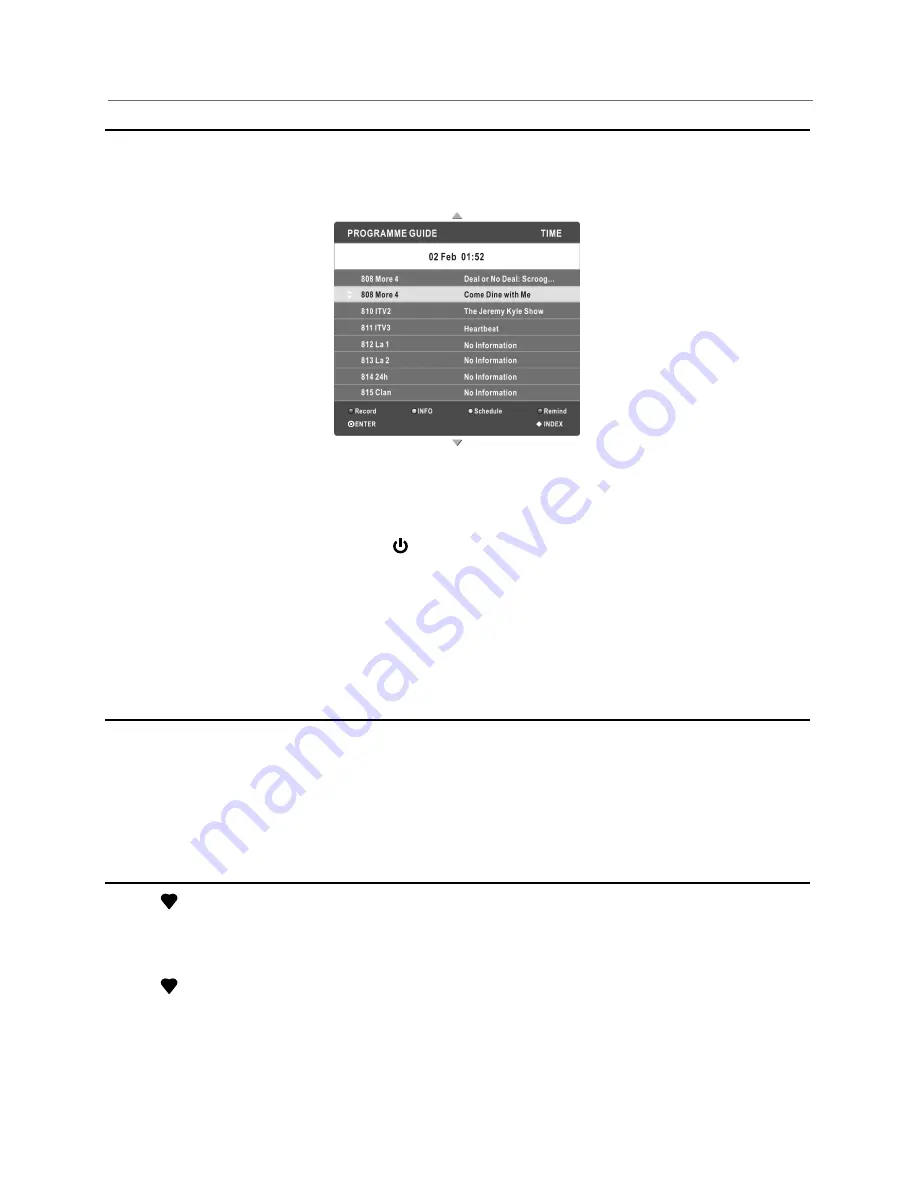
Press
EPG
button to display the Programme Guide menu. This function let
s
you know
the detailed information of the channel, indicating the time
s
of the program
s
playing.
Press
EXIT
button to
exit.
Record:
Press red button to set the parameters for recording.
The unit is able to do
schedule recording when TV is turning on or in standby mode. You can set up several
schedule recording
s
. Different schedules
can
not overlap. When recording starts in
standby mode, the front indicators will change colo
u
r and there will be no picture or
sound from the unit.
You can press button to light up the screen.
INFO:
Press green button to see the detailed information of the current channel.
Schedule:
Press the yellow button to display the Schedule list and Start time.
Remind:
If you find the desired program which will be shown in the future. Press the
blue button to book program.
INDEX:
Change the list by TIME or CHANNEL.
ENTER:
Press to change channel.
Press
LIST
button to display the Channel List.
Press
▲
/
▼
to select the items.
Press
ENTER
button to enter the channel.
Press
CH+
/
CH-
button to page down or up the Channel list.
Press
LIST
button to exit.
Press
button to display the favorite list.
Press
▲
/
▼
to select the items.
Press
ENTER
button to enter the channel.
Press
CH+
/
CH-
button to page down or up the Favorite list.
Press
button to exit.
_________
16
Содержание KALED50XXXTA
Страница 1: ......