Customer Support: http://www.pandigital.net/kodaksupport 11
Setting the Scanning Resolution
The scanning resolution is measured in dpi (dots per inch). The higher the dpi, the more details on the original are captured by
the scanner and produce a higher quality scanned image. However, a higher dpi also results in a larger image size and occupy
more space on the memory card.
To change the scanning resolution, press and release the Power button. The scanning resolution changes by
each press of the button, and the color of the Status/Card indicator also change according to the resolution
selected:
Orange: 600dpi (fine mode, default setting)
Green: 300dpi (normal mode)
The scanning resolution for transparencies is fixed as 1200dpi and cannot be changed.
Scanning a Photo
1. Insert your photo into the plastic sheath (
included with scanner
).
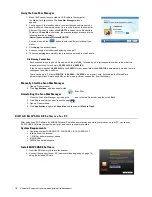
2. With the photo facing upward and in correct orientation, place one edge of the photo on the
scanner and adjust the guide lever so that the photo aligns against the left side of the feed slot.
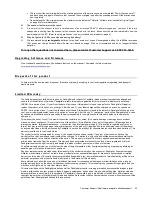
3. Insert the original level and flat into the feed slot.
CAUTION
: Do not scan glossy photos in humid environments
(humidity higher than 70% RH)
; the
surface of the photo becomes sticky and may cause the scanner to jam.
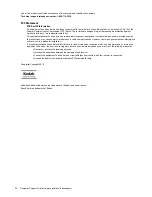
The original is fed through the slot and scanned automatically; the Power and Status/Card indicator
lights blink while scanning.
To prevent poor image quality, reserve adequate space behind the scanner for the photo to
complete the scan feeds.
When scanning is completed, the Power and Status/Card indicator lights blink while the scanner stores
the photo on the memory card.
Wait until the indicator lights stop blinking before inserting and scanning the next photo.
CAUTION
: Insert only one photo at a time, and insert the next photo only when the previous one is done. Otherwise the
scanner may malfunction.
Do not remove the memory card or disconnect the power supply or batteries while the indicators are blinking.
This scanner produces JPEG (.jpg) file formats. The date/ time attribute are not added.
For more information on how this scanner stores the scanned picture files on the memory card, refer to “Orientation” on
page 10.
If the memory card is nearly full (less than 10MB remaining), the Status/Card indicator blinks (
refer to “Indicator Lights” on
page 7
). Use another card or transfer pictures to your computer.
To
turn off the scanner
, press and hold the power button for one second. The power indicator blinks and then
goes off.
Now you can safely disconnect the power and remove the memory card from the scanner.
The scanner automatically turns off if it’s left idle for 5 minutes. (If it’s connected to a computer, the scanner
does not automatically turn off.)
Scanning 35mm Negatives
This scanner only supports the scanning of 35mm negative/monochrome 6-frame 35mm filmstrips commonly available
from your local photo studios.
Filmstrips in certain conditions are not suitable for scanning. Refer to
Suitable and Unsuitable Original Types
on
page 8.
Guide Lever
Align left
Содержание P811
Страница 1: ...P811 Personal Photo Scanner User Guide Guide de l utilisateur Gu a del usuario...
Страница 4: ...4 Customer Support http www pandigital net kodaksupport 04 Kodak P811_UG_v1 6_EN FRC SP_2010 09 07...
Страница 25: ...Fran ais...
Страница 48: ...Espa ol...
Страница 72: ......
Страница 73: ......


