background image

Sharing pictures and videos

www.kodak.com/go/support

 59

Third—transfer and email

When you transfer the tagged pictures and videos to your computer (see 

page 62

), 

the email screen opens and lets you send them to the addresses you specified. See the 
Kodak EasyShare software Help for details.

Tagging pictures as favorites

You can store your favorite pictures in the Favorites   section of your camera’s 
internal memory, then share them with friends and family. 

NOTE:  When you transfer pictures from your camera to your computer, all pictures 

(including favorites) are stored on your computer at full size. Favorite 
pictures—smaller copies of your originals—are loaded back to your camera, so 
you can share and enjoy more.

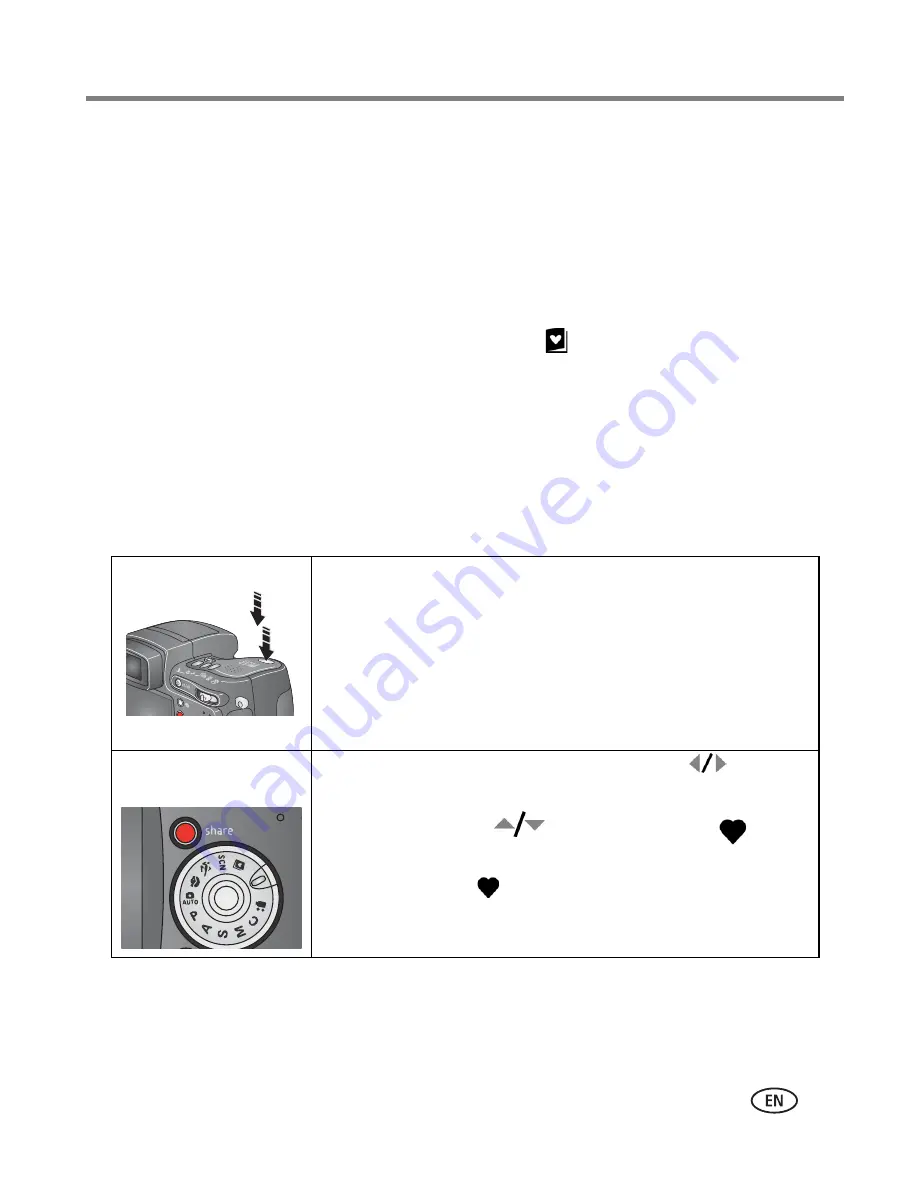
Share your favorite pictures in 4 easy steps:

1. Take pictures

2. Tag pictures as 
favorites

1

Press the Share button. Move the Joystick 

 to 


locate a picture.

2

Move the Joystick 

 to highlight Favorite 

, then 

press the OK button. 

The Favorite icon 

 appears in the status area. 


To remove the tag, press the OK button again.

Press the Share button to exit the menu.

Содержание EasyShare Z7590 User's guide

Страница 1: ...Kodak EasyShare Z7590 zoom digital camera User s guide www kodak com For interactive tutorials www kodak com go howto For help with your camera www kodak com go z7590support FPO ...

Страница 2: ...Kodak Company 2005 All screen images are simulated Kodak and EasyShare are trademarks of Eastman Kodak Company Schneider Kreuznach Xenar and Variogon are trademarks of Jos Schneider Optische Werke GmbH used under license by Eastman Kodak Company P N 4J3110 ...

Страница 3: ...Product features www kodak com go support i Top front view 1 Jog dial 4 Flip up flash 2 Shutter button 5 Self Timer Video light 3 Microphone 6 Lens 4 1 6 2 5 3 ...

Страница 4: ...upport Product features Side views 1 SD MMC card slot 5 USB port DC In A V Out cover 2 Diopter dial 6 USB port 3 External flash connector 7 DC In 5V 4 External flash connector cover 8 A V Out for TV viewing 3 1 4 5 6 8 7 2 ...

Страница 5: ...ggle button 11 Review button 3 EVF Electronic Viewfinder 12 Menu button 4 On Off button 13 Delete button 5 Zoom Wide Angle Telephoto 14 Power ring 6 Neck strap post 15 LCD screen Liquid Crystal Display 7 Status button 8 Share button 9 Joystick move OK button press 3 2 6 7 8 1 5 10 13 11 4 15 12 14 9 ...

Страница 6: ...3 Exposure bracketing First burst Last burst button Close up Landscape button 9 Tripod socket locator for EasyShare camera dock or printer dock 4 Flash button 10 Dock connector 5 6 Flip up flash Open flash switch 11 Locator for EasyShare camera dock or printer dock 7 Shutter button 3 4 1 7 2 5 9 8 10 11 6 ...

Страница 7: ...Storing pictures on a SD or MMC card 8 2 Taking pictures and videos 9 Taking a picture 9 Taking a video 14 Quickview Reviewing the picture or video just taken 15 Using optical zoom 16 Using advanced digital zoom 16 Picture taking modes 17 Using the flip up flash 23 Using an external flash unit 27 Shooting close up and landscape pictures 27 Using exposure bracketing 28 Using burst 29 Changing pictu...

Страница 8: ...ng pictures and videos on a television 52 Copying pictures and videos 53 4 Installing the software 54 Install the software 55 5 Sharing pictures and videos 56 When can I tag my pictures and videos 56 Tagging pictures for printing 57 Tagging pictures and videos for emailing 58 Tagging pictures as favorites 59 6 Transferring and printing pictures 62 Transferring pictures videos with the USB cable 62...

Страница 9: ... 70 Power ring light status 72 Direct printing PictBridge problems 73 8 Getting help 74 Helpful links 74 Telephone customer support 75 9 Appendix 76 Camera specifications 76 Storage capacities 79 Power saving features 81 Accessories 82 Upgrading your software and firmware 83 Additional care and maintenance 83 Warranty 84 Regulatory compliance 86 ...

Страница 10: ...viii www kodak com go support ...

Страница 11: ...chargeable battery requires charging before first use 1 Insert the battery into the charger 2 Insert the plug that matches your electrical outlet 3 Plug the charger into the outlet The indicator light turns red When the indicator light turns green remove the battery and unplug the charger Charging takes approximately 3 hours You can also charge the battery using an optional Kodak EasyShare printer...

Страница 12: ... Actual battery life may vary based on usage We recommend using only a Kodak EasyShare Li Ion rechargeable battery Not all manufacturers 3 7V Li Ion rechargeable batteries are compatible with the camera Damage caused by unauthorized accessories is not covered under warranty Optional battery You can use a Kodak EasyShare Li Ion rechargeable battery 1050 mAh but it is a lower power battery Expect ap...

Страница 13: ...mance is reduced at temperatures below 41 F 5 C When using your camera in cold weather carry spare batteries and keep them warm Do not discard cold batteries that do not work when they return to room temperature they may be usable Visit www kodak com go z7590accessories for Kodak EasyShare camera dock powers your camera transfers pictures to your computer and charges your battery Kodak EasyShare p...

Страница 14: ...ecome hot or leak Do not disassemble install backward or expose batteries to liquid moisture fire or extreme temperature Remove battery when the product is stored for an extended period of time In the unlikely event that battery fluid leaks inside the product contact your local Kodak Customer Service representative In the unlikely event that battery fluid leaks onto your skin wash immediately with...

Страница 15: ...urn off the camera The camera completes operations that are in process Setting the language 1 Turn on the camera Press the Menu button 2 Move the Joystick to highlight Setup Menu then press the OK button 3 Move the Joystick to highlight Language then press the OK button 4 Move the Joystick to choose a language English German Spanish French Italian Portuguese Chinese Korean or Japanese 5 When finis...

Страница 16: ...the date time anytime 1 Turn on the camera Press the Menu button 2 Move the Joystick to highlight Setup Menu then press the OK button 3 Move the Joystick to highlight Date Time then press the OK button 4 Move the Joystick to adjust the date and time Move the Joystick to advance to the next setting 5 When finished press the OK button 6 Press the Menu button to exit the menu NOTE Depending on your c...

Страница 17: ... the button again NOTE The EVF LCD screen turns off after 1 minute if no pictures are taken Press any button to turn the display back on Using the diopter dial You can adjust the EVF sharpness for your eyesight Look through the EVF Turn the Diopter dial until the viewfinder image is sharp Checking camera and picture status The icons that appear on the EVF LCD screen indicate the active camera and ...

Страница 18: ... SD Card Association When using the card for the first time format it in this camera before taking pictures see page 38 CAUTION The card can only be inserted one way forcing it may damage the camera or card Do not insert or remove a card when the green ready light is blinking doing so may damage your pictures card or camera 1 Turn off the camera then open the card door 2 Orient the card as shown o...

Страница 19: ...l to the desired setting NOTE Use Auto for general picture taking situations See page 17 for other camera mode options 3 Use the EVF or LCD screen to frame your subject Press the EVF LCD toggle button to switch to the other See page 7 The EVF LCD screen displays a mode description and a live view NOTE To take flash pictures open the flip up flash see page 20 An Open Flash warning appears on the EV...

Страница 20: ...s AF and Auto Exposure AE The AF AE indicator is displayed If the focus and or exposure fails recompose the shot and try again 5 Continue pressing the Shutter button completely down to take the picture EVF screen LCD screen green successful red failed failed exposure AF AE indicator failed focus AF AE indicator ...

Страница 21: ...en the framing marks turn from blue to green focus is accomplished 2 If the camera is not focusing on the desired subject or if the framing marks disappear release the Shutter button and recompose the scene 3 Press the Shutter button completely down to take the picture NOTE Framing marks do not appear in Landscape or Video mode When you use Focus Zone page 33 and set Center Zone the framing marks ...

Страница 22: ...s to the left it is too dark Optimal exposure is achieved when the peak is in the middle of the histogram Exposure compensation Camera mode Low battery Date stamp Landscape Flash Picture size Pictures time remaining Storage location ISO White balance Zoom digital telephoto wide Album name Exposure metering Burst Compression Aperture Shutter speed Flash compensation AF mode Focus zone Close up flas...

Страница 23: ...utter pressed halfway Press the Shutter button halfway to display the active manual settings Auto focus Exposure compensation Slow shutter speed warning Shutter speed Aperture ISO framing marks Flash compensation Auto Focus Auto Exposure AF AE indicator Open flash warning ...

Страница 24: ...ontinuous AF see page 34 5 Use the EVF or LCD screen to frame your subject Press the EVF LCD toggle button to switch to the other screen see page 7 6 Press the Shutter button completely down and release To stop recording press and release the Shutter button again During recording REC blinks on the screen and the elapsed time is displayed NOTE If you prefer press the Shutter button completely down ...

Страница 25: ...to play the video Move the Joystick to adjust the volume Press OK again to pause the video Share Press the Share button to tag a picture video for email see page 58 or as a favorite or to tag a picture for print See page 57 Delete Press the Delete button while the picture video and are displayed NOTE Only the final picture of exposure bracketing see page 28 or burst series see page 29 is displayed...

Страница 26: ... to zoom out The EVF or LCD screen displays the zoomed image and the zoom indicator 3 Press the Shutter button halfway and hold to set the exposure and focus then press completely down to take the picture When taking videos press and release the Shutter button Using advanced digital zoom Use advanced digital zoom in any Still mode to get an additional 3X magnification beyond optical zoom available...

Страница 27: ... x 15 cm print ensure that the slider remains blue Picture taking modes Use this mode For Auto General picture taking offers an excellent balance of image quality and ease of use Program Controlling exposure compensation how much light enters the camera and flash compensation The camera automatically sets the shutter speed and aperture f stop based on the scene lighting Program mode offers the eas...

Страница 28: ...odes page 21 Press the Menu button to change other settings Manual Enjoying the highest level of creative control You set the aperture flash compensation shutter speed and ISO speed Exposure compensation acts as an exposure meter recommending the proper combination of aperture and shutter speed to produce an acceptable exposure To prevent camera shake use a tripod for slow shutter speeds Use the j...

Страница 29: ...st results position your subject at least 6 ft 2 m away and fill the frame with a head and shoulder pose Use Telephoto to exaggerate background blur The camera pre settings are f 2 8 f 3 7 Multi Pattern Exposure Metering Multi Zone Focus ISO 100 Use this SCN mode For Camera pre settings Close up Subjects closer than 28 in 70 cm f 2 8 f 3 7 Macro Focus Center Weight Metering Center Zone Focus ISO 1...

Страница 30: ...he camera on a flat steady surface or use a tripod f 5 6 2 second exposure Infinity Focus Center Weight Metering Daylight White Balance ISO 100 Flower Close ups of flowers or other small subjects in bright light f 2 8 f 3 7 Macro Focus Daylight White Balance Center Zone Focus Center Weight Metering ISO 140 Manner Museum Quiet occasions like a wedding or lecture Flash and sound are disabled f 2 8 f...

Страница 31: ...size of the lens opening which determines the depth of field Smaller f numbers for example f 2 8 refers to a bigger lens opening Larger f numbers for example f 8 refers to a smaller lens opening Larger f numbers keep the main subject sharp good for landscapes and well lit conditions Smaller f numbers are good for portraits and low light conditions The highest and lowest aperture numbers may be aff...

Страница 32: ...vailable if flash setting is Off ISO controls sensitivity of the camera sensor 80 100 200 400 800 Higher settings are more sensitive to light but may produce unwanted noise in a picture You can only use ISO 800 if you are in the 1 8 MP Picture Size setting See Picture Size page 31 See Tips for better pictures on page 40 Using the jog dial to change P A S M or C mode settings The Jog dial controls ...

Страница 33: ...e other settings see page 30 4 Take a picture Using the flip up flash Use the flash when you take pictures at night indoors or outdoors in heavy shadows You can change the flash setting in most Still modes except Burst the default setting is restored when you exit the mode or turn off the camera Turning on the flash Slide the open flash switch to raise the flash and to turn it on NOTE The flash un...

Страница 34: ...it is closed Open flash unit or take the picture without flash Flash modes Flash fires Auto Flash When the lighting conditions require it Fill Every time you take a picture regardless of the lighting conditions Use when the subject is in shadow or is backlit when the light is behind the subject In low light hold the camera steady or use a tripod See Tips for better pictures on page 40 Press the fl...

Страница 35: ...s are pre set for each picture taking mode Red eye Once so the subject s eyes become accustomed to the flash then fires again when the picture is taken If the lighting conditions require flash but do not require Red eye reduction the flash may fire only once Off Never Capture modes Default setting Available settings Auto Auto Auto Off Fill Flash Red eye Portrait Auto Auto Off Fill Flash Red eye Sp...

Страница 36: ...uto Off Fill Flash Red eye Text Off Auto Off Fireworks Off Off Flower Off Auto Off Fill Flash Manner Museum Off Off Self Portrait Red eye Auto Off Fill Flash Red eye Party Red eye Auto Off Fill Flash Red eye Children Auto Auto Off Fill Flash Red eye Backlight Fill Fill Video Off Off First burst Off Off Last burst Off Off Exposure bracketing Off Off Capture modes Default setting Available settings ...

Страница 37: ...h unit is live when connected to the camera The flash synchronizes at any shutter speed Refer to your external flash unit user s guide for details NOTE The connector accepts all standard external flash cables maximum 500 volts Shooting close up and landscape pictures Use the Close up Landscape button to take pictures of scenes that are very close or very far away Not available in Scene modes 1 Set...

Страница 38: ...racketing 1 Set the exposure bracketing interval See Exposure Bracketing Interval page 32 2 In most Still modes press the Exposure bracketing button repeatedly to choose 3 Press the Shutter button halfway and hold to set the auto focus and exposure 4 Press the Shutter button completely down to take the pictures The camera takes 3 pictures To evaluate them press the Review button Exposure bracketin...

Страница 39: ...0 0 3 1 0 0 7 1 0 1 3 1 0 1 3 1 0 0 7 Option Description Purpose First Burst Camera takes up to 5 pictures 2 per second while the Shutter button is pressed Capture an expected event Example A person swinging a golf club Last Burst Camera takes up to 30 pictures 2 per second for up to 15 seconds while the Shutter button is pressed When the Shutter button is released only the last 4 pictures are sav...

Страница 40: ...change settings to get the best results from your camera 1 Turn the Mode dial to the desired mode 2 Press the Menu button Some settings are unavailable in some modes 3 Move the Joystick to highlight a setting then press the OK button 4 Choose an option then press the OK button 5 Press the Menu button to exit Setting Icon Options and icons that appear in Liveview Custom Exposure Mode Choose a prefe...

Страница 41: ...m 4 0 MP for printing up to 20 x 30 in 51 x 76 cm pictures are medium resolution with smaller file size 3 1 MP for printing up to 11 x 14 in 28 x 36 cm pictures are medium resolution with smaller file size 1 8 MP for printing 4 x 6 in 10 x 15 cm prints emailing Internet screen display or for conserving space Compression Choose a compression This setting remains until you change it The setting is d...

Страница 42: ...nder tungsten or halogen lighting without flash Fluorescent corrects the green cast of fluorescent lighting Ideal for indoor pictures under fluorescent lighting without flash Open Shade for pictures in the shade in natural lighting Unavailable in Auto Scene or Video modes Exposure Bracketing Interval Choose an exposure bracketing interval P A S M C This setting remains until you change it or take ...

Страница 43: ...n a smaller area of the subject centered in the viewfinder A circle indicates the metering spot Ideal when you need an exact exposure of a specific area in the picture Unavailable in Auto Scene or Video modes Focus Zone Choose a large or concentrated area of focus This setting remains until you change it The setting is displayed on the right side of Liveview if set to Center zone or Selectable zon...

Страница 44: ... In Auto and Scene modes this setting remains until you turn the Mode dial or turn off the camera High Color Natural Color default Low Color Black White Sepia for pictures with a reddish brown antique look NOTE EasyShare software also lets you change a color picture to black and white or sepia but you cannot change a black and white or sepia picture to color Unavailable in Video mode Sharpness Con...

Страница 45: ...mains until you change it Auto default the camera uses the card if one is in the camera If not the camera uses internal memory Internal Memory the camera always uses internal memory even if a card is inserted Video Length Video Choose a default video length useful in self timer videos Continuous default as long as there is room on the card or internal memory or until you press the Shutter button C...

Страница 46: ...isplay a picture or video for 5 seconds after it is taken On default Off Advanced Digital Zoom Choose how digital zoom is employed Continuous no pause between optical and digital zoom Pause default after reaching 10X optical zoom the zoom button must be released then activated again to begin digital zoom None digital zoom is disabled Print Warning Pause default when the blue slider on the zoom ind...

Страница 47: ...lets you connect the camera to a television or other external device NTSC default used in North America and Japan PAL used in Europe and China Orientation Sensor Orient pictures so that they are displayed with the correct side up On default Off Date Stamp Imprint the date on pictures Choose date format or turn off the feature Default is off Video Date Display On default choose from 3 date formats ...

Страница 48: ...e the Joystick to highlight 10 seconds so you have time to get into the scene or 2 seconds for a steady auto shutter release on a tripod then press the OK button Format CAUTION Formatting deletes all pictures and videos including those that are protected Removing a card during formatting may damage the card Memory Card deletes everything on the card formats the card Cancel exits without making a c...

Страница 49: ... tagging for album names Use the Set Album Still or Video feature to pre select album names before you take pictures or videos Then all the pictures or videos you take are tagged with those album names First on your computer Use Kodak EasyShare software that came with your camera see page 54 to create album names on your computer To get the latest version of EasyShare software go to www kodak com ...

Страница 50: ...A plus after the album name means more than one album is selected 6 Press the Menu button to exit the menu Third transfer to your computer When you transfer the tagged pictures and videos to your computer see page 62 the Kodak EasyShare software opens and categorizes your pictures and videos in the appropriate album See the Kodak EasyShare software Help for details Tips for better pictures Zoom Wh...

Страница 51: ... When you want to control the exposure of backlit subjects or take images in varied light use exposure compensation If the picture is too light decrease the setting if it s too dark increase the setting Use the Jog dial to access this function see page 22 Exposure Compensation ...

Страница 52: ...number and shutter speed to obtain the appropriate exposure compensation for your particular setting Images have a greater focus range with a larger f number such as f 8 But it is not the best choice when shooting a moving object so a smaller f number is preferred such as f 2 8 Wide Angle f 2 8 10X Zoom f 3 6 f 8 NOTE Some of the shutter speeds are not shown ...

Страница 53: ...ny day portraits to fill in those dark shadows under the eyes nose or under the rim of a baseball hat It s also useful for side and back lit scenes with nearby people or objects with detail you want to reveal Use Exposure Compensation or Flash Compensation when needed by adjusting the Jog dial see page 21 Fill flash on Fill flash off Images taken in Portrait mode ...

Страница 54: ...t close range see page 28 The camera automatically sets the focus distance depending on the zoom position Use available light instead of the flash if possible Close up telephoto lets you keep your distance from the subject e g when you want to capture butterflies and bees on flowers without disturbing them Close up wide at 5 in 12 7 cm Close up telephoto at 30 in 76 2 cm Images taken at f 5 1 500 ...

Страница 55: ...r Kodak 5 volt AC adapter See www kodak com go z7590accessories Viewing single pictures and videos 1 Press the Review button 2 Move the Joystick to scroll backward or forward through pictures and videos For fast scrolling hold the Joystick 3 Press the Review button to exit Review NOTE Pictures taken at the 4 4 MP 3 2 quality setting are displayed at a 3 2 aspect ratio with a black bar at the top o...

Страница 56: ...king camera status review mode Press the Review button The applied features of the current picture or video are displayed Email tag Favorite tag Print tag number of prints Protect Picture video number Storage Review Album name Scroll arrows mode location Histogram ...

Страница 57: ...of the selected picture press the OK button Playing a video 1 Press the Review button 2 Move the Joystick to locate a video In Multi up view highlight a video then press the OK button When a video is highlighted in Multi up view the video duration is displayed at the top of the camera screen 3 To play or pause a video press the OK button NOTE You can also press the Menu button highlight then press...

Страница 58: ...s the Delete screen ALL deletes all pictures and videos from your current storage location To delete more pictures and videos return to Step 2 NOTE You cannot delete protected pictures and videos this way Remove protection before deleting see page 49 Magnifying pictures 1 Press the Review button 2 Push the Zoom button to magnify the picture between 1X and 8X To see different parts of the picture m...

Страница 59: ...and cannot be deleted The Protect icon appears with the protected picture or video 4 To remove protection press the OK button again 5 Press the Menu button to exit the menu CAUTION Formatting internal memory or an SD or MMC card deletes all including protected pictures videos Formatting internal memory also deletes email addresses album names and favorites To restore them see EasyShare software He...

Страница 60: ... see page 54 to create album names on your computer To get the latest version of EasyShare software go to www kodak com go z7590downloads Then copy up to 32 album names to the camera s internal memory See Kodak EasyShare software Help for details Second on your camera 1 Press the Review button 2 Press the Menu button 3 Move the Joystick to highlight Album then press the OK button 4 Move the Joysti...

Страница 61: ...ictures and videos on the camera screen To run a slide show on a television or on any external device see page 52 To save battery power use an optional Kodak 5V AC adapter Visit www kodak com goz7590accessories Starting the slide show 1 Press the Review button then press the Menu button 2 Move the Joystick to highlight Slide Show then press the OK button 3 Move the Joystick to highlight Begin Show...

Страница 62: ... the OK button or until battery power is exhausted Displaying pictures and videos on a television You can display pictures and videos on a television computer monitor or any device equipped with a video input Image quality on a television screen may not be as good as on a computer monitor or when printed NOTE Ensure that the Video Out setting NTSC or PAL is correct see page 37 The slide show stops...

Страница 63: ... button 2 Move the Joystick to highlight Copy then press the OK button 3 Move the Joystick to highlight an option PICTURE or VIDEO copies the current picture or video EXIT returns to the Review menu ALL copies all pictures and videos from your selected storage location to the other location 4 Press the OK button NOTE Pictures and videos are copied not moved To remove pictures and videos from the o...

Страница 64: ...hardware requirements Windows 98 98SE ME 2000 SPI or XP OS Internet Explorer 5 01 or higher 233 MHz processor or greater Macintosh OS X 10 2 3 10 3 Safari 1 0 or higher 128 MB RAM 64 MB RAM for Windows 98 98SE 2000 SPI or ME OS 200 MB hard disk space available CD ROM drive Available USB port ...

Страница 65: ... 4 Follow the on screen instructions to install the software Windows OS based computer select Complete to automatically install all the applications Select Custom to choose the applications you wish to install Mac OS X follow the on screen instructions NOTE When prompted take a few minutes to electronically register your camera and software This lets you receive information regarding software upda...

Страница 66: ...Quickview When can I tag my pictures and videos Press the Share button to tag pictures videos Any time The most recent picture video taken is displayed Just after you take a picture video during Quickview see page 15 After pressing the Review button see page 45 Pictures Videos Print page 57 Email page 58 Favorites page 59 for easy organization on your computer and for sharing on your camera Press ...

Страница 67: ...he Share button to exit the menu To tag all pictures in the storage location highlight Print All press the OK button then indicate the number of copies as described above Print All is not available in Quickview To remove the print tagging for all pictures in the storage location Highlight Cancel Prints then press the OK button Select either Yes or No to delete all prints Press the OK button Cancel...

Страница 68: ...a picture video 2 Move the Joystick to highlight Email then press the OK button The Email icon appears in the status area 3 Move the Joystick to highlight an email address then press the OK button To tag other pictures videos with the same address move the Joystick to scroll through them When the picture you want is displayed press OK To send the pictures videos to more than one address repeat ste...

Страница 69: ...m with friends and family NOTE When you transfer pictures from your camera to your computer all pictures including favorites are stored on your computer at full size Favorite pictures smaller copies of your originals are loaded back to your camera so you can share and enjoy more Share your favorite pictures in 4 easy steps 1 Take pictures 2 Tag pictures as favorites 1 Press the Share button Move t...

Страница 70: ...ionality load and use Kodak EasyShare software that came with your camera see page 54 2 Connect the camera to the computer using the USB cable see page 62 or an EasyShare dock The first time you transfer pictures a software wizard helps you make choices about your favorite pictures Then your pictures are transferred to the computer Favorite pictures are loaded to the Favorites section of your came...

Страница 71: ...erring to the camera 1 Open the Kodak EasyShare software Click the My Collection tab 2 Go to the Albums view 3 Click the Camera Favorites Album for your camera 4 Click Remove Album The next time you transfer pictures from your camera to the computer use the Camera Favorites Wizard Assistant in EasyShare software to recreate your Camera Favorites Album or to turn off the Camera Favorites feature Pr...

Страница 72: ... for details 3 Plug the other end of the USB cable into the labeled USB port on the camera 4 Turn on the camera Kodak EasyShare software opens on your computer The software prompts you through the transfer process NOTE Visit www kodak com go howto for an online tutorial on connecting Also available for transferring You can also use these Kodak products to transfer your pictures and videos Kodak Ea...

Страница 73: ...ures when you insert your card into a printer with an SD or MMC card slot See your printer user s guide for details Make prints at an SD or MMC card capable Kodak picture maker Contact a location prior to visiting See www kodak com go picturemaker Take the card to your local photo retailer for professional printing Ordering prints online Kodak EasyShare print service provided by Ofoto www ofoto co...

Страница 74: ...cting the camera to the printer 1 Turn off the camera and printer 2 Optional If you have a Kodak 5 volt AC adapter optional accessory plug it into the camera and into an electrical outlet 3 Using the USB cable that came with your camera connect the camera to the printer See your printer user s guide for details Camera with fully charged batteries or with optional Kodak 5 volt AC adapter PictBridge...

Страница 75: ...ur computer see page 62 If you turned the Mode dial to Favorites the current favorite picture is displayed Disconnecting the camera from the printer 1 Turn off the camera and printer 2 Disconnect the USB cable from the camera and the printer Current Picture Press to choose a picture Choose the number of copies Tagged Pictures If your printer is capable print pictures that you tagged for printing s...

Страница 76: ... dealer of Kodak products or www kodak com go z7590accessories Kodak EasyShare dock Docking configuration printer dock 4000 camera dock II LS420 LS 443 camera dock Not compatible printer dock printer dock plus printer dock 6000 camera dock 6000 others including series 3 printer docks and camera docks Custom camera insert Adapter Dock Custom camera insert Dock ...

Страница 77: ...t the camera to a Kodak 5 volt AC adapter sold separately then try again See page 2 for more battery information Camera does not turn off and the lens does not retract Camera buttons and controls do not function Lens does not extend when camera turns on or does not retract Confirm that the battery in camera is charged Turn camera on and off again If problem still exists get help see page 74 EVF LC...

Страница 78: ... Transfer pictures to the computer page 62 Delete pictures from the card or insert a new one page 8 Change image storage location to internal memory page 35 Battery life is short Wipe the contacts with a clean dry cloth page 83 before inserting a battery in the camera Insert a charged battery page 1 You cannot take a picture Turn the camera off then on again Depress shutter button all the way page...

Страница 79: ...a Remove the battery and wipe the contacts with a clean dry cloth page 83 Reinstall the battery Turn on the camera If all else fails get customer support help see page 75 Memory card not recognizedorcamera freezes with card Card may be corrupted Format card in camera see page 8 Use another memory card If Try one or more of the following ...

Страница 80: ...ideo Out setting NTSC or PAL page 37 Make sure the external device settings are correct see the device s user s guide If Try one or more of the following Picture is too dark or underexposed Reposition camera for more available light Use Fill flash page 23 or change your position so light is not behind the subject Move so that the distance between you and the subject is within the effective flash r...

Страница 81: ...Shutter button completely down to take the picture Use P mode to adjust the Exposure and Flash Compensations page 22 Picture is not clear To automatically set exposure and focus press the Shutter button halfway and hold When the AF AE indicator turns green press the Shutter button completely down to take the picture Clean the lens page 83 Make sure camera is not in Close up mode if you are more th...

Страница 82: ...o computer USB connection is active Date and time set with lens retracted Power ring blinks green Camera turned off while picture is being processed and saved Camera operating normally Processing is completed before power off Do not remove the card while the light is blinking Camera operating normally at power up Take pictures when the blinking stops Camera operating normally during connect mode t...

Страница 83: ...to Auto Camera is accessing a card or internal memory Use the Direct print menu to change the image storage location The Direct print menu interface turns off The menu interface has timed out Press any button to redisplay it Cannot print pictures There is a connection issue Ensure that there is a connection between camera and printer page 64 There is a power issue Ensure the printer and camera hav...

Страница 84: ... com go howto Software Get information on EasyShare software www kodak com go easysharesw or click the Help button in the EasyShare software Get help with the Windows operating system and working with digital pictures www kodak com go pcbasics Other Get support for other cameras software accessories more www kodak com go support Get information on Kodak EasyShare printer docks www kodak com go pri...

Страница 85: ... Australia 1800 147 701 Greece 00800 441 25605 Spain 91 749 76 53 Austria 0179 567 357 Hong Kong 800 901 514 Sweden 08 587 704 21 Belgium 02 713 14 45 India 91 22 617 5823 Switzerland 01 838 53 51 Brazil 0800 150000 Italy 02 696 33452 Taiwan 0800 096 868 Canada 1 800 465 6325 Japan 03 5540 9002 Thailand 001 800 631 0017 China 800 820 6027 Korea 00798 631 0024 UK 0870 243 0270 Denmark 3 848 71 30 N...

Страница 86: ...mage size picture size 2576 x 1932 5 0 M pixels 2576 x 1716 4 4 M pixels 2304 x 1728 4 0 M pixels 2048 x 1536 3 1 M pixels 1552 x 1164 1 8 M pixels Display Color LCD Hybrid high resolution display 2 2 in 55 9 mm 640 x 240 153K pixels Color Viewfinder Electronic EVF LCD and EVF not simultaneous 0 26 in 6 5 mm 311k pixels Preview LCD EVF Frame rate 30 fps Lens Taking lens 10X optical zoom lens f 2 8...

Страница 87: ...ical zoom 10X 38 380 mm 35 mm equivalent F 6 32 63 2 mm actual Accessory lens thread Yes inside lens ring Lens barrier Lens cap Exposure Exposure metering TTL AE with program modes Multi Pattern AE Center Weight AE Center Spot AE Exposure range AE range EV 5 3 to 16 0 wide Full range EV 0 to 16 0 wide Exposure mode Programmed AE mode Auto P A S M and C Scene modes Aperture Priority AE f 2 8 f 8 wi...

Страница 88: ...Jog dial Used to adjust Exposure Compensation Aperture Priority AE Shutter Priority AE ISO Flash Compensation Full Manual Exposure Burst mode First Burst 5 pictures Last Burst 4 pictures both 2 0 fps AE AF AWB executed for first shot only Still image buffer 32 MB internal memory Video capture Image size frame rate VGA 640 x 480 at 12 fps QVGA 320 x 240 at 20 fps Image file format Still EXIF 2 21 J...

Страница 89: ...hare camera dock or printer dock Languages English German Spanish French Italian Portuguese Chinese Korean Japanese Other features Self timer 10 seconds Sound feedback Power up shutter self timer error sound modes White balance Auto Daylight Tungsten Fluorescent Open Shade Auto sleep mode Yes 8 minutes Color modes High Color Natural Color Low Color Black White Sepia Sharpness High Normal Low Date ...

Страница 90: ...7 19 21 27 43 32 MB SD MMC 19 22 24 30 48 64 MB SD MMC 39 44 48 60 97 128 MB SD MMC 79 88 97 121 195 256 MB SD MMC 159 178 196 242 391 512 MB SD MMC 319 356 392 485 783 Number of pictures 5 0 MP 4 4 MP 3 2 4 0 MP 3 1 MP 1 8 MP 16 MB SD MMC 4 5 5 7 12 32 MB internal memory 8 9 10 12 21 32 MB SD MMC 9 10 11 14 24 64 MB SD MMC 18 20 23 28 48 128 MB SD MMC 37 41 46 57 97 256 MB SD MMC 74 83 92 115 194...

Страница 91: ...in 47 sec 3 min 23 sec 32 MB SD MMC 1 min 52 sec 3 min 46 sec 64 MB SD MMC 3 min 59 sec 7 min 32 sec 128 MB SD MMC 7 min 59 sec 15 min 4 sec 256 MB SD MMC 15 min 58 sec 30 min 8 sec 512 MB SD MMC 31 min 57 sec 60 min 17 sec If no action for The camera To turn it back on 1 minute EVF LCD screen turns off Press the OK button 8 minutes Enters auto power off Press any button or insert remove card ...

Страница 92: ...r 55 mm threads Kodak 5 volt AC adapter Easy way to extend battery life Plug your camera in while downloading or viewing your pictures Kodak performance series digital camera case Stylish but rugged for Kodak EasyShare series digital cameras Kodak EasyShare Li Ion rechargeable battery 1700 mAh Delivers outstanding capacity and charges up to 300 times in 3 hours or less Kodak Li Ion rapid battery c...

Страница 93: ...ee cloth or an untreated lens cleaning tissue Do not use cleaning solutions unless designed specifically for camera lenses Do not allow chemicals such as suntan lotion to contact painted surfaces Do not place your camera near equipment such as electric motors Electro magnetic induction may corrupt pictures or cause camera malfunctions Rapid changes in temperature can cause harmful condensation Kee...

Страница 94: ...e will include all labor as well as any necessary adjustments and or replacement parts Such repair or replacement is the sole remedy under this warranty If replacement parts are used in making repairs these parts may be remanufactured or may contain remanufactured materials If it is necessary to replace the entire product it may be replaced with a remanufactured product Limitations Request for War...

Страница 95: ...ss of the use of the equipment cost of substitute equipment facilities or services or claims of your customers for such damages resulting from the purchase use or failure of the product regardless of cause or for breach of any written or implied warranty is expressly disclaimed and excluded here from Your rights Some states or jurisdictions do not allow exclusion or limitation of incidental or con...

Страница 96: ... which can be determined by turning the equipment off and on the user is encouraged to try to correct the interference by one or more of the following measures 1 reorient or relocate the receiving antenna 2 increase the separation between the equipment and the receiver 3 connect the equipment to an outlet on a circuit different from that to which the receiver is connected 4 consult the dealer or a...

Страница 97: ...his is a Class B product based on the standard of the Voluntary Control Council for Interference from Information Technology Equipment VCCI If this is used near a radio or television receiver in a domestic environment it may cause radio interference Install and use the equipment according to the instruction manual MPEG 4 Use of this product in any manner that complies with the MPEG 4 visual standa...

Страница 98: ... backlight 21 battery charge via charger 1 expected life 2 extending life 3 inserting 2 safety 4 battery door iv beach 20 bracketing interval 32 burst first last button iv burst using 29 button burst 29 close up landscape 27 delete 15 exposure bracketing 28 flash status 23 On Off 5 on off iii review 45 share iii 56 zoom 16 C cable audio video 52 USB 62 camera accessories 82 camera dock 3 camera sc...

Страница 99: ...splaying slide show 51 disposal recycling 83 distant scenes 27 dock printer 63 dock compatibility 66 dock connector iv downloading pictures 62 E EasyShare software 54 emailing pictures videos 58 er 81 EVF LCD toggle button iii exposure compensation PASM mode 21 exposure bracketing button iv exposure metering 33 external flash 27 external flash connector location ii external video device viewing pi...

Страница 100: ...installing 55 upgrading 83 Kodak web sites 74 L landscape 19 27 landscape button iv language 37 LCD Liquid Crystal Display screen iii LCD EVF toggle button iii lens i cleaning lens 83 light jog dial i power ring iii 72 locator for EasyShare camera dock or printer dock iv M Macintosh installing software on 55 macro mode 44 magnify picture 48 maintenance camera 83 manner 20 manual 18 memory insertin...

Страница 101: ...16 orientation sensor 37 P party 20 PASM mode screen options 21 PictBridge printer 64 picture size 31 picture status iii pictures copying 53 deleting 48 emailing tagged 58 magnifying 48 printing tagged 57 reviewing 45 storage capacity 79 tagging 50 taking modes 17 transfer via USB cable 62 picture taking tips 40 portrait 19 power auto off 81 camera 5 ring iii 72 switch iii printer dock 3 63 printi...

Страница 102: ...SD MMC card printing from 63 SD MMC card slot ii self portrait 20 self timer 30 pictures videos 38 self timer video light i service and support telephone numbers 75 setting AF control 34 album 35 bracketing interval 32 color mode 34 compression 31 date and time 6 digital zoom 36 exposure metering 33 flash 23 focus zone 33 image storage 35 language 37 picture size 31 picture taking mode 17 quickvie...

Страница 103: ...tery guidelines 3 care maintenance 83 picture taking 40 ReadMe file 67 transfer via USB cable 62 trash can deleting 15 tripod socket iv troubleshooting 67 turning camera on and off 5 U upgrading software firmware 83 URLs Kodak web sites 74 USB universal serial bus connection location ii transferring pictures 62 USB port DC in A V out cover ii V VCCI compliance 87 video length 35 video out 37 video...

Страница 104: ...94 www kodak com go support Index Z zoom digital 16 optical 16 zoom lever iii ...

Отзывы: