background image


4. Using the setup menus 


Read this section to learn how to configure your camera   
anduse the advanced features. 


4.1 Picture menu 

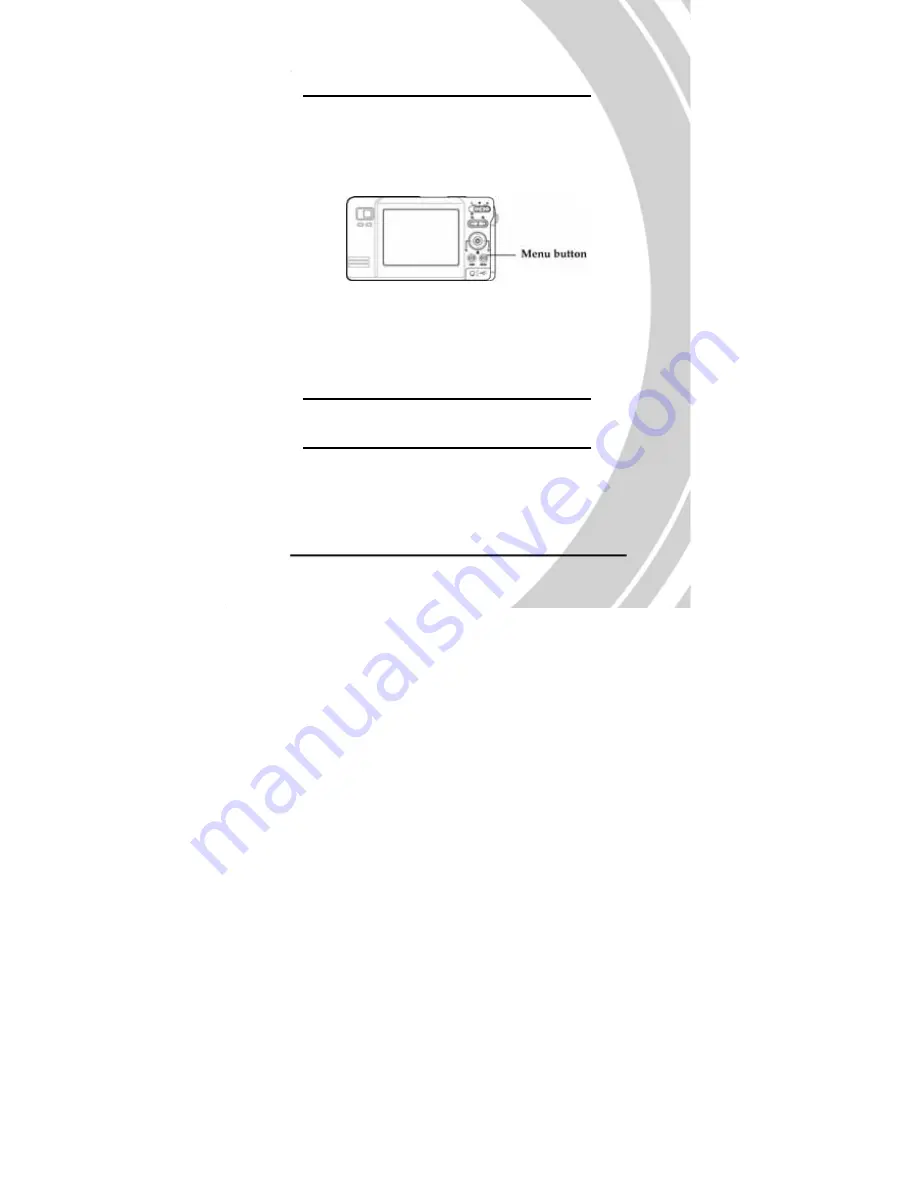
The picture menu appears when the camera is in Photo mode 

and the menu button is pressed. 


The picture menu is available in Photo mode only. 


4.1.1 Camera mode 

The camera mode can be set either to Automatic or Manual. 

When set to Automatic, the camera sets the ISO value, white 
balance, light metering, and focus. When set to Manual, these 
settings are determined by you. 


Note: When in Automatic mode, menu entries for scene, 

white balance, focus, ISO, and metering do not 

appear. 


To set the camera mode: 

1. Turn the camera on and ensure that it is in Photo mode. 

2. Press the menu button. 
3. Use the joystick to highlight the MODE option. 
 
                                              35 

Picture menu 

Содержание CyperPix E585D

Страница 1: ...owever no guarantee is made regarding the accuracy of the contents and the manufac turer reserves the right to make changes without notice Copyright Copyright 2005 All rights reserved No part of this publication may be repro duced transmitted transcribed stored in a retrieval system or translated into any language or computer language in anyform or by any means electronic mechanical magnetic opti ...

Страница 2: ... or melt certain plastics Do not store the product in cold areas When the product warms up to its normal temperature moisture can form inside which may damage the electronic circuits Do not attempt to open the casing Do not drop or knock the product Rough handing may damage the internal components Do not use harsh chemicals cleaning solvents or strong detergents to clean the product Wipe the produ...

Страница 3: ... 3 Back view 4 Top view 4 Getting started Inserting the battery 5 Inserting an SD card 6 Turning on for the first time 7 Before you start 8 Setting the date and time 8 Setting the date type 9 Setting the beep function 10 Setting the language 11 Changing modes 12 Taking your first still picture 13 Shooting your first video 13 Connecting 14 Connecting to a TV 14 iii ...

Страница 4: ...acro function 23 Using the zoom function 24 Capture mode and self timer function 24 Video and voice recorder mode 25 Video mode icons 26 Using the zoom function 27 Using the macro function 27 Playback mode 28 Playback mode icons 28 Viewing pictures and videos 29 Playing voice files 30 Displaying file information 30 Using thumbnail mode 31 Viewing a slide show 31 MP3 mode 32 MP3 mode icons 32 Playi...

Страница 5: ...or 37 Quality 37 White balance 38 Focus selection 38 Exposure adjustment EV 39 ISO adjustment 39 Metering 40 Date stamp 41 Video menu 41 Video and voice recorder mode 41 Video quality 42 Playback menu 42 Delete 42 Protect 43 Slide show delay 44 Copy to card 44 DPOF 44 Setup menu 45 Date and time 45 Date type 45 Number reset 45 v ...

Страница 6: ...Beep 46 Language 46 Power saving 46 Default 46 Format 47 USB mode 47 TV 47 Installing the software and drivers Drivers 49 Presto Video Works 6 50 Presto Mr Photo 3 55 Appendix Specifications 58 vi ...

Страница 7: ...least 32 MB of RAM Standard USB 1 1 port or better 4 x speed CD ROM drive or better At least 10 MB of available disk space Note A USB 1 1 port will enable you to transfer files to and from your host PC but transfer speeds will be much faster with a USB 2 0 port 1 2 Features The camera is packed full of features and functions including Digital still camera 5 1 megapixels Digital camcorder Mass stor...

Страница 8: ...ing items should be present in the camera pack age If any item is missing or appears damaged contact your dealer immediately 2 Unpackingee Digital camera Earphones Wrist strap Camera pouch Alkaline USB TV out AA batteries x2 cable ...

Страница 9: ... About the camera Refer to the following diagrams to familiarize yourself with thebuttons and controls of the camera 1 4 1 Front view 3 CD ROM driver and User s manual application software About the camera ...

Страница 10: ...1 4 2 Back view Note Refer to About the LEDs on 3 3 for informa tion on the camera s LEDs 1 4 3 Top view 4 About the camera ...

Страница 11: ...rting the battery The camera can use either standard AA alkaline batteries or a CR V3 3V lithium battery Note Install the battery exactly as described here Ensure that the polarity of the batteries is correct Installing the batteries incorrectly could cause damage to the camera and possibly start a fire 1 Open the battery door 2 Insert the battery as shown 5 Inserting the battery ...

Страница 12: ...ure that the batteries are inserted the right way Batteries inserted upside down can damage the product and cause a fire 2 2 Inserting an SD card An SD MMC card can be installed in the camera to provide additional storage space for still images videos MP3 or other files To install an SD card 1 Open the battery door 6 Inserting an SD card ...

Страница 13: ...t an SD card as shown Make sure the gold contacts are facing up as shown 3 Close the battery door 2 3 Turning on for the first time Press and hold the power button to turn it on 7 Turning on for the first time ...

Страница 14: ...me To set the date and time 1 Turn the camera on as described in Turning on for the first time on 2 3 2 Press the menu button to display the menu screen 3 Use the joystick to select the tools menu 4 Use the joystick to highlight the date and time option Press the joystick when the option is highlighted 8 Before you start ...

Страница 15: ... Press the joystick button to save the new setting 7 Press the menu button to leave the menu 2 4 2 Setting the date type To set the date type 1 Turn the camera on as described in Turning on for the first time on 2 3 2 Press the menu button to display the menu screen 3 Use the joystick to select the tools menu 9 Before you start ...

Страница 16: ...6 Press the menu button to leave the menu and save the set ting 2 4 3 Setting the beep function To set the beep function 1 Turn the camera on as described in Turning on for the first time on 2 3 2 Press the menu button to display the menu screen 3 Use the joystick to select the tools menu 10 Before you start ...

Страница 17: ...ss the menu button to leave the menu and save the setting 2 4 4 Setting the language To set the language 1 Turn the camera on as described in Turning on for the first time on 2 3 2 Press the menu button to display the menu screen 3 Use the joystick left right to select the tools menu 11 Before you start ...

Страница 18: ...he joystick left right to select the language option English Français Deutsch Español Italiano 繁中 簡中 日本語 Русский 2 5 Changing modes The camera can operate in three modes photo mode video mode and playback mode Use the mode switch to change the mode 12 Changing modes ...

Страница 19: ...icture The picture will automatically be saved with a unique file name 2 7 Shooting your first video Before shooting your first video ensure you have read Before you start on 2 4 To shoot a video 1 Turn on the camera and make sure it is in video mode 2 Use the viewfinder or LCD screen to frame your video 3 Press the shutter button to begin recording 4 Press the shutter button again to stop recordi...

Страница 20: ...ect the cam era to a host computer and to a TV Also learn how to connect the earphones for listening to MP3 audio files 2 8 1 Connecting to a TV Connect the camera to a TV as shown See TV on 4 4 10 for more details about display ing images on a TV screen 14 Connecting ...

Страница 21: ...onnect the camera to a host computer using the USB port as shown See USB mode on 4 4 9 for more information about connecting to a host computer 2 8 3 Connecting the earphones Connect the earphones to the camera as shown 15 Connecting ...

Страница 22: ...3 Using the camera Read this section to learn how to use the camera 3 1 Using the camera buttons All buttons are located on the top and the back of the camera Back 16 Using the camera buttons ...

Страница 23: ...ayback mode Joystick Use to navigate the OSD menus In Photo mode move left to change flash mode right to change capture mode and down to use the macro function Display To switch between LCD display modes Menu Press to display the main OSD menu MP3 Press to enter MP3 mode Power Press to turn power on or off Shutter Press to capture a picture in Photo mode or start stop video record ing in Video mod...

Страница 24: ...e LCD screen or that you don t need the LCD screen to display anything Use the Display button to cycle through the display modes When you turn the camera on the LCD display shows icons and picture by default Press the Display button once to turn off the icons and display only the picture Press the Display button a second time to turn off the LCD display image com pletely Press the Display button a...

Страница 25: ... G Video Power on Recording Mode Front LED Back LED R Back LED G Playback Power on Playing Playing Mode video voice file Front LED Back LED R Back LED G MP3 mode MP3 MP3 reading playback Front LED Back LED R Back LED G USB TV Connecting Connecting ERROR Mode USB to TV Front LED Back LED R Back LED G Legend LED turns on then off blinking LED steady LED 19 About the LEDs ...

Страница 26: ...es and store them in internal memory or on an SD card The camera is in Photomode when the mode switch is in the far right position 3 4 1 Photo mode icons Use the following picture to familiarize yourself with the Photo mode icons and symbols 20 Photo mode ...

Страница 27: ...es in black and white if set to take black and white pictures and in sepia tones to take sepia pictures 4 ISO mode When no number is shown the ISO value is automatic A number indi cates the manually set ISO value 5 Counter to display the number of the cur rent shot and the number of available shots 6 Zoom indicator to show the current zoom status 7 Time and date display 8 Camera shake warning Disp...

Страница 28: ...utomatic mode the F indicates forced flash The flash icon with the line through it indicates that flash is turned off 14 Capture mode indicator Capture mode can be single shot multi shot or self timer 3 4 2 Setting the flash There are five different flash modes To cycle through the flash modes press the joystick to the left The current flash setting is shown by an icon Icon Description Flash is tu...

Страница 29: ...aken to reduce the red eye effect 3 4 3 Using the macro function The macro function enables you to capture images of subjects very close to the lens In macro mode you can focus on subjects as close as 6 cm When not in macro mode the minimum dis tance is 18 cm Use macro mode for subjects 6 18 cm from the camera To switch the macro function on press the joystick down An icon will appear to indicate ...

Страница 30: ...n the zoom bar indicates the point where the optical zoom stops and the digital zoom begins When the optical zoom reaches the end of its range the digital zoom takes over You must take your finger off the zoom button and press it again to start using the digital zoom 3 4 5 Capture mode and self timer function The camera has three capture modes single shot multi shot and self timer Single shot mode...

Страница 31: ...ter button as normal There will be a 10 second delay before the picture is captured A countdown is displayed on the LCD screen A red LED flashes on the front of the camera to indicate that a picture is about to be taken The LED flashes faster as the time expires and stops flashing when the picture is taken 3 5 Video and voice recorder mode Use Video mode to capture video or audio and store it in i...

Страница 32: ...yourself with the Video mode icons and symbols See the table below for a description of each icon and symbol Icon Description 1 Video mode and Voice memo mode icons 2 Counter shows total number of pictures and videos stored in memory 26 Video and voice recorder mode ...

Страница 33: ...ses on the area inside this symbol 6 Record and stop icons STOP is displayed during a recording REC is displayed while not recording 7 Indicates battery status 8 Memory indicator SD card or internal memory 3 5 2 Using the zoom function See Using the zoom function on 3 4 4 3 5 3 Using the macro function See Using the macro function on 3 4 3 27 Video and voice recorder mode ...

Страница 34: ...o the following picture to familiarize yourself with the Playback mode icons and symbols Photo Playback Video Playback See the table below for a description of each icon and symbol Icon Description 1 Photo mode icon 2 Counter to display the number of the current shot and the total number of shots videos 3 Playback mode indicator 28 Playback mode ...

Страница 35: ... zoom in on an image 9 Memory indicator SD card or inter nal memory 3 6 2 Viewing pictures and videos To view pictures and videos 1 Turn the camera on and ensure that it is in playback mode The most recent picture is displayed on the screen 2 Use the joystick to move through the images videos and audio files stored in memory 3 Press the center joystick button to play video and audio files 29 Playb...

Страница 36: ...ion is displayed by default on each image video or audio file when viewed in Playback mode To display detailed information about the still image file currently dis played press the display button All the details are displayed on the screen Press the display button a second time to remove all file infor mation from the screen Press the button a third time to display basic information again Note Aud...

Страница 37: ...eft zoom button to go back to thumbnail view 3 6 6 Viewing a slide show The camera includes a slide show function A slide show dis plays each image in turn with a predefine delay between each picture To view a slide show 1 Turn the camera on and ensure that it is in playback mode The most recent picture is displayed on the screen 2 Press the menu button to display the playback menu 3 Use the joyst...

Страница 38: ...ternal speakers 3 7 1 MP3 mode icons Refer to the following picture to familiarize yourself with the MP3 mode icons and symbols See the table below for a description of each icon and symbol Icon Description 1 MP3 mode icon 2 Counter to display the number of the current track and the total num ber of tracks 32 MP3 mode ...

Страница 39: ...o into MP3 mode 1 Turn the camera on and press the MP3 button 2 Use the left and right joystick control to scroll through the MP3s stored in memory 3 Press the center joystick button to play stop the selected MP3 file 4 Use the up and down joystick control to adjust the volume up and down All the MP3s stored in memory will play one after the other until the last one is finished 33 MP3 mode ...

Страница 40: ...card You can drag and drop files to and from the new remov able drives just like any other drive See also Connecting to a computer on 2 8 2 3 8 2 Connecting to a printer You can connect the camera to a printer and print images directly from the camera Connect to a printer using the USB cable exactly the same way as you would connect a PC To print images to a printer see DPOF on 3 6 6 3 9 Connectin...

Страница 41: ...mode The camera mode can be set either to Automatic or Manual When set to Automatic the camera sets the ISO value white balance light metering and focus When set to Manual these settings are determined by you Note When in Automatic mode menu entries for scene white balance focus ISO and metering do not appear To set the camera mode 1 Turn the camera on and ensure that it is in Photo mode 2 Press t...

Страница 42: ...stick to Select 5 Press the menu button again to leave the menu Note The number represents the number of pixels 8M means 8 megapixels 5M means 5 megapixels VGA is VGA resolution 640 x 480 pixels Multishot mode is not available when the camera is set to 8M 8 megapixels 4 1 3 Scene The scene option can be set to manual in which case focus EV ISO metering and date stamp must be set manually There are...

Страница 43: ...es black and white images or images tinted with a sepia tone to give them an old fashioned look To change the color setting 1 Turn the camera on and ensure that it is in Photo mode 2 Press the menu button 3 Use the joystick to highlight the COLOR option 4 Use the joystick to select the color black and white or sepia 5 Press the menu button again to leave the menu 4 1 5 Quality The picture quality ...

Страница 44: ...nce option can only be changed when the camera mode is set to manual See Camera mode on 4 1 1 To set the white balance 1 Turn the camera on and ensure that it is in Photo mode 2 Press the menu button 3 Use the joystick to highlight the WB option 4 Use the joystick to select Auto sunlight cloudy tungsten or fluorescent light 5 Press the menu button again to leave the menu 4 1 7 Focus selection Use ...

Страница 45: ...p a subject with strong back lighting or decrease the exposure if taking a picture of something very bright To set EV 1 Turn the camera on and ensure that it is in Photo mode 2 Press the menu button 3 Use the joystick to highlight the EV option 4 Use the joystick to move the slider up and down the scale 5 Press the menu button again to leave the menu 4 1 9 ISO adjustment 4 1 9 ISO adjustment The I...

Страница 46: ...ion to determine how the camera light metering is used to calculate the exposure of the picture The metering can be set to an average value across the whole scene a center weighted value or a spot value in the center of the scene Note The metering option can only be changed when the camera mode is set to manual See Camera mode on 4 1 1 1 Turn the camera on and ensure that it is in Photo mode 2 Pre...

Страница 47: ...ect on or off 5 Press the menu button again to leave the menu 4 2 Video menu 4 2 1 Video and voice recorder mode When the camera is in video mode it can be set to record video with sound or just voice with no video To set video and voice recorder mode 1 Turn the camera on and ensure that it is in Video mode 2 Press the menu button 3 Use the joystick to highlight the MODE option 4 Use the joystick ...

Страница 48: ...h medium or low 5 Press the menu button again to leave the menu 4 3 Playback menu Use the playback menu to manage the files stored in the camera memory or on mini SD card 4 3 1 Delete Use the delete function to delete one or all the files on the cur rent memory media To delete files 1 Turn the camera on and ensure that it is in Playback mode 2 Press the menu button 3 Use the joystick to highlight ...

Страница 49: ...hat have been protected will not be deleted See Protect on 4 3 2 for more details about file protection 4 3 2 Protect Use the protect option to protect files from being accidentally deleted To protect a file or files 1 Turn the camera on and ensure that it is in Playback mode 2 Press the menu button 3 Use the joystick to highlight the PROTECT option 4 Use the joystick to select protect the current...

Страница 50: ...y to card Use the copy to card option to copy the contents of the internal memory to the mini SD card To copy internal memory to mini SD card 1 Insert the SD card turn the camera on and ensure that it is in Playback mode 2 Press the menu button 3 Use the joystick to highlight the COPY TO CARD option 4 Press the center joystick button to confirm the action 5 Press the menu button again to leave the...

Страница 51: ...he printed image 7 Press the center joystick to confirm the action 8 Use the joystick to confirm the action 9 Press the center joystick to confirm the action The DPOF information is stored 10 Press the menu button again to leave the menu 4 4 Setup menu The setup menu can be accessed from any camera mode and is used to configure the miscellaneous camera functions 4 4 1 Date and time See Setting the...

Страница 52: ...o set the power saving function 1 Turn the camera on 2 Press the menu button 3 Use the joystick to highlight the setup menu icon 4 Use the joystick to highlight the POWER SAVING option 5 Use the joystick to select OFF 3 minutes 5 minutes or 10 minutes 6 Press the menu button again to leave the menu 4 4 7 Default Use the default option to reset all settings to the factory default To reset factory d...

Страница 53: ...ive and files can be transferred between camera and host computer When connected to a com patible printer images can be printed directly from the camera To set USB mode 1 Turn the camera on 2 Press the menu button 3 Use the joystick to highlight the setup menu icon 4 Use the joystick to highlight the USB MODE option 5 Use the joystick to select PC or printer 6 Press the menu button again to leave ...

Страница 54: ...5 Use the joystick to select PAL or NTSC 6 Press the menu button again to leave the menu 48 Setup menu ...

Страница 55: ...operating system is Windows 98SE or Windows ME Windows 2000 and Windows XP are plug and play operating systems and do not require a driver to be manually loaded To load a driver 1 Insert the supplied CD ROM in the CD ROM drive 2 If the CD ROM doesn t automatically boot use Windows Explorer to execute the InstallMgr exe file in the root directory The following screen is displayed 49 Drivers ...

Страница 56: ...river automatically When the driver has been installed and the camera connected the camera memory and any installed mini SD card will appear as removable disks in Windows Explorer Files can be dragged and dropped in the same way as an ordinary disk 5 2 Presto Video Works 6 Presto Video Works 6 is an advanced software application for editing video To install Presto Video Works 6 1 Insert the suppli...

Страница 57: ...is displayed 3 Click the install button to begin the installation process fol low the instructions on screen 4 Select the language and press OK 5 Read the legal disclaimer and click Yes if you agree 51 Presto Video Works 6 ...

Страница 58: ...6 Select the version of English required if applicable 7 Click next to continue 8 Click Yes to agree to the licence agreement 52 Presto Video Works 6 ...

Страница 59: ... default installation directory or Browse to select one of your own 10 Click Next to select the default menu entry or add one of your own A status bar shows installation progress 11 Click Yes to continue 53 Presto Video Works 6 ...

Страница 60: ... you want to view the read me file 14 Presto Video Works 6 can be set to launch automatically when certain devices like the camera are connected Use the setting screen shown here to deter mine which devices affect Presto Video Works 6 More information about Presto Video Works 6 can be found in the help files when the application is started 54 Presto Mr Photo 3 ...

Страница 61: ...D ROM drive 2 If the CD ROM doesn t automatically boot use Windows Explorer to execute the InstallMgr exe file in the root directory The following screen is displayed 3 Click the install button to begin the installation process fol low the instructions on screen 4 Select the language and press OK 5 Click next to start the installation 55 Presto Mr Photo 3 ...

Страница 62: ... agree to the licence agreement 7 Click Next to select the default installation directory or Browse to select one of your own 8 Click Next to select the default menu entry or add one of your own 56 Presto Mr Photo 3 ...

Страница 63: ...ertain devices like the cam era camera are connected Use the setting Screen shown here to determine which devices affect Presto Mr Photo 3 10 Click Finish to complete the installation More information about Presto Mr Photo 3 can be found in the help files when the application is started 57 Presto Mr Photo 3 ...

Страница 64: ...ide f 5 8 mm F2 6 F4 8 Tele f 17 4 mm F4 3 F7 6 Focus Range 0 4m infinity ZP1 4 0 06 0 3m ZP5 7 0 18 0 3m macro Still image Formats JPEG EXIF DCF DPOF Direct Print DPS Resolution VGA 2M 3M 4M 5M 8M firmware interpolation Quality Fine Normal Basic Movie clips MPEG4 320 x 240 pixels 30 fps Audio Support for MP3 audio format Zoom 3x optical zoom 4x digital zoom LCD TFT screen 2 4 inch High resolution...

Страница 65: ...compensation 2 0 EV 2 0 EV in 0 2 EV steps Self timer 10 seconds PC interface USB 2 0 full speed TV out format NTSC PAL Shutter Mechanical and electronic shutter 8 1 2000 second Auto power off off 3 5 or 10 minutes user definable Power supply 2 x AAalkaline batteries CRV3 compatible Dimension 102 x 59 x 28 mm Weight 136g without batteries 59 Specifications ...

Страница 66: ...59 ...

Отзывы: