background image

KLINDEX

KLINDEX

KLINDEX

KLINDEX


S.

S.

S.

S.

R

R

R

R

....

L

L

L

L

....    

L E V I G H E T O R


T 5 - T 7


Data ultimo aggiornamento:  11/05/2007


Pag. 11 di  23 


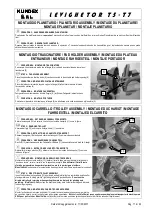
MONTAGGIO PLANETARIO / PLANETARIO ASSEMBLY / MONTAGE DU PLANETAIRE/ 

MONTAGE PLANETAR / MONTAJE PLANETARIO 


OPERAZION 3:   AUßERNANDER NEHMEN PLANETARIUM 

Positionieren Sie die Maschine wie in 

operation 1

 machen Sie kraft auf zwei von den drei Satelliten, rotieren Sie das Planetarium bis es sich vom Rest der Maschine 

trent. 


OPERACIONE 3:   DESMONTAJE PLANETARIO 

Despues haber colocado la maquina como se indica en la operaciòn n°1 haciendo fuerza sobre dos de los tres satelites, girar  el planetario de manera que se pueda 
obtener la separaciòn de la maquina. 


MONTAGGIO TRASCINATORE / PAD HOLDER ASSEMBLY / MONTAGE DU PLATEAU 

ENTRAINEUR / MONTAGE FAHRGESTELL / MONTAJE PORTADOR 


OPERAZIONE 4:   MONTAGGIO TRASCINATORE 

Posizionare il trascinatore in modo che la flangia (8) si vada ad inserire nella sede ricavata sul 
trascinatore (9) 


STEP 4:   PAD HOLDER ASSEMBLY 

Place the pad holder so that the clutch (8) can be connected to the suitable pad holder opening (9)


OPERATION 4: MONTAGE DU PLATEAU ENTRAINEUR 

Placer le plateau entraineur de façon à ce que la flange (8) aille s’insérer dans la forme de 
l’accroche du plateau (9).


OPERAZION 4:   MONTAGE FAHRGESTELL


Fahrgestell so positionieren das sich die 

flangia

 ( 8 ) im Sitz am Fahrgestell einrasten kann


OPERACON 4:   MONTAJE  PORTADOR


Posicionar el planetario  en manera que la flangia (8) se introdusca en la sede recabada en el planetario (9).


MONTAGGIO CARRELLO / TROLLEY ASSEMBLY / MONTAGE DU CHARIOT / MONTAGE 

FAHRGESTELL / MONTAJE DEL CARRITO 


OPERAZIONE 5:   ESTRAZIONE CARRELLO TRASPORTO 

Svitare la manopola (10) ed estrarre il carrello con ruote da trasporto (11) come in figura. 


STEP 5:   REMOVING TROLLEY 

Unscrew ball grip (10) and remove trolley wheels (11) as pictured.


OPERATION 5: EXTRACTION DU CHARIOT DE TRANSPORT 

Dévisser la poignée (10) et extraire le chariot de transport (11) comme indiqué sur la photo.


OPERAZION 5:   HERRAUSZIEHEN  FAHRGESTELL


Den Griff (10) ausschrauben und den Fahrestell mit Rädern (11) herraus ziehen wie in der Abb. Gezeigt


OPERACON 5:   EXTRACION DEL CARRITO TRANSPORTE


Destornillar el mango esferico (10) y extraer el carrito con las ruedas de transporte (11) como se 
indica en la figura. 


OPERAZIONE 6:   MONTAGGIO CARRELLO RUOTE SFERICHE 

Montare il carrello con ruote a sfera (12), livellare il carrello dopo aver posizionato la levigatrice in 
“posizione lavoro”, serrare il carrello con le apposite manopole.  

N

ON

 utilizzare il 

Carrello ruote 

sferiche 

 per spostare o trasportare la macchina, ma 

SOLO 

per levigare e lucidare.     

M

ANUTENZIONE

pulire sempre le ruote sferiche dopo ogni lavoro e lubrificare regolarmente i cuscinetti. 


STEP 6:   DIRECTIONAL TROLLEY ASSEMBLY 

Insert the directional trolley wheels (12) as pictured, and adjust trolley in a comfortable position after 
placing machine in “working position” tightening trolley with provided knobs.  

Do not use the 

directional trolley for carrying or transporting the machine, but only for grinding and 
polishing.    M

AINTENACE

Always clean the directional trolley each time after working and lubricate 

the bearings regularly. 


OPERATION 6: MONTAGE DU CHARIOT ROUES A SPHERES


Monter le chariot avec les roues à sphères (12) niveler le chariot après avoir positionné la machine


en « position travail », serrer le chariot avec les poignées opportunes.  

N

E PAS UTILISER

 le 

Chariot roues a sphéres

 pour déplacer ou transporter la machine, mais 

SEUL pour polir et cirer.  M

ANUTENTION

:  

nettoyer toujours les roues a sphéres après chaque travail et lubrifier les coussinet régulièrement.


10 

11 

12 

Содержание Levighetor T5

Страница 1: ...ine or other property could occur You must receive training in the operation of this machine before operating it If you or your operator s cannot read English have this manual explanained very well be...

Страница 2: ...macchina come un gradino o come una sedia Non permettere che sia usata come un giocattolo presta particolare attenzione se devi necessariamente usarla vicino ai bambini Non permettere che sia usata d...

Страница 3: ...he machine may short out or burn out if openings and or cooling vents are blocked DO NOT put any object into the openings DO NOT use with wet hands DO NOT handle plug or appliance with wet hands WARNI...

Страница 4: ...tilis e comme un jouet pr ter une particuli re attention si vous devez obligatoirement l utiliser pr s d enfants Ne pas permettre qu elle soit utilis e par des enfants DANGER D placer ou modifier des...

Страница 5: ...rs Acht Nicht von Kindern benutzen lassen GEFAHR Das tauschen von Teilen kann zu Verletzungen oder Schaden f hren Halte H nde F e Haare Finger oder sonstige K rperteile von ffnungen und Teile in Beweg...

Страница 6: ...juguete tene cuiddo si debe emplearla cerca de los ni os Non permite l empleo a los ni os PELIGRO Desplazar o modificar componentes de esta m quinq puede causar heridas y o da os Tenga manos pies cabe...

Страница 7: ...i che tutte le disposizioni di legge e o i permessi relativi all uso siano rispettati L operatore deve anche accertarsi delle condizioni di sicurezza come a sistema elettrico sufficiente b assenza di...

Страница 8: ...ierra ADVERTENCIA No respectar cuanto es dicho antes libera el fabricante da cualquier responsabilidad Cualquiera utize la maquina tiene que asegurarse que todas las disposiciones de leyes y o los per...

Страница 9: ...CHA DE LA MAQUINA Poner en marcha la maquina unicamente por el interruptor nunca conectando e desconectando el enchufe Jam s tirar el cable eletrico para apagar o desconectar la corriente Jam s presio...

Страница 10: ...la posici n figurada apoyandola en el piso gracias a la barra movil OPERAZIONE 2 MONTAGGIO PLANETARIO Posizionare il planetario in modo che il riferimento 6 si inserisca tra i due blocchi indicati con...

Страница 11: ...te da trasporto 11 come in figura STEP 5 REMOVING TROLLEY Unscrew ball grip 10 and remove trolley wheels 11 as pictured OPERATION 5 EXTRACTION DU CHARIOT DE TRANSPORT D visser la poign e 10 et extrair...

Страница 12: ...le sol Ins rer l extr mit libre du tube de l eau dans le trou pr sent sur le plan taire indiqu avec 14 Positionner le poids indiqu avec 15 comme montr sur la photo OPERAZION 7 MONTAGE UND REGULIERUNG...

Страница 13: ...pictured On the aluminium plate there are some incisions where the screwdriver can be inserted to lever up the tool OPERATION 9 DEMONTAGE DES ABRASIFS Apr s avoir positionn la machine comme d crit da...

Страница 14: ...82 M6 1 59 CEG001 CAPICORDA BLU AD OCCHIELLO 4 3 3 16 VITE UNI 6954 M3 9X16 2 60 CM01501 PIASTRA PER ASTA MANICO 1 17 CM01701 BARRA FILETTATA 6 PER GANCIO 1 62 VITE UNI 8118 M4 2X13 4 21 CM06702 INTER...

Страница 15: ...982 M6 1 59 CEG001 CAPICORDA BLU AD OCCHIELLO 4 3 3 16 VITE UNI 6954 M3 9X16 2 60 CM01501 PIASTRA PER ASTA MANICO 1 17 CM01701 BARRA FILETTATA 6 PER GANCIO 1 62 VITE UNI 8118 M4 2X13 4 21 CM06702 INT...

Страница 16: ...CERNIERA 1 KIT SUPPORTO COMANDO MACCHINA RINFORZATO REINFORCED MACHINE SUPPORT SET Cod CM1601 N Codice Descrizione Quant 1 ANELLO SEEGER 20 ALBERO UNI 7435 20 2 2 DADO AUTOBLOCCANTE M8 DIN 982 6 3 VIT...

Страница 17: ...11 1 11 PGE013 PRESSACAVO PG 16 2 12 LCE001 SPIA LUMINOSA 24V 1 13 CM06801 SUPPORTO SCATOLA DI AZIONAMENTO 2 14 VITE TCEI M6X10 UNI 5931 4 15 VITE TSEI M6X18 UNI 5933 4 KIT SCATOLA DI AZIONAMENTO L MA...

Страница 18: ...9 29x3 53 1 10 ANELLO ELASTICO UNI7435 24 3 11 RD04201 RONDELLA 1 12 RD03801 BOCCOLA 1 13 CUSCINETTO 16008 CUSCINETTO A SFERE 2 14 GUA002 PARAOLIO 50x68x8 1 16 RD08301 PIGNONE MOTORE 380 1 19 VITE TSE...

Страница 19: ...kW N Codice Descrizione Quant 1 MOTORE ELETTRICO 380V 1 2 PGE013 BLOCCA CAVO PG16 1 3 CEG015 GUAINA CORRUGATA L 4m 1 4 MOT060 COPRIVENTOLA PARAPIOGGIA PER M112A4 1 5 MOT061 PORTA INTERRUTTORE RELATIV...

Страница 20: ...UNI 5931 2 3 CA05301 ALBERO DI INTERFACCIA 2 4 COPIGLIA 4X20 UNI 1336 2 5 ROSETTA M12 UNI 6592 2 6 RTO006 RUOTA ANTITRACCIA 80 25 12 2 7 MOL006 MOLLA E 45 L 65 2 8 CA05201 ALBERO GUIDA 2 9 CA19401 RON...

Страница 21: ...nueva Modello Model LEVIGHETOR T5 T7 conforme alle seguenti Direttive Conforms to the following Directive Est conforme aux Directives Es conforme a las siguientes Directivas Direttiva Macchine 98 37 C...

Страница 22: ...nessun tipo n altre forme di risarcimento di qualsiasi genere Non ci sono altre garanzie oltre a quelle qui specificate Non ci sono altre forme di garanzia che si estendono oltre quelle qui descritte...

Страница 23: ...l uso de el producto La garant a no cubre las piezas de consumo cables el ctricos piezas de goma tubos cepillos partes el ctricas etc En caso de cualquier dificultad durante el uso de la m quina se de...

Отзывы: