Kingray KDM401a, Инструкция по эксплуатации
Инструкция по эксплуатации для Kingray KDM401a доступна для бесплатного скачивания с manualshive.com. В этом руководстве вы найдете все необходимые указания для использования продукта. Необходимо загрузить руководство перед началом использования устройства.
Поделиться
Скачать


Отзывы:
Нет отзывов
Похожие инструкции для KDM401a
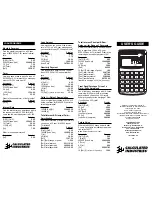
3265
Бренд: Calculated Industries Страницы: 2

GOLDEN ERA
Бренд: Tefi Vintage Lab Страницы: 2

HQ-Power Lite-Puter LPTA410
Бренд: Velleman Страницы: 15

Minimod HD
Бренд: iSys Страницы: 12

FH-150
Бренд: Casio Страницы: 4

TI-84 Plus
Бренд: kENDALL Страницы: 3

HDMT 263
Бренд: GSS Страницы: 22

HMPT 1000 FM
Бренд: GSS Страницы: 30

HDTV 1000 ASI LAN
Бренд: GSS Страницы: 45

HDMT 1000 ASI LAN
Бренд: GSS Страницы: 43

HDTV 1000 T
Бренд: GSS Страницы: 48

EC-252
Бренд: Radio Shack Страницы: 28

ConcreteCalc
Бренд: Calculated Industries Страницы: 64

OTM-3000-I
Бренд: Olson Technology Страницы: 19

HP-80
Бренд: HP Страницы: 92

NW280-200X
Бренд: HP Страницы: 555

OfficeCalc 200
Бренд: HP Страницы: 19

LaserJet Pro 300
Бренд: HP Страницы: 196


