


55
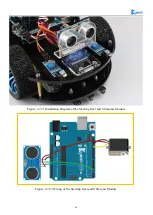
Figure .3.2.19 Wire connection diagram
3.2.3.5 Experimental Procedures
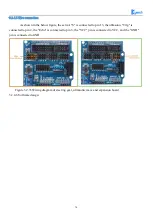
1, We need to connect it to the Arduino as shown in Fig.3.2.19.
2, Making the track.If your floor is white, then you could stick a black tape to form a loop, otherwise
stick a white tape, the shape of track is based on your own desires, the best width of the tape is 13-18mm. In
this manual, we use the black track, as shown in Fig.3.2.20.
3, Module test. We should copy the following codes to the IDE compiler environment (you can also
open the program in the CD directly) and downloading to the development board, and open the serial port
monitor (
baud rate is 9600
) to observe the changes of data when there is the white line (Fig. 3.2.21) and is
not the white line (Figure 3.2.22).
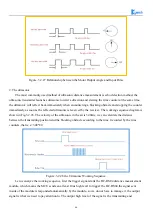
Program flow chart is as follows:
Содержание Hummer-Bot-1.0
Страница 1: ...Hummer Bot 1 0 Instruction Manual V 2 0 ...
Страница 18: ...15 Step4 You need to install motors Figure 3 1 5 Schematic diagram of motor installation ...
Страница 50: ...47 Figure 3 2 15 Diagram of Data without Obstacles ...
Страница 83: ...80 Test code Path hummer bot Lesson ModuleDemo IrkeyPressed IrkeyPressed ino ...


