4
List of spare parts page 22 - 23
When ordering spare parts, always state the full article number,
spare-part number, the quantity required and the inspection num-
ber stamped on the back.
Example order:
Art. no. 07978-900 / spare-part no.
94601775/ 2 pieces / inspection no. .................... Please keep
original packaging of this article, so that it may be used for trans-
port at a later date, if necessary
Important:
spare part prices do
not include fastening material; if fastening material (bolts, nuts,
washers etc.) is required, this should be clearly stated on the or-
der by adding the words
„with fastening material“.
KETTLER (GB) Ltd.
Merse Road · North Moons Moat · Redditch, Worcestershi-
re B98 9HL · Great Britain
KETTLER International Inc.
1355, P. B. 2747 · Virginia Beach · VA 23450 USA
http://www.kettler.net
USA
GB
Handling the equipment
■
Before using the equipment for exercise, check carefully to en-
sure that it has been correctly assembled.
■
Do not set the equipment up in rooms which are frequently used
or close to doors, entries etc.
■
It is not recommended to use or store the apparatus in a damp
room as this may cause it to rust.
Please ensure that no part of
the machine comes in contact with liquids (drinks, perspiration
etc.). This may cause corrosion.
■
The rowing machine must be set up on an even impact-resistant
base. To absorb the vibrations, lay a straw or rubber mat under
the machine.
■
The product is designed for use by adults and children should
not be allowed to play with it. Children at play behave unpre-
dictably and dangerous situations may occur for which the man-
ufacturer cannot be held liable. If, in spite of this, children are
allowed to use the equipment, ensure that they are instructed in
its proper use and supervised accordingly.
■
A few drops of viscous oil should be applied to the bearing
sleeves of the hydraulic absorbers and the rowing levers. Care
should be taken that the oil does not drip onto the floor!
■
After a longer period of disuse, the hydraulic absorbers may not
achieve their best performance at once. Before beginning exer-
cising or after a period of disuse, it is recommended to activate
the absorbers by several pumping movements.
■
Do not use corrosive or abrasive materials to clean the equip-
ment. Ensure that such materials are not allowed to pollute the
environment.
■
To operate correctly, the pulse function requires a minimum volt-
age of 2,7 volts.
■
Please ensure that liquids or perspiration never enter the ma-
chine or the electronics.
■
Before use, always check all screws and plug-in connections as
well as respective safety devices fit correctly.
■
When training intensivly shock absorbers may become very hot.
Please avoid contact and do not touch the shock absorbers af-
ter training.
Instructions for Assembly
■
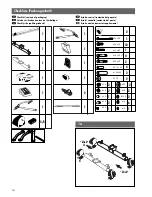
Ensure that you have received all the parts required (see check
list) and that they are undamaged. Should you have any cause
for complaint, please contact your KETTLER dealer.
■
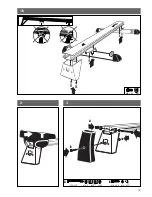
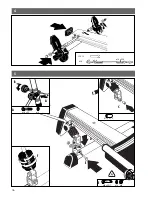
Before assembling the equipment, study the drawings carefully
and carry out the operations in the order shown by the dia-
grams. The correct sequence is given in capital letters.
■
Please note that there is
always
a danger of injury when work-
ing with tools or doing manual work. Therefore please be care-
ful when assembling this machine.
■
Ensure that your working area is free of possible sources of dan-
ger, for example don’t leave any tools lying around. Always dis-
pose packaging material in such a way that it may not cause
any danger. There is always a
risk of suffocation
if children
play with plastic bags!
■
The equipment must be assembled with due care by an adult
person. If in doubt call upon the help of a second person, if pos-
sible technically talented.
■
The fastening material required for each assembly step is shown
in the diagram inset. Use the fastening material exactly as in-
structed. The required tools are supplied with the equipment.
■
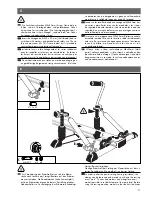
Bolt all the parts together loosely at first, and check that they
have been assembled correctly. Tighten the locknuts by hand un-
til resistance is felt, then
use spanner to finally tighten nuts com-
pletely against resistance (locking device).
Then check that all
screw connections have been tightened firmly.
Attention:
once
locknuts have been unscrewed they no longer function correctly
(the locking device is destroyed), and must be replaced.
■
For technical reasons, we reserve the right to carry out prelimi-
nary assembly work (e.g. addition of tubing plugs).
Assembly Instructions
GB
mounted in the immediate vicinity of main passageways (paths,
doorways, corridors).
■
The product is not suitable for use by persons weighing over
130 kg.


