background image

OLM-1-BA-e-1610 


  16 

5.3  Adjusting the interpupillary distance 

 
With  binocular  viewing,  the  interpupillary  distance 
must  be  adjusted  accurately  for  each  user,  in  order 
to achieve a clear image of the object. 
While  you  are  looking  through  the  eyepieces,  use 
your  hands  to  hold  the  righthand  and  lefthand  tube 
housing firmly. By pulling them apart or pushing them 
together,  you  can  either  increase  or  reduce  the 
interpupillary  distance 

(see  illustration)

.  As  soon  as 

the  field  of  views  of  the  lefthand  and  righthand 
eyepieces completely overlap each other, i.e. they combine to form a circular image, 
then the interpupillary distance is set correctly.


5.4  Dioptre adjustment 

 
The eye strengths of each eye of the microscope user can often be slightly different, 
which  in  daily  life  has  no  consequences.  But  when  using  a  microscope  this  can 
cause problems in achieving precise focussing. 
 
You  can  use  a  mechanism  on  both  tube  connectors  (dioptre  adjustment  rings)  to 
compensate for this as follows. 
 
1.  Put the right dioptre adjustment ring to position 0. 


2.  Look through the right eyepiece with the right eye and bring the object into focus 

by using the coarse and fine adjustment knob. 


3.  Then look through the left eyepiece with the left eye and use the lefthand dioptre 

adjustment ring to focus the image.  
To do this, you just need to turn the ring in both directions 

(see illustration)

, to find 

out where the image is at its most focussed. 


Содержание OLM 171

Страница 1: ...hn GmbH Ziegelei 1 D 72336 Balingen E mail info kern sohn com Tel 49 0 7433 9933 0 Fax 49 0 7433 9933 149 Internet www kern sohn com User instructions Metallurgical inverted microscope KERN OLM 1 OLM...

Страница 2: ......

Страница 3: ...ly 10 4 1 Reflected light unit 11 4 2 Objectives 12 4 3 Eyepieces 13 4 4 Specimen stage 13 5 Operation 14 5 1 Getting started 14 5 2 Pre focussing 15 5 3 Adjusting the interpupillary distance 16 5 4 D...

Страница 4: ...n additional risk of triggering an electric shock 1 2 Notes on the electrical system Before connecting to a mains power supply you must make sure that you are using the correct input voltage The infor...

Страница 5: ...ch are too high or too low vibrations dust or a high level of humidity The ideal temperature range is between 0 and 40 C and a relative humidity of 85 should not be exceeded The device should always b...

Страница 6: ...these are highly flammable substances You must therefore keep it away from naked flames and electrical devices which can be switched on and off and only use it in well ventilated rooms However organi...

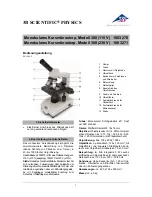
Страница 7: ...OLM 1 BA e 1610 6 2 Nomenclature...

Страница 8: ...7 OLM 1 BA e 1610...

Страница 9: ...1610 8 3 Technical data Features Product dimension 271 379 747 mm Packing dimensions 660x590x325 mm Net weight 12 5 kg Gross weight 17 kg Input voltage AC 100 240V 50 60Hz Output voltage DC 1 2 6V Fus...

Страница 10: ...9 OLM 1 BA e 1610...

Страница 11: ...OLM 1 BA e 1610 10 4 Assembly...

Страница 12: ...pertures Afterwards you must establish the electrical connection between the lamp housing and the integrated power supply unit of the microscope The plug of the connection cable 3 has to be installed...

Страница 13: ...he specimen stage and screw them into the nosepiece so that when you turn the nosepiece in a clockwise direction the objective with the next strongest magnification appears You must make sure that you...

Страница 14: ...You should always make sure that you do not touch the lenses with your bare fingers and that no dust enters the apertures 4 4 Specimen stage The supplied stage plate 1 needs to be fitted to the openi...

Страница 15: ...switch on the lighting using the main switch The next step is to place a sample on the specimen stage see left illustration 1 For the models of the OLM 1 series you can fixate the samples on the stage...

Страница 16: ...sable no matter how sharp then you should only adjust the focus using the fine adjustment knob Adjusting the torque of the coarse and fine adjustment knob Next to the left adjustment wheel for the coa...

Страница 17: ...lary distance is set correctly 5 4 Dioptre adjustment The eye strengths of each eye of the microscope user can often be slightly different which in daily life has no consequences But when using a micr...

Страница 18: ...ing individual objectives You should use the black ring below the objectives When rotating the nosepiece you must always make sure that the objective which is about to be positioned in the beam path d...

Страница 19: ...sses symbol on the side They are also marked in the item description by an additional H example HSWF 10x 23 mm When fitting the eye cups make sure that the dioptre setting is not moved We would theref...

Страница 20: ...r slide has one round aperture If needed the supplied blue filter has to be inserted into this aperture Subsequently the filter slide must be put into the slot on the connection point between the refl...

Страница 21: ...re you previously have to loosen the appropriate Allen screw 1 Now the defective bulb can be pulled out of the socket and be replaced with a new one 4 We recommend that here you should also test again...

Страница 22: ...d you can pull out the housing When doing this it is helpful to use a screwdriver or similar tool see left illustration The defective fuse can be removed from its housing and be replaced with a new on...

Страница 23: ...first adjust the field of view using the eyepieces on the device for the existing requirements and then carry out the observation using the microscope camera i e using the PC screen which is connected...

Страница 24: ...condenser has not been correctly centred The field of view is dark or is not correctly illuminated The objective is not positioned correctly on the beam path The selector switch for the beam path is...

Страница 25: ...object One side of the image is blurred The stage was not correctly fitted The objective is not positioned correctly on the beam path The nosepiece is not correctly fitted The image flickers The nosep...

Страница 26: ...materials which you can dispose of at your local recycling centre Disposal of the storage box and device must be carried out by the operator in accordance with all national or regional laws in force...

Страница 27: ...OLM 1 BA e 1610 26 Notes...

Отзывы: