background image

14

ENGLISH

Data Size: 

B6L (182 mm x 128 mm)

Book Size: 

B6L (182 mm x 128 mm)

DISPLAY SETTINGS

Default: 

XX

 DISPLAY

 COLOR  SELECT

(For 

 / 

 / 

 )

Select color for 

ALL ZONE

ZONE 1

 and 

ZONE 2

 separately.

1

  Select a zone. (See the illustration on page 13.)

2

  Select a color for the selected zone.


INITIAL COLOR

/

VARIABLE SCAN

/

CUSTOM R/G/B

/preset colors*

To make your own color, select 

[CUSTOM R/G/B]

. The color you have 

made will be stored in

 [CUSTOM R/G/B]

.

1

  Press the volume knob to enter the detailed color adjustment.

2

 Press 

S

 / 

T

 to select the color (

R

/

G

/

B

) to adjust.

3

  Turn the volume knob to adjust the level (

0

 to 

9

), then press the knob.

 DIMMER

Dim the illumination.

ON

: Dimmer is turned on. ; 

OFF

: Cancels.

DIMMER TIME

: Set the dimmer on and off time.

1

  Turn the volume knob to adjust the 

[ON]

 time, then press the knob.

2

  Turn the volume knob to adjust the 

[OFF]

 time, then press the knob.

(Default:

[ON]

PM6:00

6:00PM

18:00

 ; 

[OFF]

AM6:00

6:00AM

6:00

)

BRIGHTNESS

1

  Select a zone. (See the illustration on page 13.)

2


0

 — 

31

: Select your preferred brightness level for the selected zone.

TEXT SCROLL

AUTO

/

ONCE

: Select whether to scroll the display information 

automatically, or scroll only once. ; 

OFF

: Cancels.

*

 Preset colors: 

RED1

/

RED2

/

RED3

/

PURPLE1

/

PURPLE2

/

PURPLE3

/

PURPLE4

/

BLUE1

/

BLUE2

/

BLUE3

/

SKYBLUE1

/

SKYBLUE2

/

LIGHTBLUE

/

AQUA1

/

AQUA2

/

GREEN1

/

GREEN2

/

GREEN3

/

YELLOWGREEN1

/

YELLOWGREEN2

/

YELLOW

/

ORANGE1

/

ORANGE2

/

ORANGERED

REFERENCES

 Maintenance

Cleaning the unit

Wipe off dirt on the faceplate with a dry silicone or soft cloth.

 Cleaning the connector

Detach the faceplate and clean the connector gently 
with a cotton swab, being careful not to damage 
the connector.

Handling discs

  Do not touch the recording surface of the disc.

  Do not stick tape etc. on the disc, or use a disc with tape stuck on it.

  Do not use any accessories for the disc.

  Clean from the center of the disc and move outward.

  Clean the disc with a dry silicone or soft cloth. Do not use any solvents.

  When removing discs from this unit, pull them out horizontally.

  Remove burrs from the center hole and disc edge before inserting a disc.

 More information

For:  – Latest firmware updates and latest compatible item list


– Any other latest information

Visit <www.kenwood.com/cs/ce/>.

General

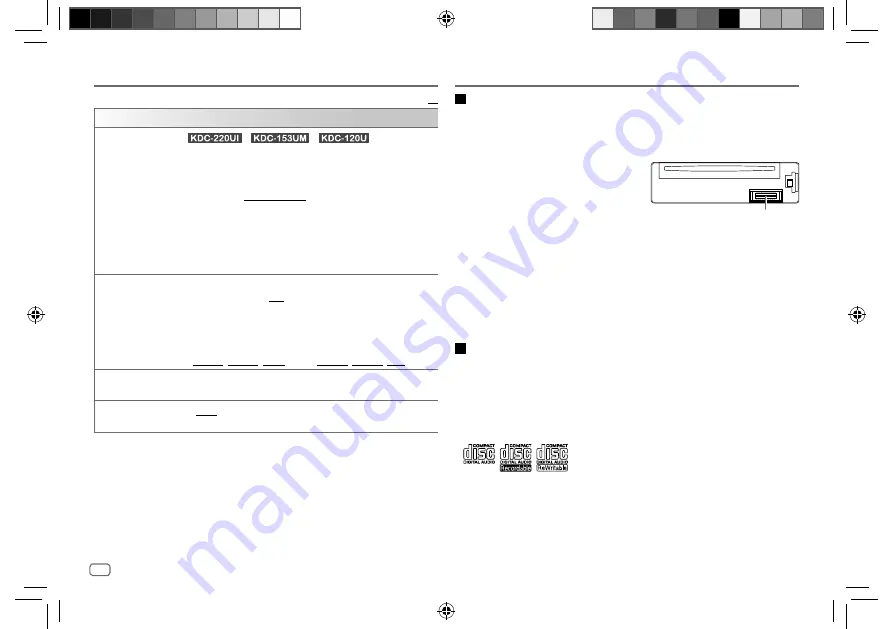
  This unit can only play the following CDs:


  For detailed information and notes about the playable audio files, visit 

<www.kenwood.com/cs/ce/audiofile/>.

Connector (on the reverse 
side of the faceplate)

JS_KWD_KDC_220UI_MN_EN_3.indd   14

JS_KWD_KDC_220UI_MN_EN_3.indd   14

6/14/2017   8:59:29 AM

6/14/2017   8:59:29 AM

Содержание KDC-1030U

Страница 1: ... 182 mm x 128 mm KDC 220UI KDC 1030U CD RECEIVER INSTRUCTION MANUAL B5A 2091 00 MN HN M2N 2017 JVC KENWOOD Corporation KDC 153UM KDC 120U JS_KWD_KDC_220UI_MN_C00_3 indd 1 JS_KWD_KDC_220UI_MN_C00_3 indd 1 6 14 2017 8 53 16 AM 6 14 2017 8 53 16 AM ...

Страница 2: ...oss of recorded data Never put or leave any metallic objects such as coins or metal tools inside the unit to prevent a short circuit If a disc error occurs due to condensation on the laser lens eject the disc and wait for the moisture to evaporate Depending on the types of cars the antenna will automatically extend when you turn on the unit with the antenna control wire connected 21 22 Turn off th...

Страница 3: ... repeatedly Press SRC repeatedly Change the display information Press DISP repeatedly 16 Not available Faceplate How to reset Attach Detach Remote control RC 406 Except for Flashes when the unit enters searching status Display window Pull out the insulation sheet when using for the first time Your preset adjustments will be erased except stored radio stations How to replace the battery Remote sens...

Страница 4: ...ss the knob 1 2 To set the date 7 Turn the volume knob to select DATE FORMAT then press the knob 8 Turn the volume knob to select DD MM YY or MM DD YY then press the knob 9 Turn the volume knob to select DATE SET then press the knob 10 Turn the volume knob to make the settings then press the knob Day Month Year or Month Day Year 11 Press and hold to exit To return to the previous setting item pres...

Страница 5: ...tion OFF Disables 10 BUILT IN AUX ON Enables AUX in source selection OFF Disables 7 P OFF WAIT For Applicable only when the demonstration mode is turned off Sets the duration when the unit will automatically turn off while in standby mode to save the battery 20M 20 minutes 40M 40 minutes 60M 60 minutes WAIT TIME Cancels CD READ 1 Automatically distinguishes between audio file disc and music CD 2 F...

Страница 6: ... for another station broadcasting the same program in the same Radio Data System network with better reception when the current reception is poor OFF Cancels 1 AM SW1 SW2 stations only FM stations only 2 Default OFF Default ON Selectable band FM1 FM2 FM3 AM SW1 SW2 FM1 FM2 FM3 AM Search for a station 1 Press repeatedly to select RADIO 2 Press repeatedly or press on the remote control to select the...

Страница 7: ... SEARCH is selectable only when the band is FM1 FM2 FM3 If the volume is adjusted during reception of traffic information alarm or news bulletin the adjusted volume is memorized automatically It will be applied the next time traffic information alarm or news bulletin is turned on AUX Preparation Select ON for BUILT IN AUX in SOURCE SELECT 5 Start listening 1 Connect a portable audio player commerc...

Страница 8: ... cable inside the car when not using 3 When connecting an Android device Press VIEW to install KENWOOD MUSIC PLAY APP is shown Follow the instructions to install the application You can also install the latest version of KENWOOD MUSIC PLAY application on your Android device before connecting For more information visit www kenwood com cs ce 4 For ANDROID Applicable only when BROWSE MODE is selected...

Страница 9: ..._ Lower case letters a to z 0 Numbers 0 to 9 Character other than A to Z 0 to 9 3 Press the volume knob to start searching To return to the root folder first file top menu press 5 To return to the previous setting item press To cancel press and hold CD USB iPod ANDROID Select control mode While in iPod source press 5 repeatedly MODE ON Control iPod using the iPod itself However you can still play ...

Страница 10: ...1 Press DIRECT 2 Press the number buttons to enter a track file number 3 Press to search for music To cancel press or DIRECT Not available if Random Play is selected Not applicable for iPod and ANDROID source Other settings 1 Press the volume knob to enter FUNCTION 2 Turn the volume knob to select an item see the following table then press the knob 3 Repeat step 2 until the desired item is selecte...

Страница 11: ...ss J K on the remote control to select the desired station 4 Press the volume knob press on the remote control to confirm To cancel press and hold Bookmark current song information Press and hold the volume knob BOOKMARKED appears and the information is stored to your device The bookmark is available on your Pandora account but not on this unit Delete a station While listening to PANDORA 1 Press 2...

Страница 12: ... frequency MID LEVEL 8 to 8 1 Adjusts the level MID Q FACTOR 0 75 1 00 1 25 Adjusts the quality factor TRE ADJUST TRE CTR FRQ 10 0KHZ 12 5KHZ 15 0KHZ 17 5KHZ Selects the center frequency TRE LEVEL 8 to 8 1 Adjusts the level PRESET EQ DRIVE EQ TOP40 POWERFUL ROCK POPS EASY JAZZ NATURAL USER Selects a preset equalizer suitable to the music genre Select USER to use the settings made in EQ PRO DRIVE E...

Страница 13: ...justs the left and right speaker output balance VOLUME OFFSET For AUX 8 to 8 0 For other sources 8 to 0 Preset the initial volume level of each source Before adjustment select the source you want to adjust SOUND RECNSTR Sound reconstruction ON Creates realistic sound by compensating the high frequency components and restoring the rise time of the waveform that are lost in audio data compression OF...

Страница 14: ...OFF Cancels Preset colors RED1 RED2 RED3 PURPLE1 PURPLE2 PURPLE3 PURPLE4 BLUE1 BLUE2 BLUE3 SKYBLUE1 SKYBLUE2 LIGHTBLUE AQUA1 AQUA2 GREEN1 GREEN2 GREEN3 YELLOWGREEN1 YELLOWGREEN2 YELLOW ORANGE1 ORANGE2 ORANGERED REFERENCES Maintenance Cleaning the unit Wipe off dirt on the faceplate with a dry silicone or soft cloth Cleaning the connector Detach the faceplate and clean the connector gently with a c...

Страница 15: ...A About iPod iPhone Made for iPod touch 5th and 6th generation iPod nano 7th generation iPhone 4S 5 5S 5C 6 6 Plus 6S 6S Plus SE 7 7 Plus You cannot operate iPod if KENWOOD or is displayed on iPod Depending on the version of the operating system of the iPod iPhone some functions may not operate on this unit About Android device This unit supports Android OS 4 1 and above Some Android devices with ...

Страница 16: ...ng time Date Clock back to the beginning For CD DA Disc name Artist Track title Artist Playing time Clock back to the beginning For MP3 WMA WAV FLAC files Song title Artist Song title Album title Song title Date Clock File name Folder name File name Date Clock Playing time Date Clock back to the beginning For MP3 WMA WAV FLAC files Song title Artist Album title Artist Folder name File name Playing...

Страница 17: ...acks are recorded Symptom Remedy CD USB iPod Correct characters are not displayed e g album name This unit can only display uppercase letters numbers and a limited number of symbols Depending on the display language you have selected 5 some characters may not be displayed correctly NA FILE Make sure the disc contains supported audio files 15 NO DISC Insert a playable disc into the loading slot TOC...

Страница 18: ...evice Reconnect the Android device If this does not solve the problem the connected Android device does not support BROWSE MODE 15 Playback is intermittent or sound skips Turn off the power saving mode on the Android device ANDROID ERROR NA DEVICE Reconnect the Android device Restart the Android device Pandora ADD ERROR New station creation is unsuccessful CHECK DEVICE Check the Pandora applicatio...

Страница 19: ...r Ground wire black or connect them in parallel Mount the unit at an angle of less than 30º If your vehicle wiring harness does not have the ignition terminal connect Ignition wire red to the terminal on the vehicle s fuse box which provides 12 V DC power supply and is turned on and off by the ignition key Keep all cables away from heat dissipate metal parts After the unit is installed check wheth...

Страница 20: ...rim plate as illustrated before fitting When installing without the mounting sleeve 1 Remove the mounting sleeve and trim plate from the unit 2 Align the holes in the unit on both sides with the vehicle mounting bracket and secure the unit with screws supplied The following screws are supplied for Round head screws M5 8 mm 4 To secure the mounting bracket Flat head screws M5 8 mm 4 Sems screws M4 ...

Страница 21: ... Black To the terminal that is grounded when the telephone rings or during conversation 18 To connect the Kenwood navigation system refer your navigation manual To front speaker left To rear speaker left To front speaker right To rear speaker right If no connections are made do not let the wire come out from the tab To the steering wheel remote control adapter When connecting to an external amplif...

Страница 22: ...VW Audi or Opel Vauxhall automobiles You may need to modify the wiring of the supplied wiring harness as illustrated below Unit Vehicle A7 Red Ignition wire Red A4 Yellow Default wiring Battery wire Yellow Light blue yellow Steering remote control wire To the steering wheel remote control adapter Blue White 2 Power control wire Antenna control wire Brown Mute control wire To the power control term...

Страница 23: ...SW2 9 500 kHz 10 135 kHz 11 580 kHz 18 135 kHz 5 kHz space Channel Space Selection Band 1 9 kHz Band 2 3 5 kHz Usable Sensitivity S N 20 dB MW 29 0 dBμ 28 2 μV SW 30 dBμ 32 μV Tuner FM Frequency Range 87 5 MHz 108 0 MHz 50 kHz space Usable Sensitivity S N 26 dB 0 71 μV 75 Ω Quieting Sensitivity DIN S N 46 dB 2 0 μV 75 Ω Frequency Response 3 dB 30 Hz 15 kHz Signal to Noise Ratio MONO 64 dB Stereo S...

Страница 24: ...Layer 3 WMA Decode Compliant with Windows Media Audio WAV Decode Linear PCM FLAC Decode FLAC file Up to 48 kHz 16 bit Audio Maximum Output Power 50 W 4 Full Bandwidth Power 22 W 4 at less than 1 THD Speaker Impedance 4 Ω 8 Ω Tone Action Bass 100 Hz 8 dB Middle 1 0 kHz 8 dB Treble 12 5 kHz 8 dB Preout Level Load CD 2 500 mV 10 kΩ Preout Impedance 600 Ω Auxiliary Frequency Response 3 dB 20 Hz 20 kHz...

Страница 25: ...JS_KWD_KDC_220UI_MN_EN_3 indd 25 JS_KWD_KDC_220UI_MN_EN_3 indd 25 6 14 2017 8 59 33 AM 6 14 2017 8 59 33 AM ...

Страница 26: ...Gazete de yayımlanan Atik Elektrikli ve Elektronik Eşyalarin Kontrolü Yönetmeliğe uygun olarak üretilmiştir Eski Elektrik ve Elektronik Ekipmanların İmha Edilmesi Hakkında Bilgi atık yan ürün toplama sistemlerini kullanan ülkeleri için uygulanabilir Sembollü üzerinde çarpı işareti olan çöp kutusu ürünler ev atıkları olarak atılamaz Eski elektrik ve elektronik ekipmanlar bu ürünleri ve ürün atıklar...

Страница 27: ...mance iPhone iPod iPod classic iPod nano and iPod touch are trademarks of Apple Inc registered in the U S and other countries Lightning is a trademark of Apple Inc Pandora the Pandora logo and the Pandora trade dress are trademarks or registered trademarks of Pandora Media Inc used with permission Android is trademark of Google Inc libFLAC Copyright C 2000 2009 Josh Coalson Copyright C 2011 2013 X...

Страница 28: ...28 mm Book Size B6L 182 mm x 128 mm KDC 220UI KDC 1030U CD ﺃﺳﻄﻮﺍﻧﺎﺕ ﻭﻣﺸﻐﻞ ﺭﺍﺩﻳﻮ ﺟﻬﺎﺯ ﺍﻟﺘﻌﻠﻴﻤﺎﺕ ﺩﻟﻴﻞ KDC 153UM KDC 120U JS_KWD_KDC_220UI_MN_C00_3 indd 2 JS_KWD_KDC_220UI_MN_C00_3 indd 2 6 14 2017 8 53 16 AM 6 14 2017 8 53 16 AM ...

Отзывы: