background image

15

 EN

 ENGLISH

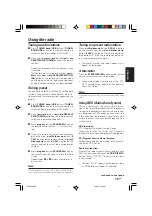
Tuning to a preset radio station

Press 

p.call/album up

 button (

P. CALL +

 button

on the remote control) or 

p.call/album down

button (

P. CALL –

 button on the remote control) or

digit buttons (0~9) on the remote control to se-
lect the desired preset number.

The preset number and radio frequency will
appear on the display.

STEREO/MONO

Press the 

STEREO/MONO

 button on the remote

control to select mono or stereo mode.

When stereo mode is selected, the icon “STE-
REO” will appear on the display (if current sta-
tion is FM stereo).

Note:

You are able to select stereo or mono mode in FM band
only.

Using RDS (Radio Data System)

RDS is a system that transmits useful informa-
tion (in the form of digital data) for FM broadcasts
along with the broadcast signal. Tuners and receiv-
ers designed for RDS reception can extract the
information from the broadcast signal for use with
various functions, such as automatic display of the
station name.

RDS functions:

PTY (Program TYpe Identification) Search
Automatically tunes to a station that is currently
broadcasting the specified program type (genre).

PS (Program Service Name) Display:

Automatically displays the station name transmit-
ted by the RDS station.

Radio Text  function:

Displays the radio text data transmitted by some
RDS stations when you press the 

RDS/DISPLAY

button. There is “NO TEXT” display if no text data
is transmitted.

The icon “R·D·S” appears on the display when
an RDS broadcast (signal) is received.

continued to next page

Using the radio

Tuning in radio stations

1

Press 

TUNER band/USB

 button (

TUNER/

BAND/USB 

button on the remote control) to

select the desired waveband: FM or AM.

2

Press and hold 

4

 or 

¢

 button (

4

 or 

¢

SEARCH/SKIP/TUNING

 button on the remote

control).

Repeat this procedure until the desired station
is reached.
To tune to a weak station briefly press 

4

 or

¢

 button (

4

 or 

¢


SEARCH/SKIP/TUN-

ING

 button on the remote control) repeatedly

until the display shows the desired frequency
or when the best reception has been obtained.

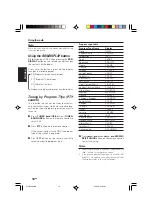
Storing preset

You can store up to 20 for FM and 20 for AM radio
stations in the memory. When a preset radio sta-
tions selected. The preset number appears on the
display.

1

Press 

TUNER band/USB

 button (

TUNER/

BAND/USB 

button on the remote control) to

select the desired waveband: FM or AM.

2

Press 

4

 or 

¢

 button (

4

 or 

¢


SEARCH/

SKIP/TUNING

 button on the remote control)

to tune to the desired frequency.

3

Press 

program

 button (

PROGRAM

 button on

the remote control) so that “– –” will start flash-
ing.

4

If you wish to store the radio station to another
preset number, 

p.call/album up

 button (

P.

CALL +

 button on the remote control) or 

p.call/

album down

 button (

P. CALL –

 button on the

remote control) to select the desired preset
number.

5

Press 

program

 button (

PROGRAM

 button on

the remote control) again to store the radio
station.
Repeat steps 

2

 to 

5

 to store other preset ra-

dio stations.

Note:

During program, if no button is press within 20 sec-
onds, the system will exit program mode automatically.

5572/08-24/EN

05.3.29, 4:54 PM

15

Содержание HM-537WM

Страница 1: ...ENGLISH FRANÇAIS DEUTSCH NEDERLANDS ITALIANO ESPAÑOL HM 537WM COMPACT Hi Fi COMPONENT SYSTEM INSTRUCTION MANUAL B60 5572 08 00 C E 0501 5572 01 07 EN 05 3 29 5 36 PM 1 ...

Страница 2: ...XPOSETHIS APPLIANCETO RAIN OR MOISTURE CAUTION RISK OF ELECTRIC SHOCK DO NOT OPEN Units are designed for operation as follows Europe AC 230 V only The marking of products using lasers The marking this product has been classified as Class 1 It means that there is no danger of hazardous radiation out side the product Location Bottom CLASS 1 LASER PRODUCT LASER KLASSE 1 APPAREIL A LASER DE CLASSE 1 L...

Страница 3: ... files other than MP3 and WMA files the equipment will assume that they can be played back and this will produce no sound and skip to the next file automatically Contents Caution Read the pages marked carefully to ensure safe operation Before applying power 2 Safety precautions 2 Unpacking 2 Media that can be played back with this unit 3 Preparing the remote control 4 Connections 4 Names and funct...

Страница 4: ...nnect the left speaker to terminal marked L with the red wire to and the black wire to Clip the stripped portion of the speaker wire as shown 1 2 3 Notes For optimal sound performance it is recommended to use the supplied speakers Do not connect more than one speaker to any one pair of speaker terminals Connecting the USB cable Connect a commercially available USB cable to the USB port on the rear...

Страница 5: ...e reverse mode TUNER BAND USB button To select TUNER input or turn the system on toTUNER input When inTUNER input press the select the waveband FM or AM To select USB input by pressing the button repeatedly 7 button To stop playback for CD orTAPE to stop program for CD FWD PLAY 6 RVS PLAY buttons To start or interrupt playback for CD FWD PLAY 6 button only To start or interrupt playback for TAPE S...

Страница 6: ...LASSIC ROCK JAZZ X BASS USB 2 1 7 8 9 0 3 4 5 6 INTRO icon SLEEP icon TOTAL icon RDS icon X BASS icon Play icons SYNC icon MP3 icon ALB icon Frequency display Preset channel display Playback time display etc STEREO icon Sound effect icons Play mode icons Reverse mode icon TIMER icons ALL icon REMAIN icon REC icon FILE SEARCH icon 5572 01 07 EN 05 3 29 4 53 PM 6 ...

Страница 7: ... CD or TAPE to stop pro gram for CD 0 6 buttons To start or interrupt playback for CD 6 button only To start or interrupt playback for TAPE rec button To record fromTUNER CD or USB to a cassette tape program button To program disc tracks for CD to program preset radio stations forTUNER To set or reset clock for clock To set or reset timer for timer Cassette tape compartment 0 open close button To ...

Страница 8: ...se or turn volume knob to the left press VOLUME DOWN button on the remote control to de crease the volume level VOL XX will be displayed VOL XX denotes the volume level The volume can be adjusted in 30 steps from minimum to maximum Basic function To switch off the volume temporarily Press MUTE button on the remote control Playback will continue without sound only system speaker output and the icon...

Страница 9: ...he display To interrupt playback press 6 button The playing time will start flashing To resume playback press 6 button again 2 To stop playback press 7 stop button Selecting a desired track passage To select a desired track Press 4 or button 4 or SEARCH SKIP TUNING button on the remote control repeatedly until the desired track appears on the display If playback is stopped press 6 button to start ...

Страница 10: ...P TUNING button on the remote control to select the desired track The digit buttons 0 9 on the remote control can also be used to select tracks The icon PROGRAM and program number will start flashing 3 Press program button on the unit PROGRAM button on the remote control to store the se lected track The track number returns to and the next program number will appear on the display 4 Repeat steps 2...

Страница 11: ... dis play and FULL will start flashing if you attempt to program more than 60 files Press program button on the unit PROGRAM button on the remote control in stop mode to review the program sequence Using the CD MP3 5 Press 6 button to play the programmed files If you press REPEAT button on the remote control during programmed playback the cur rent file or all programmed files will be played repeat...

Страница 12: ...t button REPEAT button on the re mote control twice in play or pause mode The icon REPEAT ALB will appear on the dis play To cancel repeat play repress REPEAT button on the remote control twice Note In program mode you can only select repeat one or repeat all function Intro scan This function let you listen to the first 10 seconds of each track throughout the disc Press INTRO button on the remote ...

Страница 13: ...hile the computer is finding this unit If this unit is not detected after a several sec onds try the following things Connect the USB cable again Restart your computer 3 Press TUNER band USB button TUNER BAND USB on the remote control and select USB USB will appear on the display When this unit is connected to your computer with a USB cable and the unit detects the com puter USB LINK is displayed ...

Страница 14: ...ark in the Mute box If the vol ume level is low move the slider to raise the volume level If there is a check mark in the Mute box remove it If there are breaks in the sound The sound may be broken during audio output if an operation in the computer puts a heavy load on the CPU Avoid performing operations that put a heavy load on the CPU There may be breaks in the sound if another USB cable is con...

Страница 15: ... the display when an RDS broadcast signal is received continued to next page Using the radio Tuning in radio stations 1 Press TUNER band USB button TUNER BAND USB button on the remote control to select the desired waveband FM or AM 2 Press and hold 4 or button 4 or SEARCH SKIP TUNING button on the remote control Repeat this procedure until the desired station is reached To tune to a weak station b...

Страница 16: ...cannot be found NO MATCH is displayed then after several seconds the display returns to the original display Note Some functions and function names may differ certain countries and areas Using the RDS DISPLAY button While receiving a RDS station pressing the RDS DISPLAY button on the remote control changes the contents of the display Every time the button is pressed the display changes in a follow...

Страница 17: ...ape 1 Press TAPE mode button TAPE MODE but ton on the remote control to TAPE 2 Press the area marked push open to open the cassette compartment door 3 Insert cassette tape into the compartment with the open edge facing down 4 Close the door securely 5 Press TAPE mode button TAPE MODE but ton on the remote control to select the de sired reverse mode icon plays only one side of the tape and stops ic...

Страница 18: ...top button to end recording Using the cassette Recording from your personal computer 1 Insert a blank cassette tape into the tape deck 2 Press TUNER band USB button TUNER BAND USB on the remote control and select USB When this unit is connected to your computer with a USB cable and the unit detects the com puter USB LINK is displayed See page 13 for the procedure 3 Perform the playback operation o...

Страница 19: ...tton on the remote control The icon TIMER will flash and the source display will appear View clock The clock if it is set will be shown in standby mode To view the clock in any source mode CD TUNER or TAPE press timer set button TIMER SET button on the remote control The clock will be displayed If the clock has not been set 0 00 will start flash ing Clock setting Before carrying out the clock sett...

Страница 20: ...ated To activate deactivate the timer Press timer on off button TIMER ON OFF but ton on the remote control If activated the icon TIMER will appear on the display Notes The timer off will not be activated if the starting and stopping time are the same If the selected source CD TAPE or RECTU is not available when preset timer is reached TUNER will be selected automatically During timer setting if no...

Страница 21: ...ng a clean ing tape once Caution on condensation Condensation of dew may occur inside the unit when there is a great difference in temperature between this unit and the outside This unit may not function properly if condensation occurs In this case leave the unit for a few hours and re start the operation after the condensation has dried up Be specially cautious against condensation in the followi...

Страница 22: ...player operation NO DISC is displayed Insert a disc correctly label side up Clean the disc Use a new or readable disc Wait until the moisture condensation at the lens has cleared Plug in AC cord securely Radio reception Noise in radio Tune to a correct frequency Adjust the direction of the FM antenna AM antenna is built in rotate the sys tem to face a new direction Increase the distance between th...

Страница 23: ...annel stereo General Power consumption 75 W Dimensions W 160mm 6 5 16 H 268 mm 10 9 16 D 354 mm 13 15 16 Weight net 5 3 kg 11 7 lb Speakers Enclosure Bass reflex type Speaker configuration Woofer 100 mm cone type Tweeter 35 mm cone type Impedance 4 Ω Maximum input level 50 W Dimensions W 160 mm 6 5 16 H 268 mm 10 9 16 D 218 mm 8 9 16 Weight net 2 2 kg 4 9 lb 1 piece Notes KENWOOD follows a policy ...

Страница 24: ...in the spaces designated on the warranty card and in the space provided below Refer to the model and serial numbers whenever you call upon your dealer for information or service on this product Model _____________ Serial Number ____________ 5572 08 24 EN 05 3 29 4 54 PM 24 ...

Отзывы: