background image

HM-331 (En/T)

39

Application section

Timer operation

T U N E R

T + 2 • • •

STEREO

FM

PM

AM

MHz

kHz

BEST HITS O.T

TUNED

RANDOM

PGM

REPEAT

ALL

SLEEP A.P.S.

O.T.T. PROG.

AUTO

TOTAL

TRACK NO.

8 0 1 8 1

7 0 5

1 2

do

wn

up

VOLUME / multi control

Adjust the clock before setting the timer.

Operate easy To use Timer (O.T.T.)

Playback of the selected input source starts at the specified time, and the unit is switched off after one hour. This
timer operates only once directly after setting.

Timer playback, timer recording (PROG.1, PROG.2)

With each of the two timer programs, a selected source can be played (or radio broadcast can be recorded) in the
previously set time period.

AI timer playback (PROG.1, PROG.2)

The volume increases gradually after start of timer playback.

Sleep timer (SLEEP)

The unit is turned OFF automatically after the specified period has elapsed.

To execute O.T.T.

Timer playback is possible simply by setting the time.
The source selected last before the unit was switched off will be played. One hour after start of timer
playback, the unit will be switched off automatically.

Setting the O.T.T.

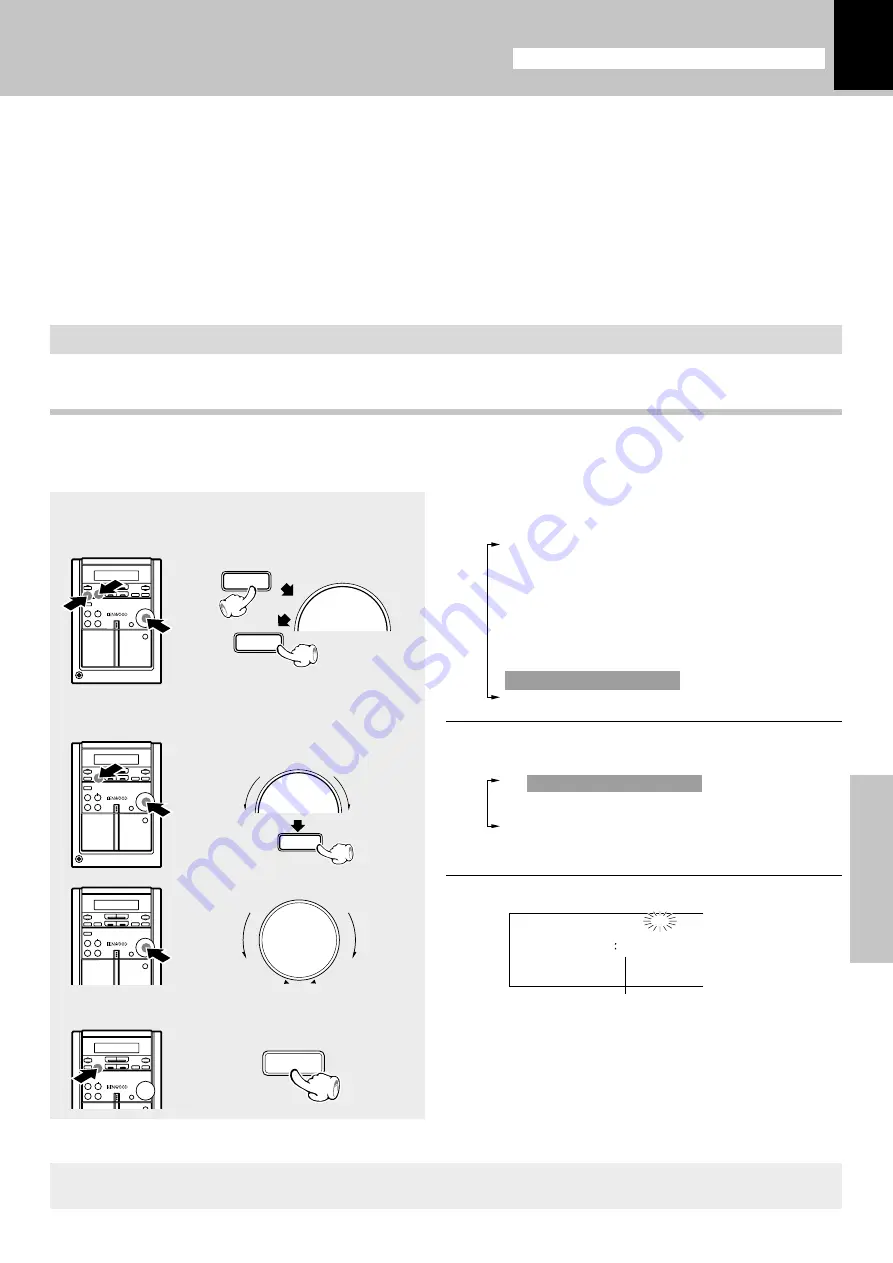
Turning the knob switches the function as shown
in the character information display.

TAPE RVS.

?

O.T.E.

?

A. MEMORY (or A. PRESET) ?

(Only when the TUNER input is selected)

AUX LEVEL

?

(Only when the AUX input is selected)

BALANCE

?

TIMER SET

?

A.P.S. SET

?

Turning the knob switches the function as shown
in the character information display.

1

O.T.T.  SET

?

2

PROG. 1  SET

?

3

PROG. 2  SET

?

1

Select the source to be played.

2

Select “TIMER SET ?” .

3

Select “O.T.T. SET ?” .

4

Set the ON time.

5

Set it.

÷

The ON time can be set in steps of 5 minutes.

÷

When the O.T.T. has been set by pressing the

“set/demo”

 key, the display shows 

“COMPLETE !”

.

The time is
advanced.

The time is
returned.

ON time display

( Press the “set/demo” key while

the “?” mark is blinking.)

Blinks

Perform steps 

1

 and 

2

 in the procedure in “Activating or deactivating the O.T.T. or program timer execution”.

w

Connect the related equipment under reference to “System connection”.

6

menu

set/demo

VOLUME / multi control

set/demo

VOLUME / multi control

set/demo

2

2

2

2

2

2

2

2

Содержание HM-331

Страница 1: ...MICRO HI FI COMPONENT SYSTEM INSTRUCTION MANUAL KENWOOD CORPORATION B60 4228 00 00 CH M T OC 9809 HM 331 DIGITAL AUDIO DIGITAL AUDIO COMPACT COMPACT TEXT ...

Страница 2: ...void a possible shock hazard by inadvertent Connection to the mains supply IMPORTANT The wires in the mains lead are coloured in accordance with the following code Blue Neutral Brown Live Do not connect those leads to the earth terminal of a three pin plug For the United Kingdom WARNING TO PREVENT FIRE OR ELECTRIC SHOCK DO NOT EXPOSE THIS APPLIANCE TO RAIN OR MOISTURE CAUTION The marking is locate...

Страница 3: ...t Items 43 Maintenance 43 Reference 43 In case of difficulty 44 Specifications 47 Playback of CD 24 Listening in the desired sequence program playback 24 Repeated playback 25 Listening to an unexpected title sequence random playback 26 R D S Radio Data System Except for some areas 28 Searching for a desired program type PTY search 29 To be able to listen to the desired information at any time 31 C...

Страница 4: ...out delay Only the consignee the person or company receiving the unit can file a claim against the carrier for shipping damage We recommend that you retain the original carton and packing materials for use should you transport or ship the unit in the future DEMO OFF To cancel demonstration Press the set demo key when DEMO is ON DEMO ON To execute demonstration After turning power ON press and hold...

Страница 5: ...ning If fingerprints or foreign matter be come attached to the disc lightly wipe the disc with a soft cotton cloth or similar from the center of the disc outwards in a radial manner Storage When a disc is not to be played for a long period of time remove it from the player and store it in its case Handling Hold the discs so that you do not touch the playing surface Discs which can be played with t...

Страница 6: ...ption Speaker right Main Unit CAUTION Note on Connection Connect the components as shown in the diagram Only plug the power cord into a power outlet once connections are completed 1 2 3 4 1 Never short circuit the and speaker cords 2 If the left and right speaker connections or the and polarity are inverted the sound will be unnatural with unclear positioning of musical instruments etc Be sure to ...

Страница 7: ...aryindooruseonly Forstablesignalreceptionwerecommendusinganoutdoorantenna Remove the indoor antenna if you connect one outdoors 1Remove the insulation from the end of the cord end Except for Europe and U K 2Connect it to the antenna terminal 3Locate the position providing good reception condition 4Fix the antenna Speaker left Speaker cord POWERcord TO WALL AC OUTLET Connect correctly to and to Eur...

Страница 8: ...udio cord 1 In case an associated system component is connected also read the instruction manual of the component 2 Insert the optical fiber cable straight into the connector until it clicks 3 Be sure to attach the protection cap when the connector is not used 4 Never band or bundle the optical fiber cable Notes Notes System connection POWERcord TO WALL AC OUTLET Audio output VCR Analog turntable ...

Страница 9: ...tion track No program No etc 4 O T E ONE TOUCH EDIT indication Appears during one touch recording 5 LOUD Loudness indication 6 TAPE REC indicators 7 EX BASS extra bass indication 8 Indication related to CD 9 Auto Power Save indicator 0 Timer related indicators RDS related indication expect for some areas Cassette deck reverse mode and TAPE equalizer T E indicators CD play pause indicators Indicate...

Страница 10: ... convenience With this function pressing any key enclosed in while the unit is in standby mode immediately start playback or reception down up on standby TAPE rec menu panel TAPE direction STOP CD open close set demo TUNER band 4 4 AUX repeat sound VOLUME multi control O T E CD TAPE 6 tape EQ 7 2 2 Auto Reverse phones push open 0 TAPE preset 1 1 0 push open 2 3 4 5 6 7 8 9 0 1 ...

Страница 11: ... the CD input and start CD playback Press during CD playback to let it pause temporarily 9 Tape play key TAPE TAPE direction indicator 0 Stop key 7 Cassette holder Press the area marked 0 push OPEN to load or eject a tape phones jack Headphones with a stereo mini plug optional can be connected CD Skip 4 TAPE 1 keys During CD operation Press to skip tracks in the forward or backward direction Durin...

Страница 12: ...key TUNER BAND key CD 6 key Stop key 7 AUX key 6 RDS related keys For Europe and U K TA NEWS key Used at the time of EON reservation PTY key ª Used at the time of program type detection 7 SET key Press to set or enter an item selected with the VOLUME multi control ENTER key It is used to enter the preset station memory in the tuner 8 MUTE key This is used to suppress the sound temporarily 9 POWER ...

Страница 13: ... In such a case change the installation position to avoid malfunction Channel space switching Except for the United Kingdom and Australia The space between radio channels has been set to the one that prevails in the area to which the system is shipped However if the current channel space setting does not match the setting in the area where the system is to be used for instance when you move from a...

Страница 14: ...ding input One touch operation When the CD or TAPE input is selected while the corresponding disc or tape has been loaded it immediately starts to play 2 Selecting the desired output TUNER Broadcasts CD TAPE AUX External input 8 Pressing the CD 6 AUX TAPE or TUNER band key selects the cor responding input 3 Volume adjustment Quick turning produces a larger change amount Dynamic rotary vol ume cont...

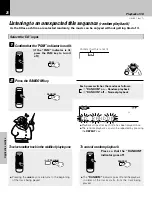
Страница 15: ... with CD and TAPE not operating the unit is switched off automatically by this function This is convenient when you forgot to switch off the unit This function can be activated or deactivated by the following operation 1 Select A P S SET 2 Select 3 Set it A P S off A P S on Lights Goes off When the TUNER or AUX input is selected APS operates only when the volume is set to zero or when MUTE is on L...

Страница 16: ... press ing the CD 6 key and playback will start Skipping tracks To fast forward and backward Playback from desired track Start playback To pause playback Start playback To pause playback To stop playback To stop playback Skipping tracks 1 Load a disc 1 Open the CD cover 2 Place a disc 3 Close the CD cover The label side must be on top Open the CD cover 2 Start playback Lights 0 push open 1 1 CD 6 ...

Страница 17: ...disc Be sure to place a disc horizontally Placing it with an inclination will result in malfunction Titles are displayed for discs conforming to CD TEXT After a few seconds play starts from track No 1 In regard to CD TEXT When discs conforming to CD TEXT are played with this unit the text information recorded on the CD disc name or titles is displayed automatically 1 2 3 2 3 7 TOTAL 2 3 4 5 TOTAL ...

Страница 18: ...ing playback the tape running direction changes each time the key is pressed The direction indicators show the current direction in which the tape advances when playback or recording is started automatically by the one touch operation etc This direction is the direction stored in memory when the tape was last stopped To change the tape transport direction press the TAPE key 2 3 dur ing playback th...

Страница 19: ... a tape A tip for use of the tape counter The tape counter is set to 0000 when a cassette tape is loaded By writing down the counter reading in case you want to interrupt recording playback in the middle of the tape the memo will be helpful as a reference for locating the same position when continuing the recording playback the next time The tape counter figure decrements dur ing recording or play...

Страница 20: ...s the band 1FM 2AM Select a station Remote control only Select a station 2 Select a station Auto tuning The next broadcasting station will be received automatically each time this key is pressed Manual tuning Press the key repeatedly or hold it depressed until a station is received When no stations have been memorized Every time the key 4 or is pressed the preset stations are switched over as foll...

Страница 21: ...ions are preset under the same number the previous memory is replaced with the latest memory contents Collective presetting of stations auto preset Keep the ENTER key depressed about 2 seconds A maximum of 40 stations of the band presently being received will be preset When there are many stations and the intended station has not been preset please also use One by one presetting manual preset M E ...

Страница 22: ...rection When recording is started the tape is transported in the direction selected in this step Wind the tape to the position where recording is to be started 1 Press the play key 2 Press the play key again 3 Stop playback To reverse the transport direction Check the tape transport direction indicator 3 Set the recording condition Select the reverse mode Pause the recording Stop the recording Let...

Страница 23: ... CD player pauses at the begin ning of the selected track 3 Put the cassette deck in Record pause mode Press TAPE rec key twice 4 Start playing the CD Synchro recording starts Recording stops when the stop 7 key of the CD player is pressed Select an input source other than TAPE TUNER Broadcasts CD AUX External input The character information display shows the recording input source 4 Select the so...

Страница 24: ...han one track repeat steps 1 and 2 for each track Go to step 2 within 8 seconds Start playback 3 Tracks will be played in the order they were programmed following the program numbers When the 4 or the key is pressed during play the program will jump to the preceding or the following track respectively When the 4 key is pressed once during playback the play position returns to the beginning of the ...

Страница 25: ...LL 3 Off Repeat deactivated Lights Setup for repeating selected tracks 2 Select REPEAT 1 Program the track sequence according to steps 1 to 2 of Listening in the desired se quence All selected tracks will be repeated REPEAT PGM light Start playback To stop repeated playback Press the REPEAT key repeatedly until the repeat mode is switched off The REPEAT or REPEAL ALL indicator turns off and playba...

Страница 26: ...each title has been played once The random playback can also be repeated by pressing the REPEAT key To select another track in the middle of playing one Pressing the 4 key once returns to the beginning of the track being played The RANDOM indicator goes off and the playback in order of the tracks starts from the track being played To cancel random playback Press so that the RANDOM indicator goes o...

Страница 27: ...isplay press this key to scroll the display and view the characters which has not be displayed When pressed during stop When pressed during playback Scrolls the track title display Scrolls the disc title display DOT DISP Playback of CD W o r l d N M u s i c T PM MHz BEST HITS O T E 8 0 5 8 0 N e w l Y o r k B i T PM MHz BEST HITS O T E 8 0 5 8 0 ...

Страница 28: ...tion name is automatically displayed EON Enhanced Other Network When the information to be received is set in advance and any RDS station in the same network starts broadcasting of such information the reception automatically will be switched to that station The RDS indicator lights up when an RDS broad cast signal is received Some functions may not be provided or be given different names dependin...

Страница 29: ...erious Classical Other Music News Current Affairs Information Sport Education Drama Culture Science Varied Weather Finance Children s programs Social affairs Religion Phone in Travel Leisure Jazz music Country music National music Oldies music Folk music Documentary A Selection with the 1 keys B Selection with the numeric keys The program types 1 to 9 and 0 can be selected directly with the number...

Страница 30: ...riginal display If a program of the desired type is found that program is received and the program type name display changes temporarily to the station name display Station name display R O C K R M STEREO MD EDIT TITLE SEARCH FM PM AM MHz kHz BEST HITS O T E TUNED RANDOM PGM REPEAT ALL SLEEP A P S O T T PROG TP R D S EON EON T E NR AUTO TOTAL TRACK NO 0 1 1 1 0 2 5 0 1 2 TA PTY R D S Radio Data Sy...

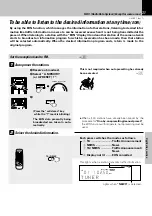
Страница 31: ... is not being transmitted at the present When listening to a station with the EON display lit and another station of the same network starts to broadcast an information program for which a reservation has been made then that station will be selected automatically When the desired information program ends return is made to the original program R D S Radio Data System Except for some areas TA NEWS P...

Страница 32: ...tation without EON function When there is no EON display with the op erations of steps 3 and 4 and the desired in formation is selected in advance waiting for the desired information will be done only with the presently received RDS station In regard to TP Traffic Program indicator When the TP indicator is lit this indicates that the station or another station in the same net work is broadcasting ...

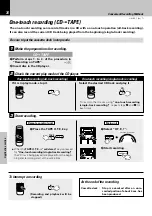
Страница 33: ...fi One touch recording of an entire CD onto a tape One touch recording of the CD track being played onto a tape This is convenient for recording of desired tracks from a disc being heard for the first time Recording of programmed tracks in the pro grammed order Convenient for recording only the desired CD tracks in the desired order Program recording can be used in combination with the One touch r...

Страница 34: ...opped One touch recording all track recording One touch recording single track recording At the end of the recording Cassette deck Stop is executed after an unre corded portion of about 4 sec has been produced Be sure to put the cassette deck in stop mode If it is in play mode stop it Select the desired CD track and play it To record other tracks using one touch recording single track recording re...

Страница 35: ...yback When the PGM key is pressed to cancel the edited contents the entire editing contents will be erased Tracks programmed in excess of the tape recording time will be cut off Recording of the programmed tracks in the programmed order starts To perform operation on the main unit see step 3 in the procedure in One touch recording Program the desired sequence of CD tracks O T E TAPE 7 To interrupt...

Страница 36: ...ormation display TAPE RVS O T E A MEMORY or A PRESET Only when the TUNER input is selected AUX LEVEL Only when the AUX input is selected BALANCE TIMER SET A P S SET Adjust The right volume is decreased The left volume is decreased The levels of both BASS and TREBLE can be adjusted in 2 steps in the range between 8 and 8 Adjusting the tone while the LOUD or EX BASS indicator is lit turns it off and...

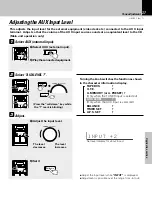
Страница 37: ...X external input 1 Select AUX external input 2 Playtheconnectedequipment 1 Adjust the input level 2 Set it The level decreases The level increases Select AUX LEVEL Press the set demo key while the mark is blinking Turningtheknobswitchesthefunctionasshown in the character information display TAPE RVS O T E A MEMORY or A PRESET Only when the TUNER input is selected AUX LEVEL Only when the AUX input ...

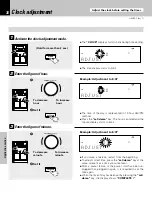
Страница 38: ... un plugged then plugged in again it is required to set the time again When the time of day has been set by pressing the set demo key the display shows COMPLETE Enter the figure of minute Adjust the clock before setting the timer Hold for more than 2 sec A D J U S T 2 STEREO MD EDIT TITLE SEARCH FM PM AM MHz kHz BEST HITS O T E TUNED RANDOM PGM REPEAT ALL SLEEP A P S O T T PROG TP R D S EON EON T ...

Страница 39: ...rce selected last before the unit was switched off will be played One hour after start of timer playback the unit will be switched off automatically Setting the O T T Turningtheknobswitchesthefunctionasshown in the character information display TAPE RVS O T E A MEMORY or A PRESET Only when the TUNER input is selected AUX LEVEL Only when the AUX input is selected BALANCE TIMER SET A P S SET Turning...

Страница 40: ... station should be preset prior to the above Adjust the listening volume When the power is switched on by the timer for recording MUTE automatically becomes ON Select a program No Turningtheknobswitchesthefunctionasshown in the character information display TAPE RVS O T E A MEMORY or A PRESET Only when the TUNER input is selected AUX LEVEL Only when the AUX input is selected BALANCE TIMER SET A P ...

Страница 41: ...only when TUNER is selected above 1 Select the preset station No 2 Enter it 1 PLAY Timer play 2 REC 3 AI PLAY Timer play with gradu ally increasing volume 1 TUNER Broadcasts 2 CD 3 TAPE 4 AUX External input video etc For timer recording 1 Select the mode 1 Select REC 2 Enter it 2 Select the input source 1 Select what is to be recorded 2 Enter it 3 Select the broadcast station onlywhenTUNERisselect...

Страница 42: ...tandby mode When timer operation is not required To set the same timer program again Press so that all PROG indicators are OFF Press so that the desired PROG indicators lights The reservation contents are held in memory Be sure to load a disc or tape and adjust the listening volume Note Note To check or modify the reservation contents restart the timer reservation from the beginning Sleep timer SL...

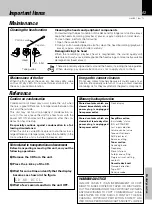
Страница 43: ...d increases etc Reference Maintenance of the Set When the front panel the case etc becomes dirty wipe with a soft dry cloth Do not use thinner alcohol etc as these can cause discoloration In regard to contact cleaners Do not use contact cleaners because it could cause a mal function Be specially careful not to use contact cleaners containing oil for they may deform the plastic component Stored con...

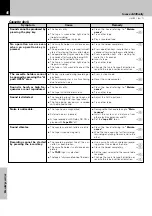
Страница 44: ...ed into the jack The speaker cords are short circuited Imperfect insertion The speaker cords are disconnected The BALANCE is set completely to the left or right channel Remedy Cause Symptom Adjust the present time again Adjust the present time again Adjust the present time referring to Clock adjustment Set the timer ON time and OFF time Press the TIMERkey to set up the execu tion Connect antennas ...

Страница 45: ...uced Sound skips The disc is placed upside down The disc position is displaced The disc is extremely dirty The disc is scratched Dew is condensed on the optics lens The disc has not been placed The player is not put to the play mode The disc is extremely dirty The disc is scratched The disc is dirty The disc is scratched The player is subject to vibration 5 e 5 5 Remote control unit Symptom Cause ...

Страница 46: ...operation key is pressed The cassette holders cannot be opened by pressing the 0 push OPEN area Sound is harsh or high fre quencies are not reproduced Sound is distorted Noise is noticeable Sound vibrates Recording cannot be started by pressing the record key e r e e e 5 The head is dirty The tape is wound too tight due to irregular winding A nonrecorded tape is played The cassette holder is not c...

Страница 47: ...ck 4 track 2 channel stereo Recording system AC bias system Frequency 65 kHz Heads Playback recording head 1 Erasing head 1 Motors 1 Wow and flutter 0 2 W R M S Fast winding time Approx 100 seconds C 60 tape General Power consumption 36 W Dimensions W 180 mm H 257 mm D 275 mm Weight net 5 1 kg Main unit Enclosure Book shelf type magnetically shielded Speaker configuration Woofer 100 mm cone type T...

Страница 48: ...found on the back of the unit in the spaces designated on the warranty card and in the space provided below Refer to the model and serial numbers whenever you call upon your dealer for informa tion or service on this product Model Serial Number ...

Отзывы: