


Disc
34
■
To switch among picture angles
Touch
[
Angle
]
. Each time you touch this key,
picture angles are switched.
* These keys may not function depending on
the disc.
Ñ
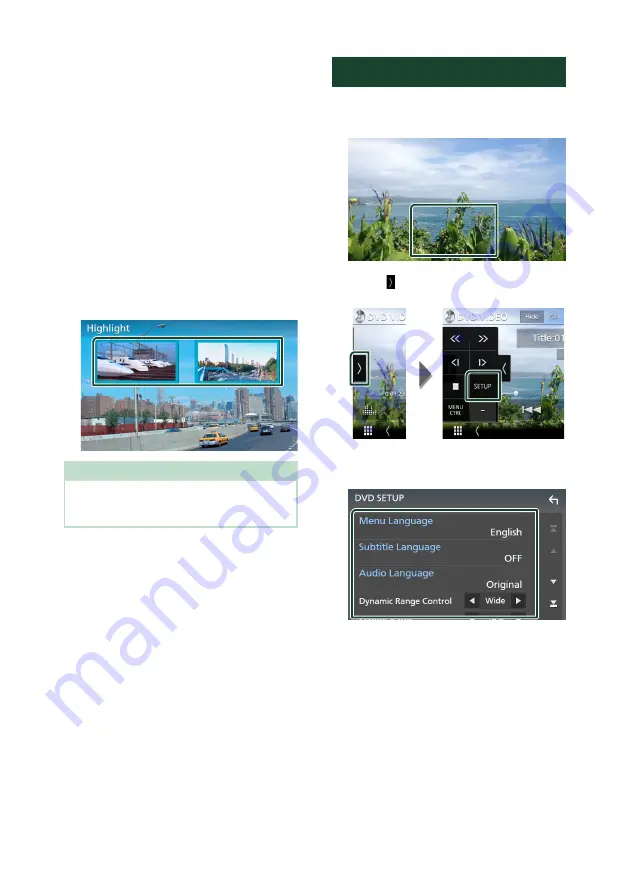
Highlight control
Highlight control lets you control the DVD
menu by touching the menu key directly on
the screen.
1
Touch
[
Highlight
]
on the Menu Control
screen.
2
Touch your desired item on the screen.
NOTE
• The highlight control function is cancelled
automatically if you do not operate for a
predetermined period of time.
DVD SETUP
You can set up the DVD playback functions.
1
Touch the framed area during playback.
2
Touch
[
]
on the left side of the screen.
Touch
[
SETUP
]
.
h
h
DVD SETUP screen appears.
3
Set each function as follows.
■
[
Menu Language
]
/
[
Subtitle Language
]
/
[
Audio Language
]
See
■
[
Dynamic Range Control
]
Sets the dynamic range.
[
Wide
]
: The dynamic range is wide.
[
Normal
]
: The dynamic range is normal.
[
Dialog
]
(Default): Makes the total sound
volume larger than the volumes in other
modes. This is effective only when the
Dolby Digital software is in use.
Содержание DNX577S
Страница 133: ...Hi Res Audio logo and Hi Res Audio Wireless logo are used under license from Japan Audio Society ...
Страница 134: ...DNX997XR DNX697S DNX577S GPS NAVIGATION SYSTEM INSTRUCTION MANUAL 2020 JVCKENWOOD Corporation IM402_Nav_K_En_00 ...
Страница 156: ......
Страница 199: ...Hi Res Audio logo and Hi Res Audio Wireless logo are used under license from Japan Audio Society ...


