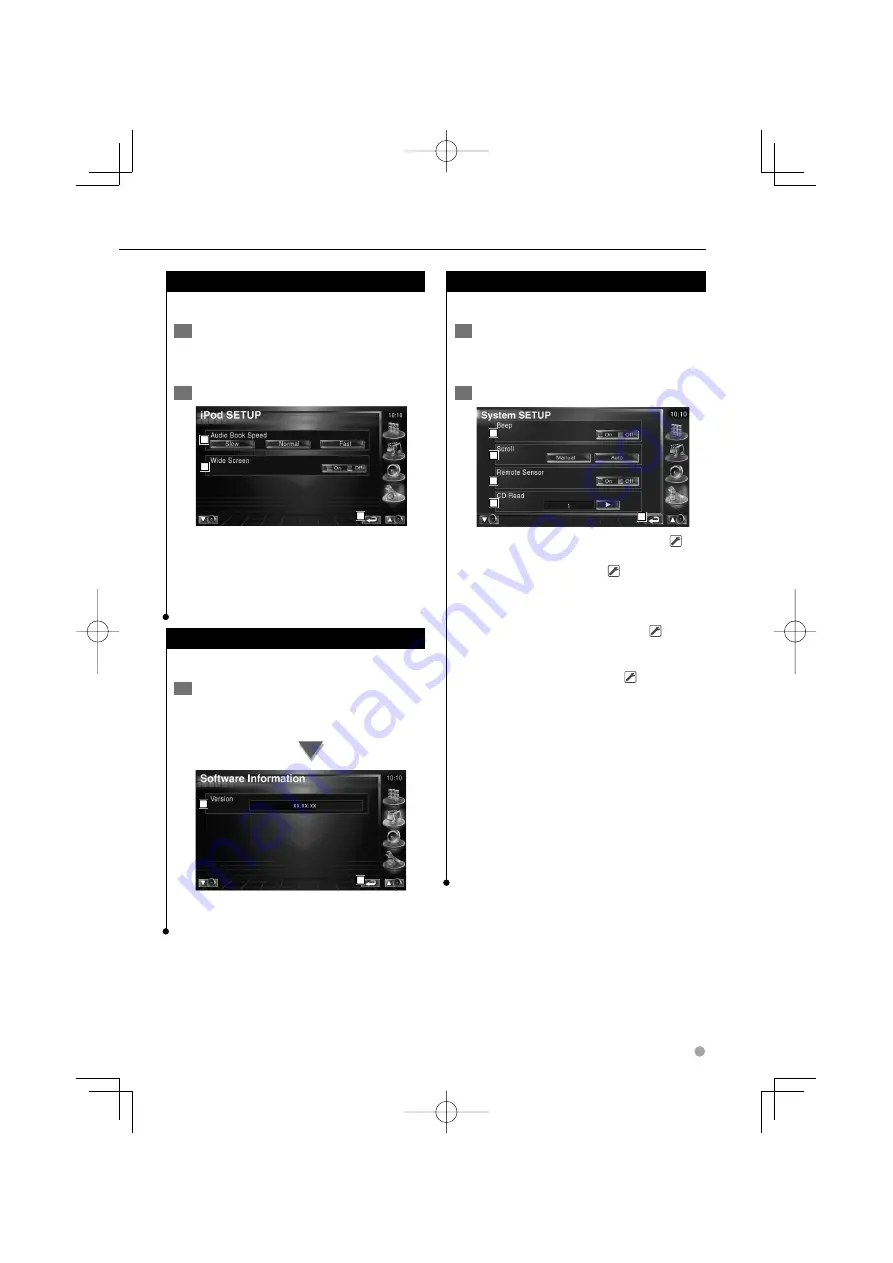
background image

English     

71

iPod Setup

Performs setup when using iPod.

  1  

  Display the iPod SETUP screen

Touch [iPod SETUP] in the SETUP Menu 
(page 66).

  2  

  Setup each item

1

3

2

1

  Sets the Audiobook playback speed.

2

  Sets Wide Screen on or off.

3

  Returns to the original screen.

•  "Wide Screen" cannot be set while he iPod is connected.

Software Information

Checks the software version of this unit.

  1  

  Display the Software Information screen

Touch [Software Information] in the SETUP 
Menu (page 66).

1

2

1

  Displays the software version.

2

  Returns to the original screen.

System Setup

You can set up the system parameters.

  1  

  Display the System SETUP screen

Touch [System SETUP] in the SETUP Menu 
(page 66).

  2  

  Setup each item

1

5

2

3

4

1

  Turns the key touch tone On or Off. (

 On)

2

  Allows scrolling of text display on the 

Source Control screen. (

 Manual)


"Auto": 

 Scrolls the screen automatically.


"Manual":  Allows you to scroll the screen 

manually.

3

  Selects a remote control signal. (

 On)

When turned "Off", the remote control of TV 
reception is rejected.

4

  Sets a music CD playback. (

 1)


"1":   Automatically recognizes and plays 

back an Audio file disc, a DVD or a 
music CD.


"2":   Forcibly plays back a disc as a music CD. 

Select "2" if you wish to play a music CD 
having a special format or if you cannot 
play a disc in the "1" position.

5

  Return to the original screen.

•  You cannot play an Audio file/VCD disc in the "2" 

position. Also, you may not play some music CDs in the 
"2" position.

•  Your setup is disabled when the disc is being played.

B64-3658-00̲00̲En̲p66-p104.indd   71

B64-3658-00̲00̲En̲p66-p104.indd   71

07.2.5   8:21:19 PM

07.2.5   8:21:19 PM

Содержание DDX8029

Страница 1: ... B64 3658 00 00 EV E2V MONITOR WITH DVD RECEIVER DDX8029 INSTRUCTION MANUAL VIDEO AUDIO B64 3658 00 00 En p1 p65 indd 1 B64 3658 00 00 En p1 p65 indd 1 07 2 8 11 27 07 AM 07 2 8 11 27 07 AM ...

Страница 2: ...ol Panel 22 Functions While Displaying the Control Screen 23 Set Disc Name 26 Folder Select Function of Audio File 26 Disc Select Function of Disc Changer 27 Direct Search 27 iPod Control 37 Connecting an iPod 37 Functions when Displaying the Easy Control Panel 37 Functions while displaying the Control Screen 38 iPod List 39 Video File Picture File Watching 28 Function During Playback Screen 28 Fu...

Страница 3: ...n 71 System Setup 71 AV Interface Setup 72 User Interface 73 Entering Background 75 Background Delete 75 Background Select 76 Touch panel Adjustment 76 Clock Setup 77 Monitor Setup 78 Security Code Setup 80 TV Setup 81 RDS Setup 82 DAB Setup 82 Announcement Select 83 AMP Control 83 Setup Memory 84 EXT SW Setup 85 Audio Control 86 Audio Control Menu 86 Audio Control 86 Equalizer Control 87 Tone Set...

Страница 4: ...e mode is switched in following order each time you touch the button Display Setting AUTO1 Tunes in a station with good reception automatically AUTO2 Tunes in stations in memory one after another MANU Switches to the next frequency manually Manual Memory Stores the current receiving station in memory SRC 1 Select a station you wish to store in memory 2 Store in memory Next page 3 The above operati...

Страница 5: ...English 5 B64 3658 00 00 En p1 p65 indd 5 B64 3658 00 00 En p1 p65 indd 5 07 2 8 11 27 13 AM 07 2 8 11 27 13 AM ...

Страница 6: ...s in the CD slot If you try to load a 3 in CD with its adapter into the unit the adapter might separate from the CD and damage the unit Safety precautions About CD players disc changers connected to this unit Kenwood disc changers CD players released in 1998 or later can be connected to this unit Refer to the catalog or consult your Kenwood dealer for connectable models of disc changers CD players...

Страница 7: ... a cloth moistened with neutral cleaner then wipe it again with a clean soft dry cloth Applying spray cleaner directly to the unit may affect its mechanical parts Wiping the faceplate with a hard cloth or using a volatile liquid such as thinner or alcohol may scratch the surface or erases characters TV tuner that can be connected to this unit KTC V500E KTC V300E KTC D500E About Navigation units th...

Страница 8: ...Standard Support Remark DVD DVDVideo DVD Audio DVD R MP3 WMA AAC JPEG MPEG DivX Playback Multi border Multisession Playback depends on authoring conditions Compatible with 8 cm 3 inch discs DVD RW DVD R DVD RW DVD R DL Double layer OnlyVideo format DVD R DL Double layer DVD RAM CD Music CD CD TEXT 8 cm 3 inch discs supported CD ROM MP3 WMA AAC JPEG DivX playback Multisession supported Packet write...

Страница 9: ...remove it from this unit 1 2 4 1 5 4 5 2 1 2 6 3 DVD disc marks Symbol Description ALL Indicates a region number The discs with this mark can be played with any DVD player 8 Indicates the number of audio languages recorded Up to 8 languages can be recorded in a movie You can select a favorite language 32 Indicates the number of subtitled languages recorded Up to 32 languages can be recorded 9 If a...

Страница 10: ...les are played in the order from 1 to 0 CD v Folder v Audio fi v v v v v Folder Audio file The Audio file plays in the order which is written by CD writing software You may be able to set the playing order by writing the play sequence numbers such as 01 to 99 at the beginning of the file name Audio files are played in the order the files are written You can specify the order of playback by numberi...

Страница 11: ... the size shown above to fit to the screen The picture files with information attached such as Exif may not be displayed or operated e g rotation display properly Extensions Picture files must have one of the following extensions jpg jpeg jpe Acceptable discs disc formats file and folder names and playing order are the same as those for audio files Refer to About Audio files page 10 About USB devi...

Страница 12: ...ect button to close the operation panel F Adjusts the volume B Attenuates the volume Press it again to cancel muting A Turns power ON OFF Press the button to turn on the power When the button is pressed and held down for 1 second or more the power is turned off E Listening the traffic information Press it for more than 1 second to turn the Traffic Information function On or Off page 35 A Switches ...

Страница 13: ...cting a USB device playback starts automatically Remove the USB device Press on the USB control screen to enter the USB suspend mode and then remove the USB device Refer to USB Device Control page 40 Removing the USB device before entering the USB suspend mode may result in damaging the data in the USB device If the USB source is selected when a USB device is not connected No Device is displayed W...

Страница 14: ... turn off the video display by pressing the button longer than 1 second When you press the button again the previous video display comes back on The Rear view camera video is displayed when the vehicle s gear is in Reverse Set the NAVIGATION of the AV Interface Setup page 72 to RGB AV IN to display the Navigation video D B64 3658 00 00 En p1 p65 indd 14 B64 3658 00 00 En p1 p65 indd 14 07 2 8 11 2...

Страница 15: ...to the external AUX terminal optional accessory Although nothing is played back the clock etc are displayed You cannot switch to a source that is not connected or inserted You can also play audio files video files and picture files with the Built in Disc Player Refer to List of playable discs page 8 for the type and format of these media It is necessary to set NAVIGATION Source of AV Interface Set...

Страница 16: ...Forward Chapter Search Area Selects the next chapter 5 Backward Chapter Search Area Selects the previous chapter 6 DVD Disc Menu Control Buttons Area Displays the Disc Menu Control buttons page 19 7 Information Display Button Area Watching DVD VCD DVD Audio Listening DVD Audio playback screen Mode Full T 0 00 05 AV OUT AV IN1 Group 1 Tr a c k 1 DVD AUDIO T 0 00 05 Group 1 Tr a c k 1 DVD AUDIO 8 9 ...

Страница 17: ... OUT AV IN1 Title 1 C h a p 1 DVD VIDEO T 0 00 05 Title 1 C h a p 1 DVD VIDEO SRC T 0 00 05 Title 1 Chap 1 IN AT T S R C SCRN EXT SW DVD VIDEO T 0 00 05 Title 1 Chap 1 DVD VIDEO Mode Full AV OUT AV IN1 1 2 3 4 5 3 4 7 6 1 Switches the source 2 Stops playing When pressed twice the disc is played from its beginning when you play it in the next time 3 Fast Forwards or Fast Backwards 4 Chapter Search ...

Страница 18: ...e next time 4 Selects a chapter a scene or a track When the play is paused touch this button to start single frame stepping 5 Plays or pauses 6 Slow Forwards or Backwards during DVD play 7 Switches the button display 8 Switches the Repeat Play operations in the following sequence DVD Title Repeat Chapter Repeat Repeat Off DVD Audio Group Repeat Track Repeat Repeat Off VCD Track Repeat Repeat Off A...

Страница 19: ...r C a n c e l C a n c e l Top Top Hignlight Menu Menu M e n u C t r l M e n u C t r l E x i t E x i t Return Return 1 6 8 5 7 2 3 4 3 3 3 1 Calls the Menu 2 Returns to the Disc Menu screen 3 Selects a menu option 4 Enters your menu selection 5 Returns to the previous menu screen 6 Displays the Top Menu 7 Highlight Control 8 Clears the Disc Menu Control Highlight Control You can select a chapter an...

Страница 20: ...title language during program playback only w Switches the voice language during program playback only e Displays the Zoom Control screen r Clears the Disc Menu Control Zoom Control 1 1 1 1 Z o om Z o om 3 3 S U B Audio Angle 1 2 1 2 M e n u C t r l M e n u C t r l E x i t E x i t 3 3 x 2 x 2 C a n c e l C a n c e l Z o omC t r l Z o omC t r l Z o om Z o om E x i t E x i t 15 16 16 16 16 17 18 t C...

Страница 21: ...e it is pressed DVD Title Chapter Time Direct number DVD Audio Group Track Direct number VCD when PBC is On Scene Direct number VCD when PBC is Off Track However the direct search may not be supported for some discs 2 Enter a number or time R VOL 1 2ABC 3DEF 4GHI 7 PQRS BS 5JKL 8TUV 0 9WXYZ 6MNO 1 ATT 2ZONE Y 1 CLEAR DIRECT When playing back a VCD enter a PBC scene number if PBC is On or a track n...

Страница 22: ...05 CD CH D 2 T 1 IN S R C D D 1 7 7 4 4 5 1 Switches the source 2 Stops playing 3 Fast Forwards or Fast Backwards only when a CD is played back on the built in disc player 4 Selects a music When you continue to touch button Fast Forwards or Fast Backwards Disabled when a CD built in disc player are being played 5 Plays or pauses 6 Selects a folder only when an Audio file is played back on the buil...

Страница 23: ...nning when you play it in the next time 5 Selects a track 6 Plays or pauses 7 Switches the button display 8 Starts or stops Scan Play that plays the beginning of each music one after the other 9 Repeats to play the present track p Starts or stops Random Play to play music in random order q Switches the number of lines displayed in the Information Display w Switches the play time display between Tr...

Страница 24: ...peats to play the preset files or data Starts or stops Random Play to play files of the present folder in random order z Switches the number of lines displayed in the Information Display x Folder and File Number Display c Play Mode Display v Play Time Display b Function Indicator n Appears when a disc is inserted 37 m Repeats to play the music or data of the present folder 38 39 40 You can search ...

Страница 25: ...y S Play Time Display D Function Indicator F Appears when a disc is inserted 55 56 G Repeats to play a disc the present disc Function of Disc Changer H Starts or stops Magazine Random Play to play songs of the disc changer in random order Function of Disc Changer 57 58 59 J Sets a name to the disc being played page 26 K Displays a list of discs in the Disc changer and allows you to select the disc...

Страница 26: ...Audio files stored in media and devices according to hierarchy 1 Start Folder Select 2 Selects a song 2 3 4 1 1 5 1 Scrolls the list 2 Lists folders and Audio files Folder opens when touched and the Audio file is played 3 Moves to the top hierarchy level 4 Moves up a hierarchy level 5 Returns to the original screen Music Disc Audio File Listening B64 3658 00 00 En p1 p65 indd 26 B64 3658 00 00 En ...

Страница 27: ...l play time Audio file Folder File 2 Enter a track number R VOL 1 2ABC 3DEF 4GHI 7 PQRS BS 5JKL 8TUV 0 9WXYZ 6MNO 1 ATT 2ZONE Y 1 CLEAR DIRECT 3 Search When searching for a track V SEL OUT MENU IN ENTER ZOOM DVD T V AUD DISP POSITION SRC O O O During play of an external disc player or disc changer 1 Enter a disc or track number R VOL 1 2ABC 3DEF 4GHI 7 PQRS BS 5JKL 8TUV 0 9WXYZ 6MNO 1 ATT 2ZONE Y ...

Страница 28: ...G Picture Control Button Area page 30 DivX Sub Off Audio 1 1 MPEG Not effective 6 Information Display Button Area Functions When Displaying the Easy Control Panel Displays a floating control panel in the screen Mode Fu l l PICTURE 1 2 5 5 P 0 0 0 0 0 DVD MED I A AV I N1 AV OUT SRC P 0 0 0 0 5 DVD MED I A 1 5 IN AF PICTURE Mode Fu l l PICTURE 1 5 P 0 0 0 0 5 DVD MED I A AV I N1 AV OUT S R C 1 2 3 3...

Страница 29: ...auses 7 Selects a folder 8 Switches the button display 9 Starts or stops Scan Play that plays the beginning of each song or data one after the other p Repeats to play the preset files or data q Starts or stops Random Play to play files of the present folder in random order w Switches the number of lines displayed in the Information Display e Folder and File Number Display r Play Mode Display t Pla...

Страница 30: ...Select Searches folders and Video files Pictures stored in media and devices according to hierarchy 1 Start Folder Select 2 Selects a file 3 4 1 1 5 2 1 Scrolls the list 2 Lists folders and Video files Picture files Folder opens when touched and the Video file Picture file is played 3 Moves to the top hierarchy level 4 Moves up a hierarchy level 5 Returns to the original screen Video File Picture ...

Страница 31: ... function On or Off See Traffic Information page 35 3 Switches to the FM1 2 3 band 4 Switches to the AM band 5 Tunes in a station Use the Seek Mode page 32 to change the frequency switching Functions When Displaying the Easy Control Panel Displays a floating control panel in the screen SRC Mode F u l l P 0 00 05 AV I N1 AV OUT Title 1 Chap 1 IN AT T S R C SCRN EXT SW DVD VIDEO 98 1 MHz FM1 TUNER A...

Страница 32: ...y page 33 13 14 15 16 e Searches station by program type See Search for Program Type page 36 r Lists and selects memorized station See Preset Select page 34 t Displays Radio Text screen See Radio Text page 34 y Displays the external device control screen See External Device Power Supply Control page 54 Seek Mode Sets a station selection The mode is switched in following order each time you touch t...

Страница 33: ...minates when 6 stations are stored or when all stations are tuned in The operation ends automatically if you do not operate within 10 seconds Manual Memory Stores the current receiving station in memory 1 Select a station you wish to store in memory 2 Store in memory Continue to touch until the memory number appears B64 3658 00 00 En p1 p65 indd 33 B64 3658 00 00 En p1 p65 indd 33 07 2 8 11 27 59 ...

Страница 34: ...text Only when receiving the FM broadcast 1 Select a station 2 Display the radio text 3 2 2 1 1 Select the Program Service Name Title Artist name Station Name Category1 2 or Radio Text for text display When is appeared the text display is scrolled by pressing it 2 Scrolls the Radio text plus display 3 Returns to the original screen Radio Listening B64 3658 00 00 En p1 p65 indd 34 B64 3658 00 00 En...

Страница 35: ...cally if you do not operate within 10 seconds Traffic Information When a traffic bulletin starts any source is switched to the traffic information and it is displayed automatically 1 Set the Traffice information mode When the traffic bulletin starts The Traffic Information screen appears automatically Traffic Information screen It is necessary to have Traffic Information function set to On in orde...

Страница 36: ...2 3 4 1 Program Type is displayed Touch to select a Program Type 2 Scrolls the Program Type list 3 Search for the program type It is displayed when the Program type is selected 4 Returns to the original screen 3 Searches station of the selected Program Type Radio Listening B64 3658 00 00 En p1 p65 indd 36 B64 3658 00 00 En p1 p65 indd 36 07 2 8 11 28 06 AM 07 2 8 11 28 06 AM ...

Страница 37: ...isabled Functions when Displaying the Easy Control Panel Displays a floating control panel in the screen Mode F u l l AUTO MAIN ST TI P 0 00 00 i P od AV I N1 AV OUT SRC Mode Fu l l AV I N1 AV OUT P 0 00 05 iPod IN AT T S R C SCRN EXT SW 1 2 2 4 3 3 5 6 1 Switches the source 2 Fast Forward or Fast Backward 3 Music Video Search 4 Plays or pause 5 Display the Screen Control screen Refer to Screen Co...

Страница 38: ... music or video one after the other 7 Repeats to play the preset files or data 8 Starts or stops Random play 1 9 Total number of music in the iPod and the music number display p Play Mode Display q Play Time Display 12 w Starts or stops Album Random Play plays randomly from current album 1 15 16 17 13 14 e Display the list of music category See iPod List page 39 r Display the list of video categor...

Страница 39: ...re listed Touch a category name to move its lower level If music title is displayed the music is played by touching it If is touched all the music in its category is played 3 Returns to previous category 4 Moves to the top category 5 Displays the currently playing category B64 3658 00 00 En p1 p65 indd 39 B64 3658 00 00 En p1 p65 indd 39 07 2 8 11 28 12 AM 07 2 8 11 28 12 AM ...

Страница 40: ...e various playback functions SRC Mode F u l l DVD MEDIA AV I N1 AV OUT P 0 00 05 P 0 00 05 0002 0006 IN AF S R C SCRN EXT SW 2 1 USB SRC 2 3 3 4 6 7 8 9 10 11 13 5 4 12 1 1 Music information display Selects Folder Name File Name TItle Artist Name or Album Name When is appeared the text display is scrolled by pressing it 2 Removes the USB device When No Device is shown the USB device can be removed...

Страница 41: ...isplays the list of category Refer to USB List page 41 u Displays information screen of music being played i Displays the external device control screen See External Device Power Supply Control page 54 1 Disable during play list mode USB List Lists and searches music contained in the USB device 1 Display the Category List 2 Select a category 1 1 Returns to the original screen 3 Select music 7 2 3 ...

Страница 42: ... Scrolls the list 2 Lists folders and Audio files Folder opens when touched and the Audio file is played 3 Moves to the top hierarchy level 4 Moves up a hierarchy level 5 Displays the currently playing file 6 Returns to the original screen USB Device Control B64 3658 00 00 En p1 p65 indd 42 B64 3658 00 00 En p1 p65 indd 42 07 2 8 11 28 18 AM 07 2 8 11 28 18 AM ...

Страница 43: ...can be displayed automatically when it is updated Various control screens appear in the TV Source mode You can only operate TV with the optional accessory TV Tuner connected Functions When Displaying the Easy Control Panel Displays a floating control panel in the screen Mode F u l l 2ch AV IN1 AV OUT IN AUTO1 AUTO1 AF TV TV1 TV TV1 2ch Preset 1 Group 1 Group 1 Preset 1 SRC Mode F u l l 2ch AV I N1...

Страница 44: ...ode 8 TV Area Group Dispaly Refer to TV Setup page 81 9 Memory Number Display p Channel Number Display 11 q When to buttons appear you can recall channels on memory For memory of broadcasting stations see Auto Memory page 45 or Manual Memory page 45 12 13 14 w Sets a name to the tuned station page 46 e Lists and selects memorized station See Preset Select page 46 r Displays the external device con...

Страница 45: ... are stored or when all stations are tuned in The operation ends automatically if you do not operate within 10 seconds Press for seconds Manual memory Stores the current receiving channel in memory 1 Select a station you wish to store in memory 2 Store in memory Continue to touch until the memory number appears B64 3658 00 00 En p1 p65 indd 45 B64 3658 00 00 En p1 p65 indd 45 07 2 8 11 28 24 AM 07...

Страница 46: ...Name Assigns a name to a station 1 Select a station you wish to name 2 Start Name set 3 Enter the name See Character Entry page 56 for information on how to enter a name 4 End Name set You can enter characters only after you have applied the parking brake TV Watching B64 3658 00 00 En p1 p65 indd 46 B64 3658 00 00 En p1 p65 indd 46 07 2 8 11 28 26 AM 07 2 8 11 28 26 AM ...

Страница 47: ...the Screen Control screen page 59 for the Screen Control 5 Switches to Video1 6 Switches to Video2 The Easy Control Panel display is hidden when you touch a central area of the monitor Functions While Displaying the Control Screen Mode F u l l AV I N1 AV OUT IN AF VIDEO VIDEO VIDEO1 VIDEO1 SRC Mode F u l l AV I N1 AV OUT IN AF VIDEO VIDEO VIDEO1 VIDEO1 S R C SCRN EXT SW V I D 1 V I D 1 V I D 2 V I...

Страница 48: ...ral area of the monitor Various control screens appear in the DAB Tuner source mode with the optional accessory DAB tuner connected only Functions While Displaying the Control Screen Switches to control screen to use various functions SRC Mode F u l l AV I N1 AV OUT IN AUTO1 RDS DAB S R C SCRN EXT SW 98 1 MHz DAB 1 DAB SEEK Band S S SRC 5 4 6 8 3 4 9 3 7 2 10 1 1 Displays information concerning mu...

Страница 49: ...tion by specifying program type See Search for Program Type page 52 r You can list and select services See Service Select page 51 t Displays DAB information y Displays the external device control screen See External Device Power Supply Control page 54 Seek Mode Sets a station selection mode The mode is switched in following order each time you touch the button Display Setting AUTO1 Tunes in a ense...

Страница 50: ...h or Auto Memory terminates when 6 stations are stored or when all stations are tuned in Service Preset Memory The current receiving service is stored in memory 1 Select a service you wish to store in memory 2 Store in memory Continue to touch until the memory number appears DAB Tuner Control B64 3658 00 00 En p1 p65 indd 50 B64 3658 00 00 En p1 p65 indd 50 07 2 8 11 28 34 AM 07 2 8 11 28 34 AM ...

Страница 51: ...ce 2 Scrolls the service list 3 Returns to the original screen 3 Search the serveice Language Filter Setting Setting the menu language 1 Start Language Filter Setting 2 Select a language 1 3 2 2 1 Language display 2 Switches language list 3 Returns to the original screen 3 Search the language B64 3658 00 00 En p1 p65 indd 51 B64 3658 00 00 En p1 p65 indd 51 07 2 8 11 28 36 AM 07 2 8 11 28 36 AM ...

Страница 52: ...an switch the program type 4 Language display 5 Switches language list 6 Returns to the original screen 3 Searches service of the selected Program Type DAB Announcement When the Announcement you have turned on starts any source is switched to the Announcement automatically When the announcement starts The Announcement screen appears automatically Announcement screen DAB Tuner Control B64 3658 00 0...

Страница 53: ...ected source 2 Scrolls the source display 3 Displays the external device control screen See External Device Power Supply Control page 54 4 Switches the skin 3 types 5 Displays the Hands Free Control screen See Hands Free Unit Control page 58 The displayed source depends on the type of device connected In addition you cannot press the button of currently unavailable source B64 3658 00 00 En p1 p65 ...

Страница 54: ...ff the external device power supply 2 Returns to the original screen You must connect a commercially available relay unit in order to use this function Connect the external device to be controlled to that relay unit Refer to EXT SW Setup page 85 for information on setting the power on or off specification External Device Power Supply Control Controlling the external device power supply B64 3658 00...

Страница 55: ... the audio source during phone call SRC The system resumes audio play during the phone call When the call ends Hang up the phone The system resumes playing automatically To use the TEL Mute feature you need to hook up the MUTE wire to your telephone using a commercial telephone accessory Refer to INSTALLATION MANUAL Muting Audio Volume upon Reception of Phone call B64 3658 00 00 En p1 p65 indd 55 ...

Страница 56: ...ers a space If you erase a character locate the cursor on it and touch this button 3 Enters characters 4 Scrolls up or down the character button display 5 Exits the Character Entry mode and returns to the previous screen You can enter characters only after you have applied the parking brake Character Entry B64 3658 00 00 En p1 p65 indd 56 B64 3658 00 00 En p1 p65 indd 56 07 2 8 11 28 42 AM 07 2 8 ...

Страница 57: ...rol Displayed on the TV Video iPod or Rear View Camera screen only 4 Contrast Control 5 Black Level Adjustment 6 Dimmer Mode Setup SYNC Turning the Dimmer function On or Off when the vehicle light control switch is turned On or Off On The display dims Off The display doesn t dim 7 Returns to the previous screen The Screen Control screen is displayed only when you have applied the parking brake The...

Страница 58: ...s screen See Redialing page 62 5 Switches between the private and hands free modes only when a call in progress 6 Displays the Hands Free Set Up screen See Setting up the Hands Free Phone page 63 7 Enter three phone numbers for quick dialing See Quick Dialing page 60 8 Enters a phone number See When Dialing page 59 9 Displays the signal strength The more the number of bar segments the stronger the...

Страница 59: ...information about it cannot be obtained Setting the cell phone in the private mode can disable the hands free function When Called When you receive a call you can use the hands free phone 1 Respond to a call When a call arrives the Hands Free Control screen appears automatically 2 End the call The previous screen reappears When Dialing Make a call by entering a phone number 1 Enter a phone number ...

Страница 60: ... Therefore the destination subscriber name and others are not displayed during dialing Calling by Phone Book You can call a person using his her phone number that you have registered in the Phone Book 1 Display the Phone Book screen The Initial Input screen appears Initial Input screen 1 1 3 2 1 Scrolls the character array display 2 Displays the Phone Book beginning with the name whose first chara...

Страница 61: ...ation responds 6 End the call The previous screen reappears To use the Phone Book it must have been downloaded from the cell phone For more details see the instruction manual of your bluetooth Hands Free Box and your cell phone Up to 20 characters can be displayed for each name in the Phone Book Initials including no corresponding name will not be displayed During search a non accent character suc...

Страница 62: ...a and returns to the Hands Free Control screen 5 Returns to the Hands Free Control screen 2 Select a destination you wish to call 3 Confirm the destination The Hands Free Control screen appears again The selected destination data is displayed 4 Make a call You can start talking when the destination responds 5 End the call The previous screen reappears The Out Going Calls list screen or Incoming Ca...

Страница 63: ...Displays the Phone Select screen 5 Displays the Phone Delete screen 6 Returns to the Hands Free Control screen Either the time interval for automatic answer set on this unit or the time interval set on the cell phone whichever is shorter takes effect Select the speaker which is further from the microphone in order to prevent howling or echoes Selecting a Hands Free Phone You can choose the Hands F...

Страница 64: ... 2 1 Selects the cell phone to be deleted from the list 2 Returns to the Hands Free Set Up screen 3 Select a Hands Free phone you wish to delete The Phone Book outgoing call list and incoming call list are deleted together with the deleted Hands Free phone Hands Free Unit Control B64 3658 00 00 En p1 p65 indd 64 B64 3658 00 00 En p1 p65 indd 64 07 2 8 11 28 58 AM 07 2 8 11 28 58 AM ...

Страница 65: ...English 65 B64 3658 00 00 En p1 p65 indd 65 B64 3658 00 00 En p1 p65 indd 65 07 2 8 11 28 59 AM 07 2 8 11 28 59 AM ...

Страница 66: ...UP Menu page 66 Audio SETUP cannot be selected when no source is selected 2 Setup each item 5 1 2 3 4 1 Selects the speaker to set the crossover See Crossover Network Setup page 67 2 Sets the availability of subwoofers 3 Selects the type of front speakers Standard Setup for general diameter speakers Narrow Setup for small diameter speakers Middle Setup for middle diameter speakers Wide Setup for l...

Страница 67: ... can set up the DVD play 1 Display the DVD SETUP screen Touch DVD SETUP in the SETUP Menu page 66 2 Setup each item 1 2 3 4 5 1 Selects a disc menu language 1 See Language Setup page 68 2 Selects a subtitle language 1 See Language Setup page 68 3 Selects an audio language 1 See Language Setup page 68 4 Sets the dynamic range Wide 1 The dynamic range is reduced by changing from Wide to Normal and f...

Страница 68: ...nged Short Middle Long 1 Disabled when a DVD is being played 11 12 q Switches Group Continuous On or Off Off If Off is selected the group playback is stopped or menu screen is appeared at the end of the group playback If On is selected the group playback is continued w Switches the Video Mode of a DVD Audio disc On or Off Off If On is selected a DVD Audio disc is played as a DVD Video disc If Off ...

Страница 69: ...language you use Parental Level Setup Sets a parental level 1 Display the Parental Level code number screen Refer to DVD Setup page 67 and touch Parental Level 1 2 3 4 5 1 Enters a code number 2 Cancels the current setup and returns to the DVD SETUP 2 screen 3 Indicates the present parental lock level 4 Determines the code number and displays the Parental Level setup screen 5 Clears the code numbe...

Страница 70: ...e is needed when making a disc which has DRM Digital Rights Management 1 Display the DivX SETUP screen Touch DivX SETUP in the SETUP Menu page 66 1 2 1 Displays the registration code 2 Returns to the original screen When downloading a DivX VOD file controlled by DRM register the code appeared on the screen such as the one above Otherwise the file may not be able to play with this unit Remaining nu...

Страница 71: ...m 1 5 2 3 4 1 Turns the key touch tone On or Off On 2 Allows scrolling of text display on the Source Control screen Manual Auto Scrolls the screen automatically Manual Allows you to scroll the screen manually 3 Selects a remote control signal On When turned Off the remote control of TV reception is rejected 4 Sets a music CD playback 1 1 Automatically recognizes and plays back an Audio file disc a...

Страница 72: ...PUT port Off Must be used if no navigation system is connected The navigation display is cancelled when the AV source is switched 5 Return to the original screen 6 7 8 6 Selects an AV source to be output at the AV OUTPUT port AV IN1 7 Sets a method to switch to the rear view camera video display Off On Switches to the rear view camera video display when engaging the shift knob of car to Reverse Of...

Страница 73: ...4 5 1 Selects the background to display Change Displays images entered into this unit Refer to Background Select page 76 2 Enables entering or deleting of background images into of from this unit Press to enter the USB suspend mode and then remove the USB device Memory Enables entering of background images Refer to Entering Background page 75 Delete Enables deleting of background image entered int...

Страница 74: ...en updated Manual Information is displayed when you touch on the screen p Returns to the original screen 11 12 13 q Sets an on screen display of the DVD Playback screen Manual Auto Information is displayed for 5 seconds when updated Manual Information is displayed when you touch on the screen w Sets an on screen display of the TV screen Auto with the optional accessory TV tuner connected only Auto...

Страница 75: ...the image 5 Returns to the Picture Select screen Refer to About Picture files page 11 for readable image specifications Up to 3 images can be loaded This operation is not possible when USB is selected as the source Background Delete Deletes the background image 1 Display Delete Image Select screen 2 Select the image to be deleted Background Delete Cancel 10 10 1 1 Returns to the original screen 3 ...

Страница 76: ...t Enter Cancel Touch panel Adjustment You can adjust the touch panel operations 1 Display the Touch panel Adjustment screen Touch Touch in the SETUP Menu page 66 2 Starts Touch panel setup 1 1 Returns to the original screen 3 Adjusts the Touch panel 2 3 Follow the instruction on the screen and touch the center of 2 Cancels the adjustment and returns to the Touch Panel Adjust screen 3 Resets to the...

Страница 77: ...minutes 4 Sets 00 minute Setup examples 3 00 3 29 3 00 3 30 3 59 4 00 5 Sets the clock time in synchronization with the time data sent from the RDS station On When turned On the synchronized mode starts and the clock cannot be adjusted manually 6 Returns to the original screen 3 Adjust the clock time B64 3658 00 00 En p66 p104 indd 77 B64 3658 00 00 En p66 p104 indd 77 07 2 5 8 21 35 PM 07 2 5 8 2...

Страница 78: ...7 6 Sets the Monitor angle 7 Returns to the original screen 8 9 10 12 11 8 Selects a screen mode of the iPod Video playback screen You can select any of the following screen mode Full Just Zoom Normal 9 Selects a screen mode of the DVD playback screen You can select any of the following screen mode Full Just Zoom Normal p Selects a screen mode of the VIDEO1 playback screen You can select any of th...

Страница 79: ...l screen or Navigation the display is shown in the full size display mode automatically The screen mode of these displays cannot be changed The picture qua lity can be set for each source Full picture mode Full Zoom picture mode Zoom Justify picture mode Just Normal picture mode Normal B64 3658 00 00 En p66 p104 indd 79 B64 3658 00 00 En p66 p104 indd 79 07 2 5 8 21 37 PM 07 2 5 8 21 37 PM ...

Страница 80: ...s to the original screen 2 Start Security Code setup If you have already completed the code registration cannot touch 3 Enter a security Code Input four digit number 4 Register your security code 5 Reenter the security code Reenter the same security code as that you have entered in Step 3 for confirmation If you enter a different security code the screen returns to Step 3 for the first code entry ...

Страница 81: ...a while Incorrect entry count Receiver inoperable time 1 2 5 minutes 3 1 hour 4 or more 24hours TV Setup The TV signal receiving areas can be set with the optional accessory TV Tuner connected only 1 Displaying TV SETUP screen Touch TV SETUP in the SETUP Menu page 66 2 Setting up TV 1 2 1 Sets the present TV1 receiving area 2 Returns to the original screen 3 4 3 Sets the present TV2 receiving area...

Страница 82: ... 7 Returns to the original screen DAB Setup You can set the DAB reception only with the optional accessory DAB Tuner connected 1 Display the DAB Setup screen Touch DAB Set Up in the SETUP Menu page 66 2 Setting up DAB 1 2 3 4 5 1 Turns the DAB Priority On or Off 2 Turns the Dynamic Range Control function On or Off 3 Turns the Regional Announcement function On or Off 4 Sets a program type to be sel...

Страница 83: ...nected only 1 Displaying the Amp Control screen Touch Amp Control in the SETUP Menu page 66 2 Setting up Amp Control 4 5 1 2 2 3 3 1 Setup option and value display 2 Select a setup option 3 Selects a set value 4 Enters the set value 5 Returns to the original screen For the model name of amp you can control from the system see the amp s catalog For the options and values you can change and for the ...

Страница 84: ...rization touch No The Setup Menu screen appears again 3 Returns to the original screen 2 Start Set Up Memory 4 5 6 7 4 Recalls the memorized settings 5 Memorizes the current Audio Set Up and AV Interface settings 6 Clears the currently memorized settings 7 Returns to Set Up Memory screen 3 Memorize or recall the settings When memorizing the Audio Set Up and AV Interface settings If settings have a...

Страница 85: ...e external device See Character Entry page 56 for information on how to enter the name 2 Sets the power signal output mode EXT SW1 Pulse EXT SW2 Level Pulse Generates a single power signal pulse Level Continues output of high power signal Sets to turn output on off each time the button on the EXT SW Control screen is pressed 3 Sets the Pulse signal output time Outputs 500ms when 1 is set Increases...

Страница 86: ... Control Touch Audio Control in the Audio Control Menu page 86 2 Display the Audio Control screen 1 1 2 2 3 5 4 1 Adjusts the right and left volume balance 2 Adjusts the front and rear volume balance 3 Turns the Loudness control function On or Off If turned On high and low tones are automatically enhanced during low volume 4 Displays the present source information The stream Dolby Digital dts Line...

Страница 87: ... to another source may be extremely loud You may not set some models of power amp boost to 18 See the catalog or instruction manual of power amplifier Equalizer Control You can set up the equalizer 1 Display Equalizer Control Touch Equalizer in the Audio Control Menu page 86 2 Display the Equalizer screen 1 2 3 4 1 Selects an equalizer curve type You can select any of the following equalizer curve...

Страница 88: ...ass and Middle can be set 9 Returns to the original screen Audio Control Zone Control You can set the front and rear audio source 1 Display Zone Control Touch Zone Control in the Audio Control Menu page 86 2 Set the Zone Control 1 3 5 2 3 4 1 Turns the Zone Function that sets different source sounds for front and rear speakers On or Off 2 Switches the front and rear audio sources This button appea...

Страница 89: ... is switched depending on the front sound source 4 Adjusts the volume of the rear channel This button appears when the Zone function is On 5 Returns to the original screen There are following limitations when zone function is set to On There is no output from the subwoofer Audio Setup page 66 and Equalizer Control page 87 are not available B64 3658 00 00 En p66 p104 indd 89 B64 3658 00 00 En p66 p...

Страница 90: ... downwards to remove it as illustrated Insert the batteries with the and poles aligned properly following the illustration inside the case If the Remote Controller operates only over shorter distances or does not operate at all it is possible that the batteries are depleted In such instances replace the both batteries with new ones Remote Controller mode switch The functions operated from the remo...

Страница 91: ...PBC MODE TOP MENU AUDIO ANGLE RETURN NAVI VOL FM D O O VOICE CANCEL ROUTEM SUBTITLE AV OUT OPEN MAP DIR VIEW O O O Cursor key Moves the cursor when displaying menu OUT MENU IN ENTER ZOOM FNC MENU PBC MODE TOP MENU AUDIO RETURN DVD T V NAVI AUD POSITION O O O O ENTER Enters options OUT MENU IN ENTER ZOOM FNC MENU PBC MODE TOP MENU AUDIO RETURN DVD T V NAVI AUD POSITION O O O O Hands free communicat...

Страница 92: ...u press this key DVD DVD Audio VCD CD Audio files DVD mode Folder search Selects the folder to be played ANGLE ZOOM 1 2ABC 3DEF 2ZONE VOL FM AM D Y 1 O O O O O O Track search and file search Selects the track or file to be played ANGLE ZOOM 1 2ABC 3DEF 2ZONE VOL FM AM D Y 1 O O MAP DIR VIEW O O O O Play Pause Pauses the track Press again to resume playing V SEL OUT MENU IN ENTER ZOOM DVD T V AUD D...

Страница 93: ...OM 2ZONE VOL FM AM D Y O O VOICE CANCEL ROUTEM SUBTITLE AV OUT OPEN MAP DIR VIEW O O O O AUDIO Switch Voice Language Switches the voice language each time you press this key ENTER FNC MENU PBC MODE TOP MENU AUDIO ANGLE RETURN DVD T V NAVI O O O VOICE CANCEL ROUTEM SUBTITLE AV OUT OPEN MAP DIR VIEW TV TV mode Switching Band Video Switches between the station of the TV band to receive and video inpu...

Страница 94: ...g key first then specify the frequency of the station to receive NAVI NAVI mode Joystick Scrolls the map or moves the cursor OUT MENU IN ENTER ZOOM FNC MENU PBC MODE TOP MENU AUDIO RETURN DVD T V NAVI AUD POSITION O O O O ENTER Performs the selected function OUT MENU IN ENTER ZOOM FNC MENU PBC MODE TOP MENU AUDIO RETURN DVD T V NAVI AUD POSITION O O O O Zoom Zooms in or out the navigation map V SE...

Страница 95: ... NAVI O O O O VOICE CANCEL ROUTEM SUBTITLE AV OUT OPEN MAP DIR VIEW MAP DIR Switches between the heading up navigation and north up navigation map displays FNC MENU PBC MODE TOP MENU AUDIO ANGLE ZOOM RETURN NAVI VOL FM D O O VOICE CANCEL ROUTEM SUBTITLE AV OUT OPEN MAP DIR VIEW O O O Hands free communication Enters the dialing method selection mode When a call comes in it answers the call FNC MENU...

Страница 96: ...hat might seem to be a malfunction in your unit may just be the result of slight misoperation or miswiring Before calling service first check the following table for possible problems General The Touch Sensor Tone doesn t sound The preout jack is being used The Touch Sensor Tone can t be output from the preout jack Tuner source Radio reception is poor The car antenna is not extended Pull the anten...

Страница 97: ... level you set Error 07 67 The unit is not operating correctly due to some reason or other Push the unit s Reset button If the Error 07 67 message does not disappear see your nearest Kenwood dealer No Device USB device Disconnected iPod The USB device iPod is selected as a source although no USB device iPod is connected Change the source to any source other than USB iPod Connect an USB device iPod...

Страница 98: ...Kurdish ky Kirghiz la Latin lb Luxembourgish ln Lingala lo Laotian lt Lithuanian lv Latvian Lettish mg Malagasy mi Maori mk Macedonian ml Malayalam mn Mongolian mo Moldavian mr Marathi ms Malay mt Maltese my Burmese na Nauru ne Nepali nl Dutch no Norwegian oc Occitan om Afan Oromo or Oriya pa Punjabi pl Polish ps Pashto Pushto pt Portuguese qu Quechua rm Rhaeto Romance rn Kirundi ro Romanian ru Ru...

Страница 99: ...English 99 B64 3658 00 00 En p66 p104 indd 99 B64 3658 00 00 En p66 p104 indd 99 07 2 5 8 22 18 PM 07 2 5 8 22 18 PM ...

Страница 100: ...z Sampling frequency 48 kHz 20 22 000 Hz Sampling frequency 44 1 kHz 20 20 000 Hz Total Harmonic Distortion 0 008 1 kHz S N Ratio dB 100dB DVD Audio 192k Dynamic Range 100dB DVD Audio 192k DISC Format DVD Audio DVD Video VIDEO CD CD DA Sampling frequency 44 1kHz 48kHz 88 2kHz 96kHz 176 4kHz 192kHz Quantifying bit number 16 20 24 bit USB IF section USB Standard USB 1 1 2 0 File System FAT 16 32 Max...

Страница 101: ...PWR DIN45324 B 14 4v 30W 4 Preout level V 5V 10kΩ Preout impedance 80Ω Speaker impedance 4 8 Ω Tone action Bass 100 Hz 8 dB Middle 1 kHz 8 dB Treble 10 kHz 8 dB External SW Maximum Power Supply Current 500mA General Operating voltage 14 4 V 11 16 V allowable Current Consumption 15 A Installation Size W H D 182 112 163 mm Operational Temperature Range 10 C 60 C Storage Temperature Range 20 C 85 C W...

Страница 102: ...ownload online and you can create your own using your personal content and easy to use tools from DivX com About DivX Certified DivX Certified products are officially tested by the creators of DivX and guaranteed to play all versions of DivX video including DivX 6 Certified products qualify for one of several DivX Profiles that designate the type of video the product supports from compact portable...

Страница 103: ...ed as Class 1 It means that the unit is utilizing laser beams that are of a weaker class There is no danger of hazardous radiation outside the unit Information on Disposal of Old Electrical and Electronic Equipment applicable for EU countries that have adopted separate waste collection systems Products with the symbol crossed out wheeled bin cannot be disposed as household waste Old electrical and...

Страница 104: ...B64 3658 00 00 En p66 p104 indd 104 B64 3658 00 00 En p66 p104 indd 104 07 2 5 8 22 20 PM 07 2 5 8 22 20 PM ...

Отзывы: