background image

8

QUICK GUIDE

1. BEFORE USE

Open the packaging carefully and check 
that all parts are present (see “Included” 
on page 4).

Keep the packaging film away from chil-
dren. Danger of suffocating.

Clean the pot and all its parts before 
the first use, as described in the chapter 
“Cleaning, care, maintenance”.


2. OPENING

Push the locking slider forwards with your 
thumb. Pull the lid and pot apart, remove 
the lid.


3. ADDING THE FOOD TO BE COOKED

Observe the minimum liquid level of ap-
prox. 250 ml.

Now, add the food you wish to cook. The 
maximum fill level is 2/3 of the pot volume.

For foods which absorb liquid, the maxi-
mum fill level is 1/2 of the pot volume (e.g. 
dry pulses, rice).

The fill levels always include both the food 
for c liquid.

MIN

MAX


4. CLOSING

The circle symbol on the lid and the pot 
handle should be aligned. Push the lid and 
pot handle together, the pot is closed.


5. SETTING THE PRESSURE LEVEL

I

   Gentle setting 

I I   

Fast setting

QUICK GUIDE

9

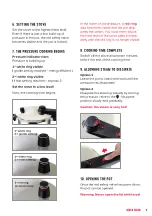
6.  SETTING THE STOVE

Set the stove to the highest heat level. 
Even if there is just a low build-up of 
pressure in the pot, the red safety valve 
becomes visible and the pot is locked.


7.  THE PRESSURE COOKING BEGINS

Pressure indicator rises 

Pressure is building up

1

st

 white ring visible 

I gentle setting reached – energy efficient 1

2

nd

 white ring visible 

I I  fast setting reached – express 2

Set the stove to a low level!

Now, the cooking time begins.

3

rd

 red ring  

(overpressure)

1

st

 white ring  

(I = gentle setting)

2

nd

 white ring  

(I I = fast setting)


In the event of overpressure, a 

red ring 

also becomes visible and the pot dissi-
pates the steam. You must then reduce 
the heat level of the stove plate immedi-
ately until the red ring is no longer visible.

8. COOKING TIME COMPLETE

Switch off the stove around ten minutes 
before the end of the cooking time.


9.  ALLOWING STEAM TO DISSIPATE

Option 1 


Leave the pot to stand and wait until the 
pressure has dissipated.

Option 2  

Dissipate the steam gradually by turning 
the pressure valve to the    “dissipate” 
position slowly and gradually. 

Caution: the steam is very hot!

10.  OPENING THE POT

Once the red safety valve has gone down, 
the pot can be opened.

Warning: Never open the lid with force!

QUICK GUIDE

Содержание ALFA

Страница 1: ...INSTRUCTIONS FOR USE PRESSURE COOKER 3 0 L 4 5 L 6 0 L KELOMAT ALFA...

Страница 2: ...in the food of goodness its aromas and flavour aren t lost HEALTHIER thanks to the brief exposure to heat under the air seal the valuable yet oxygen sensitive vitamins and minerals are retained MORE E...

Страница 3: ...all stove types gas electrical ceramic and induction Faster better healthier and more efficient cooking are the benefits of cooking with the ALFA pressure cooker You will quickly become familiar with...

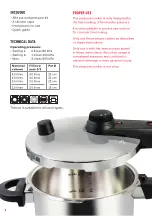
Страница 4: ...usage is considered improper and can lead to material damage or even personal injury The pressure cooker is not a toy INCLUDED Alfa pot with pressure lid 2 silicone caps Instructions for use Quick gui...

Страница 5: ...efore cooking Pressure cooking is this simple Setting the pressure level Setting the stove to the highest heat level The cooking time is complete Leaving the pot to cool Slowly and gradually reducing...

Страница 6: ...ed in the instructions The thermal sandwich base may only be set to the stove plate suitable for its size When heating always observe the highest power level When using the pot on an electric stove th...

Страница 7: ...As these foods are caused to surge upwards when cooking there is a risk that they may block the pressure regulating valve For this reason check that the valves are clear before using the pot again Nev...

Страница 8: ...pot apart remove the lid 3 ADDING THE FOOD TO BE COOKED Observe the minimum liquid level of ap prox 250 ml Now add the food you wish to cook The maximum fill level is 2 3 of the pot volume For foods w...

Страница 9: ...e ring I I fast setting In the event of overpressure a red ring also becomes visible and the pot dissi pates the steam You must then reduce the heat level of the stove plate immedi ately until the red...

Страница 10: ...red safety valve Locking slider Seal markings The pressure level indicator 11 1 5 7 6 8 10 KELOMAT ALFA OVERVIEW PARTS OVERVIEW Base etching Product identification SKT pressure cooker pot SKP pressur...

Страница 11: ...CATOR shows you the pressure levels reached in the pot During the cooking process the first white ring 1 gentle setting or also the second white ring 2 fast setting should be permanently visible accor...

Страница 12: ...y spent cooking And you save energy up to 60 for slow cooked dishes between 30 and 40 for dishes with shorter cooking times You can cook with practically no cooking smells and cooking vapour PRESSURE...

Страница 13: ...the lid and pot handles together The lock ing slider clicks into place audibly STEAM INSERT GRATE OPTIONAL Place the bar on the base of the pot and place the steam insert on the stands Pour enough liq...

Страница 14: ...isible Now the pot can no longer be opened Depending on the fill level it takes a few minutes until the preset cooking setting is reached WARNING In the event of overpressure a red ring also becomes v...

Страница 15: ...ually by itself Recommend ed for foamy and porridge like dishes Option 2 Slowly and gradually reducing the steam by gradually and slowly turning the pres sure valve to position WARNING The escaping st...

Страница 16: ...d is sealed Whether the sealing ring is in the correct position The condition of the sealing ring replace if necessary The cleanliness of the lid the safety valve and the pressure regulating valve The...

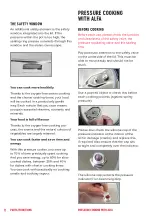
Страница 17: ...umber of cooking processes It must be replaced at the latest when it has become hard or dark THE SAFETY VALVE Only needs to be cleaned under running water and rinsed when the lid is being cleaned It c...

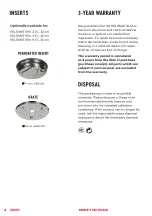
Страница 18: ...rried out free of charge The warranty period is calculated as 3 years from the date of purchase purchase receipt All parts which are subject to normal wear are excluded from the warranty DISPOSAL The...

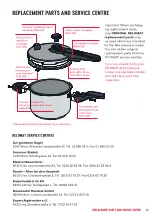
Страница 19: ...CENTRE Replacement parts excluded from warranty Important When exchang ing replacement parts only ORIGINAL KELOMAT replacement parts may be used which are intended for the Alfa pressure cooker You ca...

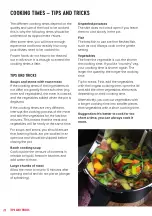
Страница 20: ...at foaming foods are pre cooked in an open pot and should be skipped before closing the pot Batch cooking soup Cook double the amount of contents in relation to liquid freeze in batches and add water...

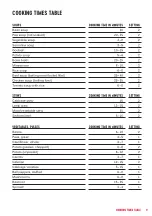
Страница 21: ...en soup boiling fowl 25 35 2 Tomato soup with rice 6 8 2 STEWS COOKING TIME IN MINUTES SETTING Cabbage stew 15 2 Lentil stew 13 15 2 Meat vegetable stew 20 2 Serbian beef 8 10 2 VEGETABLES PULSES COOK...

Страница 22: ...ut bigger chunks brown them separately and place them on top of one another to complete cooking FISH COOKING TIME IN MINUTES SETTING Steamed fish with potatoes 6 8 1 Fish in white wine with potatoes 6...

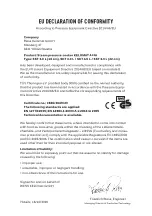
Страница 23: ...o 0826 3669 20 The following standards are applied EN 12778 2005 EN 12983 1 2000 A 1 2004 A 2005 Technical documentation is available We hereby confirm that these items where intended to come into con...

Страница 24: ...iess at www kelomat at Company register number FN 248214x Companies court Regional Court of St P lten K005 A GBA 01 21 CN 4 0 DIE KELOMAT ALFA RANGE KELOMAT Alfa 3 0 L 18 cm 2038 305 KELOMAT Alfa 4 5...

Отзывы: