manualshive.com logo in svg
background image

M3 User and Service Manual

Содержание M3

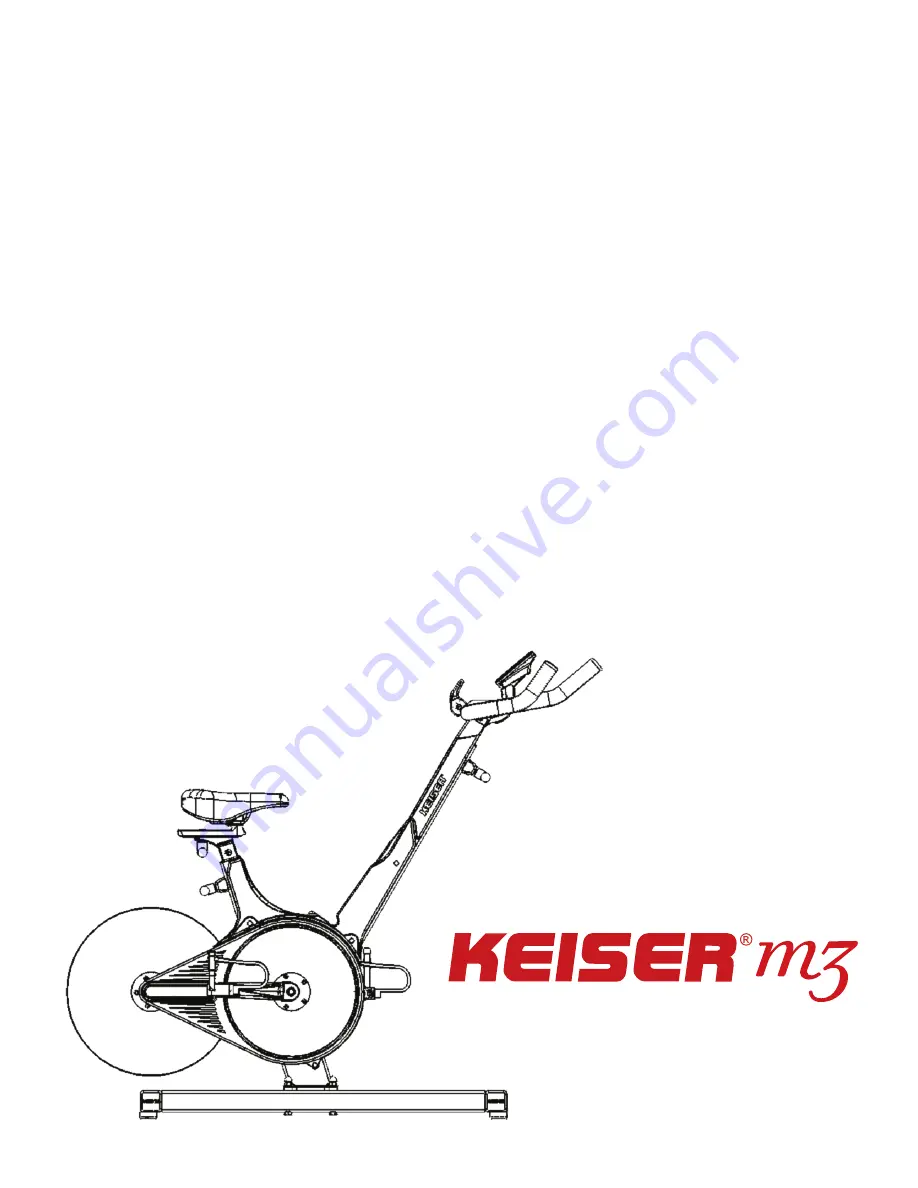
Страница 1: ...M3 User and Service Manual...

Страница 2: ...e Keiser M3 Indoor Cycle Do not skip substitute or modify any steps or procedures herein as doing so could result in personal injury and will void your warranty We have put a number of precautions in...

Страница 3: ...nt T Handle 4 Aluminum Flywheel 5 Sweat Guard 6 Water Bottle Holder 7 Up Down Handlebar Adjustment T Handle 8 Handlebars 9 Multi Function Computer System 10 Resistance Shifter 11 Belt Cover 12 Shimano...

Страница 4: ...Line 4 Pedaling or Elapsed Time The number shown reports the total time spent cycling and will reset to zero after 60 seconds of inactivity or if the computer is reset using the gear lever Line 5 Odo...

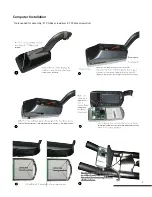
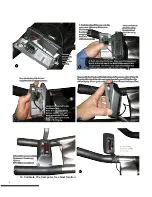
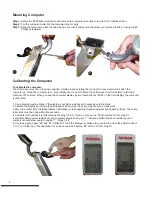
Страница 5: ...Computer Installation 3 Tools needed for assembly 1 Phillips screwdriver 2 Phillips screwdriver...

Страница 6: ...12 Calibrate The Computer See Next Section 4...

Страница 7: ...5...

Страница 8: ...n the time display the computer is calibrated 1 Cycle display must be blank If the display is not blank wait about 50 seconds until it is blank 2 Activate the display by rotating the crank pedal As so...

Страница 9: ...s Once each screw has been started place the palm of one hand on the center of the handlebar pressing firmly and evenly onto the handlebar post With the other hand tighten each screw with the Allen wr...

Страница 10: ...sition 1 3 Assembling Pedal to Crank Arm Step 1 Unwrap the pedal set and Loctite 242 obtain the Torque wrench 15mm crowfoot 4 extension and 15mm open end wrench Step 2 With a clean cloth wipe the thre...

Страница 11: ...6x1 X 20 SS and 5mm Allen wrench Remove the flywheel from its foam envelope NOTE Use the foam envelope to handle the flywheel during assembly Step 3 Carefully slide the flywheel between the two magnet...

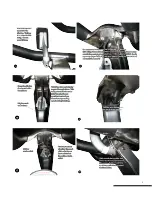
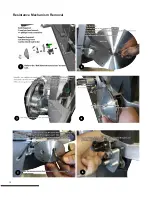
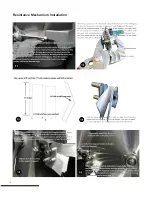
Страница 12: ...Resistance Mechanism Removal 10...

Страница 13: ...11...

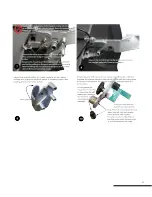
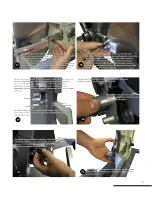
Страница 14: ...Resistance Mechanism Installation 12...

Страница 15: ...13...

Страница 16: ...14...

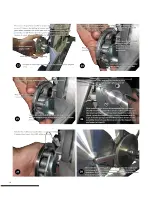
Страница 17: ...Steps For Belt Removal 15...

Страница 18: ...Steps for Belt Installation 16...

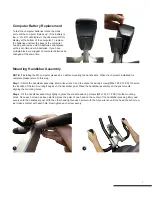
Страница 19: ...Crank Arm and Axle Removal and Installation 17...

Страница 20: ...18...

Страница 21: ...19...

Страница 22: ...ight and comfort Secure your feet in the pedals Move the shifter toward yourself and down and begin pedaling The computer should wake up and display ODO and total distance ridden across the bottom Aft...

Страница 23: ...irty or come in contact with sweat Do not use household or industrial cleaners because many of them are designed to clean glass tile porcelain and greasy or oily surfaces and can destroy the protectiv...

Страница 24: ...cture Users agents or anyone directing the use of said equipment shall determine the suitability of the product for its intended use and said parties are specifically put on notice that they shall ass...

Страница 25: ...23...

Страница 26: ...24...

Страница 27: ...25...

Страница 28: ...Questions Please Contact the Keiser Service department 2470 S Cherry Ave Fresno CA 93706 Toll Free 1 800 888 7009 Phone 559 256 8000 Fax 559 256 8100 www keiser com 26...

Страница 29: ...bit and power drill STEP 6 Loosen the band on the crimping tool and fully open the handles STEP 7 Hand tighten the supplied threaded insert onto the mandrel of the crimping tool until it bottoms out...

Страница 30: ...l Guard Installation Equipment You Will Need 6mm Allen Wrench Two 10mm Wrenches Step 1 Make sure to have all parts and tools present prior to assembly PARTS INVENTORY A Bolt and Nut B Brackets C Tube...

Страница 31: ...the middle of the 2x4 tube of the base frame Remove the two screws and washers from the base frame These Screws will be used to mount the flywheel guard in step 4 Step 2 Assemble the brackets B to the...

Страница 32: ...nd tighten brackets to the base frame with the screws and washers that were removed in step three inset Do not fully tighten the bolts 4 5 Step 5 Make sure the Tube is centered over the Flywheel The F...

Страница 33: ...USA 1 800 888 7009 International 1 559 256 8000 service keiser com 6 Step 6 By not fully tightening the bolts the brackets allow the tube to move front to back and left to right to some degree Center...

Страница 34: ...ST WWW KEISER COM Keiser is committed to building the best products possible for our customers It has come to our attention that when seat posts on the M3 Indoor Cycle are not properly tightened the s...

Отзывы: