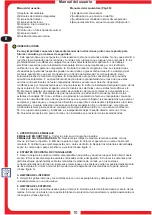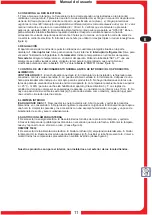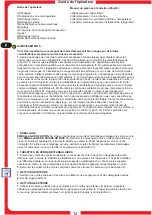
background image

Operator's guide:

1)Unpacking instructions
2)Rectangular glass shelves
3)Internal cleaning
4)External cleaning

7)Checking correct functioning

5)Connection to the mains
6)Controls

8)Internal cleaning
9)Replacement of internal light

Maintenance manual (Page 50):

1)Cleaning the condenser

4)Wiring diagram diagram of refrigeration unit

2)Replacement of a fixed glass panel
3)Replacement of the evaporator

s internal fan

!

I

UK

D

E

F

NL

P
S

DK

FIN

B

GR

CZ
EE

LV

LT

H

M

PL

SK

SLO

6

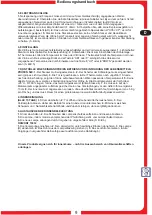
Operator's guide

WARNINGS

It is most important that this instruction booklet is kept together with the appliance both for future
reference and for reasons of safety.
1

UNPACKING INSTRUCTIONS

CARDBOARD PACKAGING 1a

WOODEN CRATE

2. RECTANGULAR GLASS SHELVES
1

2

3

. 4

5

3. INTERNAL CLEANING
1
2

4. EXTERNAL CLEANING
1

2

3.

1

4

5

. Adults should operate this appliance only. Do not allow children to use the controls or play with it.

. Cut surrounding tape. Remove the cardboard packaging by sliding

upwards.

. Remove door's slilding panels by lifting them upwards and then pulling out the bottom side. . Unpack

the shelves stored on the top of the appliance. . Fix them at the various heights by placing them upon
the plastic brackets on one side, and on the provided supports on the other

. The presence on the

supports of special protections devices prevents the shelves from sliding. . Place door panels back into
place, taking care in having both handles on the outside

. Only clean the internal surfaces and glass panels with a soft,wet sponge and a neutral detergent.
. Dry with care using a soft cloth.

. Use the same products as used for the internal cleaning. . Remove the protection plastic white tape

from the steel of the grids.

Cut the white protection tape of the side panel and remove it by seizing by

the corners

.

.

.

2

3

4

5

6

7

. It

is forbidden to modify in any way the main functions and characteristics of this appliance. . The electrical
installation of the appliance should be carried out by a qualified electrician or other competent person.

. Never attempt to carry out repairs unassisted. Inexpert repairs can cause serious damage and

malfunction. . Assistance has to be provided by an authorized engineer only. Always use original spare
parts. . This appliance is not suitable for the storage of basic commodities not including food-stuffs.

. The manufacturers of this appliance accept no responsibility for the consequences of misuse in

contravention of these safety instructions. It further reserves the right to carry out improvements without
prior notice.

8

9

10

11

12

13

14.

. Avoid installing the cabinet directly in line with sunlight. . Nevere install the appliance

near sources of heat, such as radiators, stoves, etc.

. Keep the ventilation grills free from obstruction

for at least 30 cm.

. Ensure that the products displayed on the shelves and grills do not hang over the

edges.

. If damp air or products to be refrigerated should cause ice to form on the evaporator, we

recommend stopping the compressor and placing the goods in special refrigerated containers, kept at the
same temperature, until defrosting is completed;if this is not carried out the compressor will continue to
operate leading to a wasteful consumption of electricity and poor performance.

. If the appliance is not

working and unused, it is indispensable to keep the door open at least 10 cm.

Our products are for

internal use only

do not install outside restaurants, shops.

1.

1b

2

3

4

5

6

5. CONNECTION TO THE MAINS

A

2

3

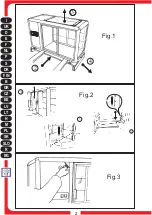
. Remove the nails from the wooden crate with care. . Lift the appliance.

. Remove the pallet or crate. . Place the appliance on a horizontal level surface. . Pay attention

anything is left inside the packing. . Separate the packingmaterials according to their type, for easier
disponsal (see picture 1).

(see picture 2).

(see picture 3).

Ensure that mains voltage and frequency are the same as those stated on the rating plate ( ) attached

to the appliance. . Ensure that the supply socket has the following characteristics:

-

-

. Ensure that there is no danger of explosion (AD) in the room.

The connecting cable to the appliance is H05 VVF, designed for internal use only.

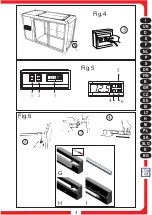
Insert the plug,do

not use triple and reduction outlets (See picture 4).

a)

b)

c)

It is properly

earthed. It is appropriate for the nominal current as set out on the rating plate. It complies with the IEC
regulations: Magneto-thermic differential switch with In = nominal value as stated on the rating plate;
Differential with Id sensitivity = 30 mA.

Содержание Tecfrigo ORIZONT 150 Q

Страница 1: ...www kbs gastrotechnik de Stand Juli 2018 BEDIENUNGSANLEITUNG Aufsatzk hlvitrine Orizont 200 KBS Gastrotechnik GmbH Johannes Kepler Str 14 55129 Mainz...

Страница 2: ...MANUTENZIONE MAINTENANCE INSTANDHALTUNG MANTENIMIENTO ENTRETIEN ONDERHOUD MANUTEN O UNDERH LL VEDLIGEHOLDEL SESANVISNING HUOLTO OHJEET ONDERHOUD DR BA APKOPE VZDR EVANJE HOOLDUS KARBANTART S DR BA KON...

Страница 3: ...I UK D E F NL P S DK FIN B GR CZ EE LV LT H M PL SK SLO R BG 2 Fig 1 3 4 2 Fig 2 1 4 3 Fig 3...

Страница 4: ...I UK D E F NL P S DK FIN B GR CZ EE LV LT H M PL SK SLO R BG 3 Fig 4 A 5 T 12 5 P 3 2 1 4 5 6 12 5 P Fig 5 Fig 6 4 2 3 G H I...

Страница 5: ...ratura per il tempo necessario allo sbrinamento caso contrario il compressore funzioner continuamente provocando un inutile consumo di energia elettrica e uno scarso rendimento Se l apparecchiatura ri...

Страница 6: ...i elevata potenza sull apparecchiatura La temperatura ambiente non sia superiore a 25 C U R 60 per la quale l apparecchio abilitato Classe climatica 3 Sia assicurato un flusso d aria adeguato al vano...

Страница 7: ...Assistance has to be provided by an authorized engineer only Always use original spare parts This appliance is not suitable for the storage of basic commodities not including food stuffs The manufactu...

Страница 8: ...uorescent tube Reassemble by following the above instructions in reverse order see figure 6 1 Light switch 2 Refrigeration switch 7 CHECKING CORRECT FUNCTIONING BEFORE PLACING THE FOODSTUFFS IN MAKE S...

Страница 9: ...ABLAGEN GLASPLATTEN 1 2 3 4 5 3 INNENREINIGUNG 1 2 4 AUSSENREINIGUNG 1 2 3 Denken Sie daran dass die ausgestellten Produkte nicht ber die Ablagen oder Gitter hinnausstrecken d rfen Sollte es durch die...

Страница 10: ...t Die T r ist geschlossen Der Thermometer nach ungef hr 1 Stunde nach der Einschaltung zeigt den f r die aufzubewahrenden Waren passenden Temperaturwert Keine direkte Sonnen bzw starke Lichteinstrahlu...

Страница 11: ...ado con los clavos Elevar el aparato Eliminar la paleta o caja Colocar el aparato en un plano horizontal nivelado Verificar que el embalaje est vac o antes de tirarlo Separar los materiales del embala...

Страница 12: ...ALIMENCIOS CONTROLAR QUE 1 2 3 4 5 6 7 8 1 2 3 4 SUSTITUCI N L MPARA INTERNA Fijarse bien que la tensi n y la frecuencia de la red correspondan a las indicadas en la placa colocada en el aparato Fija...

Страница 13: ...ERNE 1 2 3 Seuls des adultes devront faire fonctionner cet appareil Ne pas laisser des enfants toucher les commandes ou jouer avec l appareil Il est interdit d alt rer ou de modifier les caract ristiq...

Страница 14: ...aisser d givrer l vaporateur en arr tant l appareil pendant environ une heure Nettoyer les parois et les accessoires avec une ponge imbib e d eau m lang e un peu de bicarbonate de soude et s cher soig...

Страница 15: ...van de wand Denk eraan dat de tentoongestelde producten niet buiten de omtrek van de schappen of roosters mogen steken 12 13 14 1 UITPAKINSTRUCTIES KARTONNEN VERPAKKING 1a HOUTEN KIST 1b 2 3 4 5 6 2 D...

Страница 16: ...5 De stekker in het stopcontact zit De schakelaar van de koelinstallatie omgezet is en het groene lampje brandt De deur goed dicht is De thermometer ongeveer een uur na het inschakelen de gewenste te...

Страница 17: ...b os raios do sol N o instalar o aparelho em proximidades de fontes de calor tais como aquecedores calor ficos etc Manter as grelhas de ventila o do grupo compressor distante das paredes pelos menos d...

Страница 18: ...r cerca de uma hora desde a liga o est adequada aos produtos N o h raios solares ou de far is de elevada pot ncia a reflectir directamente na aparelhagem A temperatura ambiente n o superior a 25 C Hum...

Страница 19: ...rn p g a luftfuktighet eller varor som ska nedkylas rekommenderas det att stanna kompressorn och placera varorna i en l mplig kylbeh llare med samma kyltemperatur under avfrostningen I motsatt fall fo...

Страница 20: ...lljus eller kraftig belysning f r inte riktas direkt p anordningen Lokalens temperatur f r inte verskrida 25 C med relativ fuktighet p 60 som apparaten r avsedd f r klimatklass 3 Luftfl det r anpassat...

Страница 21: ...4 UDVENDIG RENG RING 1 2 3 Install r ikke montren p steder med direkte sollys Install r ikke apparatet i n rheden af varmekilder eksempelvis varmeapparater radiatorer osv S rg for at kompressorens ud...

Страница 22: ...og at det gr nne lys lyser D ren er ordentligt lukket Den indvendige temperatur n r der er g et cirka en time er egnet til de aktuelle madvarer Apparatet ikke uds ttes for direkte sollys eller en st...

Страница 23: ...lytett vist tuotteista Suorita sulatus aseta tuotteet sulatuksen ajaksi astiaan joka on j hdytetty samaan l mp tilaan kuin laite ja pys yt kompressori Muuten kompressori toimii jatkuvasti kuluttaen tu...

Страница 24: ...eseen ei kohdistu auringonvaloa tai voimakkaita valoja Ymp rist n l mp tila ei ole yli 25 C Suht kost 60 jolle laite on s detty ilmastoluokka 3 Moottori saa riitt v sti ilmaa ritil n edess on oltava v...

Страница 25: ...paraat niet in de buurt van warmtebronnen zoals kachels centrale verwarming enz Installeren Houd de ventilatieroosters van de compressorgroep tenminste 30 cm van de wand Denk eraan dat de tentoongeste...

Страница 26: ...eschakeld en het groene lichtje brandt De deur goed dicht is De thermometer ongeveer een uur na het inschakelen de gewenste temperatuur aanduidt Er geen zonnestralen of felle lampen direct op het appa...

Страница 27: ...2 3 4 5 6 7 8 9 1 50 1 4 2 3 1 2 3 4 5 6 7 8 9 10 11 12 13 14 30 10 cm evaporator cm 1 1 1 2 3 4 5 6 2 1 2 3 4 5 3 1 2 4 1 2 3 1 2 3 I UK D E F NL P S DK FIN B GR CZ EE LV LT H M PL SK SLO 26...

Страница 28: ...1 2 3 4 SET 5 UP 6 DOWN 7 1 2 3 4 5 6 7 8 8 1 2 3 4 9 1 2 3 4 IEC In 30 mA AD T H05 VVF 3 4 5 25 C U R 60 3 10 cm Max 5 Kg 6 6 ORIZONT 150Q 1 2 3 4 5 6 G H I I UK D E F NL P S DK FIN B GR CZ EE LV LT...

Страница 29: ...zen v bl zkosti zdroj tepla jako jsou kamna radi tory apod M ky ventilace kompresorov jednotky mus b t vzd len od st ny nejm n 30 cm Ulo en potraviny ukl dejte tak aby nep esahovaly okraj polic nebo r...

Страница 30: ...e hodinu po zapnut za zen vhodn pro ulo en dan ho typu potravin Na za zen nedosahuj p m slune n paprsky i vysoce v konn sv tidla Teplota prost ed nep esahuje 25 C a relativn vlhkost je 60 hodnoty pro...

Страница 31: ...s spetsiaalsesse samale temperatuurile jahutatud mahutisse vastasel korral t tab kompressor pidevalt ebat hususalt tarbides asjatult elektrienergiat Kui vitriinkapp seisab ja seda kasutata tuleb kindl...

Страница 32: ...ei leta 25 C suhteline niiskus 60 mis on seadme etten htud t tingimused Kliimaklass 3 Tagatud on vajalik hujuurdevool mootoriruumi j ttes resti ette v hemalt 10 cm vaba ruumi Siseruum on ige koormuseg...

Страница 33: ...u saules staru iedarb ba Aizliegts iek rtu uzst d t siltumener ijas avotu tuvum pie kr sn m elektriskajiem sild t jiem utt Kompresijas grupas ventil cijas rest m ir j atrodas ne maz k k 30 cm no sien...

Страница 34: ...neatrodas tie os saules staros vai paaugstin tas jaudas m ksl g s gaismas staros Apk rt j s vides temperat ra nep rsniedz 25 C un mitrums 60 parametri kas piem roti iek rtai Klimatisk klase 3 J nodro...

Страница 35: ...riame kompresori sustabdyti prekes perkelti kit iki tos pa ios temperat ros aldom talp ir palaukti kol aparatas atitirps prie ingu atveju kompresorius dirbs nei sijungdamas sukels bereikaling energijo...

Страница 36: ...g vienai lentynai viduje palikta pakankamai erdv s alto o Atjungti maitinimo tamp Atidaryti duris ir i traukti viduje laikomas prekes Palikti garintuv kad atitirpt atjungus j ma daug valandai I valyti...

Страница 37: ...a hogy a ki ll tott term kek ne rjenek a polcok vagy a r csok perem n k v l Ha a leveg p r s t n a leveg p ratartalma vagy a leh tend term kek ltal okozott rendellenes j gk pz d s k vetkezne be akkor...

Страница 38: ...ok l mpa f nye A k rnyezeti h m rs klet ne haladja meg a 25 C ot 60 N T mal amelyn l a k sz l k m k d k pes 3 as kl maoszt ly A motort r sz m ra sz ks ges l gmozg s biztos tva legyen legal bb 10 cm re...

Страница 39: ...enza Teknika awtorizzat U a biss partijiet ori inali L appliance huwiex ma luq biex jikkonserva o etti o ra li mhumiex alimentari Id ditta li olqot l appliance ma terfax responsabilita meta n normi sp...

Страница 40: ...older tal lampa billi ssegwi d direzzjo Ne i d diffu ur G billi timbotta fil enb Ne i l lampa H Aqla t tubu minn mal owlder I Ibdel it tubu fluworoxxenti Er a qieg ed kollox f postu billi tibda minn...

Страница 41: ...one na deszcz czy bezpo rednie dzia anie promieni s onecznych Nie instalowa urz dzenia blisko r de ciep a takich jak kaloryfery czy piecyki itd Kratki wentylacyjne kompresora musz by oddalone od ciane...

Страница 42: ...iny od w czenia jest odpowiednia dla wstawionych artyku w Do urz dzenia nie dochodz promienie s oneczne czy nad urz dzeniem nie s ustawione ar wki o du ej mocy Temperatura pomieszczenia nie przekracza...

Страница 43: ...bo slne n mu iareniu Nein talujte pr strojov zariadenie do bl zkosti tepeln ch zdrojov ako s napr kachle radi tory a pod Ventila n mrie ky kompresorovej jednotky musia by vzdialen od steny aspo 30 cm...

Страница 44: ...i stenou a ro tom mus by vo n priestor min 10 cm aby bol zaru en dostato n pr vod vzduchu do priestoru motora Vn torn priestor mus by spr vne za a en Poli ky nesm by pr li preplnen varom mus by ponech...

Страница 45: ...od stene vsaj 30 cm Paziti da razstavljeni izdelki ne presegajo robov predalov ali re etk e se pojavi abnormalni sloj ledu na evaporatorju povzro en od previsoke vlage v zraku ali od shranjenih izdelk...

Страница 46: ...sijati direktno na napravo ka brez ovir pred re etko za vsaj 10 cm Notranji prostor mora biti pravilno nabavljen brez previsoke te e na predalih najve 5 Kg za vsaki predal pustiti dovolj prostora za...

Страница 47: ...nt sc zut Dac nu folosi i aparatul l sa i u a deschis cel pu in 30 de cm l sa i iluminarea neonul aprins f r s fi pornit r cirea T ia i banda din polipropilen i scoate i cutia ndep rta i sc ndurile di...

Страница 48: ...ruri de nalt putere pe aparatur Temperatura ambientului s nu fie ar celei de u care aparatura este abilitat S fie asigurat un flux vat n nc perea motorului f r o tur ri n fa a grilajului pentru cel pu...

Страница 49: ...I UK D E F NL P S DK FIN B GR CZ EE LV LT H M PL SK SLO BG R 48 1 2 3 4 5 6 7 8 9 10 11 12 13 14 1 1 2 3 4 5 6 2 1 2 3 4 5 3 1 2 4 1 2 3 5 1 2 30 10 1 1 2 3 1 2 4 5 6 7 8 9 3 50 1 2 3 4...

Страница 50: ...5 25 3 10 5 1 6 6 IEC Id VVF SET or P UP DOWN R H 60 G I 3 4 5 6 1 2 3 4 5 6 7 1 2 3 4 5 6 8 8 15 1 2 3 4 9 1 2 3 4 1 2 3 4 6 A 7 ORIZONT 150Q 5 I UK D E F NL P S DK FIN B GR CZ EE LV LT H M PL SK SLO...

Страница 51: ...opas Handleiding van de persoon belast met het onderhoud Pokyny pro dr bu Hooldusjuhend Instrukcija tehnisk s apkopes darbiniekam Techninio aptarnavimo darbuotojo vadovas Karbantart si k zik nyv Manwa...

Страница 52: ...51 Fig 1 2 3 Fig 2 Fig 3 8 6 7 4 2 3 2 3 4 5a 5a 5b 2 3 I UK D E F NL P S DK FIN B GR CZ EE LV LT H M PL SK SLO R BG...

Страница 53: ...y Unscrew the screw fixing the upper corner on the sliding drive of the door Repeat the same for the lower corner Unscrew the supports of the glass shelves unscrew the fastening screws of the rear ang...

Страница 54: ...e sup rieur sur la glissi re de la porte R p ter pour l angle inf rieur D visser les montants de soutien des tablettes en verre D visser les vis de fixation des angles arri res sup rieurs et inf rieur...

Страница 55: ...ns fl nsar Anv nd dammsugaren f r att suga bort kvarblivet damm S tt p gallret igen och koppla p str mmen se fig 1 Bryt str mmen Lossa f stskruvenfr n det vre vinkelf stet p d rrskenan Upprepa f r det...

Страница 56: ...NG VAN DE INTERNE VENTILATOR VAN DE VERDAMPER 1 2 3 4 5 6 7 8 9 Schakel de elektrische voeding uit middels de hoofdschakelaar en haal de stekker uit het stopcontact Met een schroevendraaier de twee sc...

Страница 57: ...rrata sama alumise nurgakinnitusega Kruvida klaasriiulite vertikaalsed tugipostid lahti keerata tagumiste nurgakinnituste kruvid lahti nii all kui leval keerata v ljaspool tagumiste nurgakinnituste kr...

Страница 58: ...ls r szen alul s fel l is a h ts sz gidomok r gz t csava e a h l zati csatlakoz st Csavarozz k ki a fels bor t lap csavarjait Cs sztass k el a fels bor t lap lemez t a megjel lt ir nyban T vol ts k e...

Страница 59: ...energie stla en m hlavn ho vyp na a a vytiahnite z str kov vidlicu zo ie ovej Skrutkova om odskrutkujte upev ovacie skrutky postarnn ho ro tu a vyberte samotn ro t tetcom odstr te prach usaden na lop...

Страница 60: ...pirator Cupla i alimentarea cu electricitate vezi Fig 1 Decupla i alimentarea De uruba i uruburile de fixare din col ul superior de pe ghidajul de alunecare al u ii Re eta i col ul inferior De uruba i...

Страница 61: ...60 Orizont 150 200 Q Orizont 200 Self Service 2 1 13 3 5 14 4 Orizont 200 GBT 4 13 3 5 1 2 I UK D E F NL P S DK FIN B GR CZ EE LV LT H M PL SK SLO R BG...

Страница 62: ...ce il calore necessario per l evaporazione dell acqua o deteriorare la resistenza elettrica Quindi si raccomanda di prestare attenzione a questa bacinella e procedere alla sua pulizia periodicamente T...

Страница 63: ...elaar Klemmenbord Smoorspoel Stekker Starter Thermostaat Ventilator koelinstallatie Ventilator verdamper Neon 1 2 3 4 5 6 7 8 9 10 11 12 13 14 1 2 3 4 5 6 7 8 9 10 11 12 13 14 Vani ka Kompresor Konden...

Страница 64: ...Filtru Interruttur Terminal Dwal Neon Rijattur Plakka tal Kurrent Starter Termostat Ventilatur Kundensatorju Ventilatur Evapuratorju 1 2 3 4 5 6 7 8 9 10 11 12 13 14 Miska Kompresor Kondensator Parnik...

Страница 65: ...FRIGO s p a 42024 Castelnovo di Sotto Reggio Emilia Italy Via Galileo Galilei 22 Tel 0522 683246 0522 688443 Fax 0522 682196 Fax Uff acquisti 0522 682311 Fax Uff amm 0522 688444 e mail info tecfrigo c...

Отзывы: