uBreakiFix Fixture Install & Maintenance Guide
12
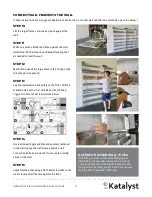
STEP 16
Set the cabinet next to the K-Wall Frames mounted on
the wall. Use provided hardware (E) to fasten cabinet
to the adjacent frame. Adjust leveling feet as needed
to level.
STEP 17
Set the 4’ K-Wall panel on top of the cabinet, and
follow steps 12 - 14 to secure to the wall.
STEP 18
Secure to the adjacent wall frame, and then to the
cabinet below using the provided hardware.
STEP 19
Locate the wood end panels. Referencing the up
arrow, drop the system screws into the keyhole slots
and then use bolts to fasten (F).
STEP 20
Set the header cubbies onto the header flags and
then secure to each other and the adjacent end
panels with provided hardware (G & H). Fasten
securely onto the header flags with the smaller bolts
(I).
STEP 21
To install the decorative signage in the cubbies, start
by placing four pins (J) into the rear holes on either
side. Then insert the sign panel. Lock into place by
inserting pins into the front four holes.
CONNECT THE CABINET & WALL PANEL
Содержание asurion uBreakiFix Fixture
Страница 16: ......
Страница 17: ......
Страница 19: ...THIS PAGE INTENTIONALLY LEFT BLANK ...
Страница 28: ...Short Cabinet Workbench Drawer Assembly Workbench Co mm un ity Wa ll Bo x Fra me s ...
Страница 29: ...Glass Panels K Wall Frames K Wall Frames Drawer Assembly Workbench Tech Gallery Panels ...
Страница 30: ...Co mm un ity Wa ll Bo x Fra me s Tech Gallery Panels ...
Страница 31: ...uBreakiFix Fixture Install Maintenance Guide 31 ...


