manualshive.com logo in svg
background image

30 / 57 


For chimneys, the minimum safety distances to flammable material differs from product to 
product. Always check the manufacturer’s instructions. In case of doubt, approach your local fire 
safety officials. 

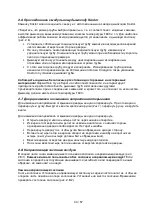
2.5. Connecting the stove to a brick chimney and instructions for JK stoves 

The KS stove can be connected to a brick chimney from the back or the top. JK models can only 
be connected from the top. For a brick chimney connection, the safety distances and protectors 
named in chapter 2.4. and the chimney’s masonry regulations must be adhered to. 
 

2.5.0. Connection from the rear, only in KS models 

Make an opening in the brick chimney that is 2-3cm wider than the connection pipe. 
Detach the stove's outer back mantle. Use a screwdriver to detach the plate covering the hole in 
the inner back mantle. Move this covering plate onto the hindmost hole on top of the stove. Place 
the connection pipe delivered with the stove in its rear wall opening. Push the stove into its place. 
Make sure that the connection pipe settles well into the hole in the chimney. Tighten the space 
between  connection  pipe  and  chimney  with  a  flexible,  fire-proof  material  such  as  fire  wool. 
Neaten  the  hole  with  a  Kastor  covering,  available  at  your  hardware  store.  The  covering  is 
attached to the brick chimney surface with metal attachments or fireproof glue. (Picture 2.5.1.) 

 
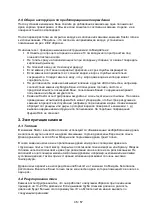
Stoves with extended feed doors must only be installed into walls made of non-flammable 
material (brick, concrete etc.).

The non-flammable material must be arranged around the door 

extension as shown in picture 5. If there is a flammable floor in the room with the door, the area 
requiring protection must extend 100mm beyond both sides of the door and at least 400mm in 
front of it. The protective layer should be a metal sheet with a thickness of at least 1mm. 


2.5.1 Stoves with an extended door 

The floors of the sauna and the room into which the stove door opens must be on an equal level. 
The room with the stove door may also be on a lower level, but never higher than the sauna's 
floor! 

The  stove  and  its  extension  must  be  installed  on  a  sturdy,  immovable,  fireproof,  level 

surface. A cast concrete base is the best choice. If the floor of the room with the door in it 

is flammable,

 there must be a non-flammable protective layer (i.e. cast concrete or masonry) of 

at least 60mm beneath the door extension. The fire protection measures on the door side must 
also adhere to the instructions in chapter 2.3. 

By adding fireproofing the stove and its door extension may also be installed on wooden 

floors.

 Nevertheless, the dividing wall must be non-flammable (brick, concrete or similar). For the 

sauna  and  the  extended  door,  a  concrete  slab with  a  thickness  of  60mm  is  usually  acceptable 
(remember  to  take  care  of  moisture  draining).  The  fireproofing  on  the  sauna  side  floor  must 
extend 250mm in front of the stove, 250mm at its sides and 250mm behind it or, at the back and 
sides, up to a fireproofed wall. The fire protection measures on the door side must also adhere to 
the instructions in chapter 2.3. 
 

In unclear cases consult the local fire safety officials. 


2.5.2.  INSTALLATION THROUGH THE WALL AND FITTING THE FRAME , KS-12–20-27-37 

JK models, also with water tank 

See also the instructions in chapter 2.6. concerning flue pipe installation. 
Make  sure  that  you  have  received  the  frame  that  belongs  to  the  door  extension  (behind  the 
stove, between the packing hoop and the stove). 
Installation through the wall: 

  Make a hole in the wall. Its size should leave about 10-20mm of clear space all around 

the door extension. 

  Remove the stove door by taking the hinge pin off (note the 2 base plates between door 

and frame). 

Содержание KS Series

Страница 1: ...KASTOR KS sarjan puukiukaiden asennus ja k ytt ohje KS 12 KS 20 KS 27 KS 37 ja JK mallit...

Страница 2: ...12 5 Ongelmatilanteet 13 6 Takuu ja valmistajan tiedot 14 Monterings och bruksanvisning f r KASTORS vedeldade bastuugnar i KS serien KS 12 KS 20 KS 27 KS 37 15 1 F re montering 16 1 1 F rpackningens i...

Страница 3: ...nd changing the opening directionVirhe Kirjanmerkki ei ole m ritetty 2 8 Air guide plate Virhe Kirjanmerkki ei ole m ritetty 2 9 General directions to prevent damage Virhe Kirjanmerkki ei ole m ritett...

Страница 4: ...t hankkimaan luotettavilta yhteisty kumppaneiltamme Ter s on suomalaista Ruukin rakenneter st joka tasalaatuisuutensa ansiosta taipuu monimuotoisiin ratkaisuihin lujuutensa s ilytt en Lasiluukkumme o...

Страница 5: ...2 4 o Piippuliit nn n paikka mahdollisen vanhan piipun liit nn n korkeus lattiasta ja mahdollisen uuden piipun asennusreitti o Lattian materiaali palava palamaton kaakeloitu ja vesieristetty 2 Asennu...

Страница 6: ...itte t kivet pystyasentoon kuva 2 2 maksimi kivim r on noin 60kg Kivien koolla kivim r ll ja sekoittamalla eri kivilaatuja kesken n voidaan tasapainottaa l ylyominaisuudet saunaan ja saunojan mieltymy...

Страница 7: ...jeiden mukaisilla suojauksilla jolloin kiuas voidaan asentaa esimerkiksi 1100mm levyiseen aukkoon esim KS 20 aukko on 490mm 250mm 740mm Kun et isyys kiukaan yl pinnasta kattoon on v hint n 1200mm ei k...

Страница 8: ...sken n tai huoneen lattia johon suuluukku tulee voi olla my s alemmalla tasolla kuin l ylyhuoneen lattia Huom Ei miss n tapauksessa ylemp n Kiuas my s jatketun suuluukun osalta asennetaan vaakasuorast...

Страница 9: ...elevyll joita saa rautakaupasta Peitelevy kiinnitet n tiilihormiin metallisilla kiinnikkeill tai tulenkest v ll massalla kuva 2 5 2 2 6 Liitt minen Kastor valmishormiin Kastor kiuas voidaan liitt p lt...

Страница 10: ...eet ovat kylm t Tiilihormi voi vaurioitua Varo heitt m st vett suoraan lasiluukulle Kiukaan k ytt ik lyhenee jos kiuasta l mmitet n jatkuvasti punahehkuisena Kiukaan k ytt ik lyhenee oleellisesti jos...

Страница 11: ...lkea liikaa palamisen aikana varo h k vaaraa 3 3 L mmitystehon s t L mmitystehoon vaikuttaa polttoaineen laatu ja m r l polta kiukaassa liian pitki puita Varo k ytt m st kiuasta jatkuvasti punahehkuis...

Страница 12: ...ajan Kun menet saunomaan lis tarvittaessa tulipes n muutama polttopuu lis 4 Huolto 4 1 Kiukaan puhdistus Kiukaan pinta voidaan puhdistaa heikolla pesuaineliuoksella ja kostealla pehme ll liinalla pyyh...

Страница 13: ...nen t ysi pes llinen tukevaksi pilkottuja kuivia polttopuita Onko veto liian kova Liekki palaa viel yhdysputkessa joka on punainen vaikka kiukaan alap vaipan sis ll ei hehku punaisena Katso luku 3 2 v...

Страница 14: ...lukuun 3 huolellisesti Vesis ili llisen kiukaan s ili ss vesi ei l mpene riitt v sti Onko veto liian kova Liekki palaa viel yhdysputkessa joka on punainen vaikka kiukaan alap vaipan sis ll ei hehku p...

Страница 15: ...l rt oss skaffa fr n v ra p litliga samarbetspartners St let r finskt Ruukki konstruktionsst l som tack vare sin j mna kvalitet b js i m ngformiga l sningar och som trots det beh ller sin styrka V ra...

Страница 16: ...ldfasta konstruktioner punkt 2 3 och 2 4 o Platsen f r skorstensanslutning anslutningens h jd fr n golvet f r en eventuell gammal skorsten och monteringsv gen f r en eventuell ny skorsten o Golvmateri...

Страница 17: ...enmagasinet upp till kanten l gg de platta stenarna lodr tt bild 2 2 Maximal stenm ngd r ca 60kg Genom stenstorlek stenm ngd och att blanda olika stenarter kan man justera badegenskaperna s att de bal...

Страница 18: ...t anvisningarna nedan varvid ugnen kan monteras till exempel i en ppning p 1000 mm t ex ppningen f r modellen KS 20 r 490 mm 250 mm 740 mm Om avst ndet fr n ugnens ovansida till taket r minst 1200 mm...

Страница 19: ...n placeras kan ocks ligga l gre n golvet i basturummet men aldrig h gre Ugnen och ven den f rl ngda luckan monteras v gr tt p ett or rligt och stabilt brandisolerat underlag B sta underlag r gjuten be...

Страница 20: ...sten eller med eldfast massa bild 2 5 2 2 6 Anslutning till en f rdig Kastor skorsten Kastor ugnen kan anslutas ovanifr n till fabrikstillverkad Kastor skorsten Var s ker p att v lja r tt typ av f rd...

Страница 21: ...la omst ndigheter elda inte genast i b rjan p full effekt f r att tegelskorstenen inte skall ta skada Kasta inte kallt vatten p glasluckan Eldas ugnen kontinuerligt s att den r r dgl dande f rkortas l...

Страница 22: ...f s som extra tillbeh r inne i vre delen av ugnen ovanf r den v lvda flamskivan Om detta inte hj lper regleras draget med r kspj llet Spj llet f r aldrig st ngas f r mycket medan man eldar risk f r os...

Страница 23: ...t Nu r elden lagom stark en l ngre tid N r du b rjar bada kan du vid behov l gga in n gra klabbar till i eldstaden 4 Underh ll 4 1 Reng ring av ugnen Ugnens yta kan reng ras med mild tv ttmedelsl snin...

Страница 24: ...visningen tminstone en omg ng stadiga torra vedklabbar r draget f r h rt Flammorna n r nda in i anslutningsr ret som gl der r tt trots att ugnens nedre del innanf r manteln inte gl der Se avsnitt 3 2...

Страница 25: ...eh llaren I en ugn med vatten beh llare r draget f r h rt Flammorna n r nda in i anslutningsr ret som gl der r tt trots att ugnens nedre del innanf r manteln inte gl der Se avsnitt 3 2 om reglering av...

Страница 26: ...ble material procured from reliable suppliers we have gathered over the years The steel is Finnish structural steel from Ruukki which can be bent into various solutions while retaining its hardness du...

Страница 27: ...on of chimney connection height from floor of any existing chimney connection or installation route of any new chimney pipe o Floor material flammable non flammable tiled and waterproofed 2 Installati...

Страница 28: ...itions Picture 2 2 The maximum stone capacity is about 60kg By adjusting stone size amount and adding other types of stone you can balance the steam consistency to suit the sauna and your preferences...

Страница 29: ...d the nearest flammable material is 150 mm These safety distances can be reduced by using protectors according to instructions given below These will enable you to install the stove in a space just 1...

Страница 30: ...of it The protective layer should be a metal sheet with a thickness of at least 1mm 2 5 1 Stoves with an extended door The floors of the sauna and the room into which the stove door opens must be on a...

Страница 31: ...ary Make sure the pipe extends sufficiently into the chimney but not so far that it blocks up the chimney Seal the empty space between connection pipe and chimney with flexible fireproof material such...

Страница 32: ...the stove into the sauna before you add the stones burn a full load of wood in a well ventilated sauna to burn off the last protective substances and harden the coating Once the outdoor burn in has be...

Страница 33: ...e stove s upper part The sauna and or stones do not heat up properly in less than an hour although the stove has the correct size When you light the fire the chimney valve and ash compartment door mus...

Страница 34: ...fire has burned for 5 10 minutes the burning can be adjusted by closing the ash door to 0 5 2 cm Restrict excessive draught with the chimney valve if necessary During this heating phase the fire comp...

Страница 35: ...ir leaks Is the stove s other flue opening closed tightly with the cap that came with the stove Is the flame plate in the upper part of the stove clean of ash Is the connecting pipe between stove and...

Страница 36: ...re the stones good quality and the correct size Suitable stones are peridotite or dunite of a length of over 10 cm and not too flat The sauna heats up quickly but the stones remain cool Correct amount...

Страница 37: ...astor products are of high quality and reliable For its wood burning stoves Helo Oy grants a 3 year warranty for its Kastor stoves covering manufacturing flaws This warranty does not cover any damage...

Страница 38: ...38 57 KASTOR KS KS 12 KS 20 KS 27 KS 37 KASTOR Kastor Ceram 800 Coanda www Kastor fi...

Страница 39: ...39 57 1 1 1 o o o o o 2 o 1 2 o 2 3 2 4 o o 2 2 1 2 7 o o 2 8 JK...

Страница 40: ...40 57 2 1 2 1 2 2 10 2 2 60 2 3 Kastor 60...

Страница 41: ...41 57 400 250 250 2 3 2 3 1 60 100 2 3 2 Kastor 2 4 2 4 1 50 100 200 KS 20 490 200 690 500 1000 500 85 1000 1200 150 1100 KS 20 490 250 740 1200 2 4 2 50 75 1 7 2 4 2...

Страница 42: ...42 57 30 100 400 1 50 100 50 400 2 5 JK 2 4 2 5 0 KS 2 3 2 5 1 5 100 400 1 2 5 1 60 2 3...

Страница 43: ...43 57 60 250 250 250 2 3 2 5 2 KS 12 20 27 37 JK 2 6 10 20 2 40 5 10 5 2 5 3 2 3 45 45 Kastor 2 5 2...

Страница 44: ...44 57 2 6 Kastor Kastor Kastor 600 2 6 400 Kastor Helo Oy 600 2 7 2 2 8 2 8 1 2 8 2...

Страница 45: ...45 57 2 9 Kastor 2 8 2 10 Kastor Helo Helo 3 3 1 Kastor 35 3 2 10 20...

Страница 46: ...46 57 1 0 5 2 3 3 3 3 1 3 5 3 0 5 2 40 50 3 3 2...

Страница 47: ...47 57 3 5 10 0 5 2 50 60 3 3 3 40 60 4 4 1 Kastor Nokipois 4 2 4 3 2 6 4 4 Kastor Noki Pois 4 4 1 2 7...

Страница 48: ...48 57 5 www kastor fi Puukiukaat Valitse itsellesi sopivin kiuas 3 5 100 120 3 3 3 2 2 2 10 80 C...

Страница 49: ...49 57 3 2 3 2 3 5 2 2 10 2 2 3 3 3 6...

Страница 50: ...50 57 Kastor Helo 3 3 HELO OY Tehtaankatu 5 7 11710 Riihimaki 358 0207 560300 e mail info helo fi www helo fi...

Страница 51: ...51 57 7 Kuvat bilder pictures p Kuva bild picture 1...

Страница 52: ...tones Sectional view of the stove s stone compartment 2 3 Kuva bild picture p Kastor kiukaan asentaminen Kastor suoja alustaa k ytt en Montering av Kastor bastuugn med Kastor skyddsunderlag f r ugn In...

Страница 53: ...tion pipe 2 Palava aineinen materiaali jos ei suojalevy min et isyys kiukaasta 1000mm Br nnbart material om ingen skyddspl t anv nds r avst ndet 1000mm fr n ugnen Flammable material distance from stov...

Страница 54: ...v ugnen ovanifr n till Connecting the stove from the back to a brick chimney tegelskorstenen Connecting the stove from the top to a brick chimney Kuva bild picture p 2 6 Liitt minen Kastor valmishormi...

Страница 55: ...re p 2 8 1 Kuva bild picture p 2 8 2 1 Ilmanohjainlevy 1 Ilmanohjainlevy Luftstyrningsskiva Luftstyrningsskiva Air guide plate Air Guide plate 2 Arina 2 Arina Rost Rost Grate Grate 3 Arinan kannatin R...

Страница 56: ...56 57...

Страница 57: ...57 57 v 3 1 3 5 10 doc...

Отзывы: