


7
Descriptions
○
1
— Power :
Press and hold the Power button on the digital pad
○
2
— Batteries Trough :
1.5V AAA size x 4
Pen Refills Trough :
Three refills (Two are Black, One is Red) for digital pen
○
3
— Working Area :
Please refer to Working area section for detail descriptions.
○
4
— Function Key :
Please refer to Front
panel’s functions for detail descriptions.
⑤
— LCD Display:
displays information about your pages and pens
⑥
— USB Connector :
Connect to a USB port on your PC
⑦
—Pen Clip:
clip your pen here when it is idle or unused.
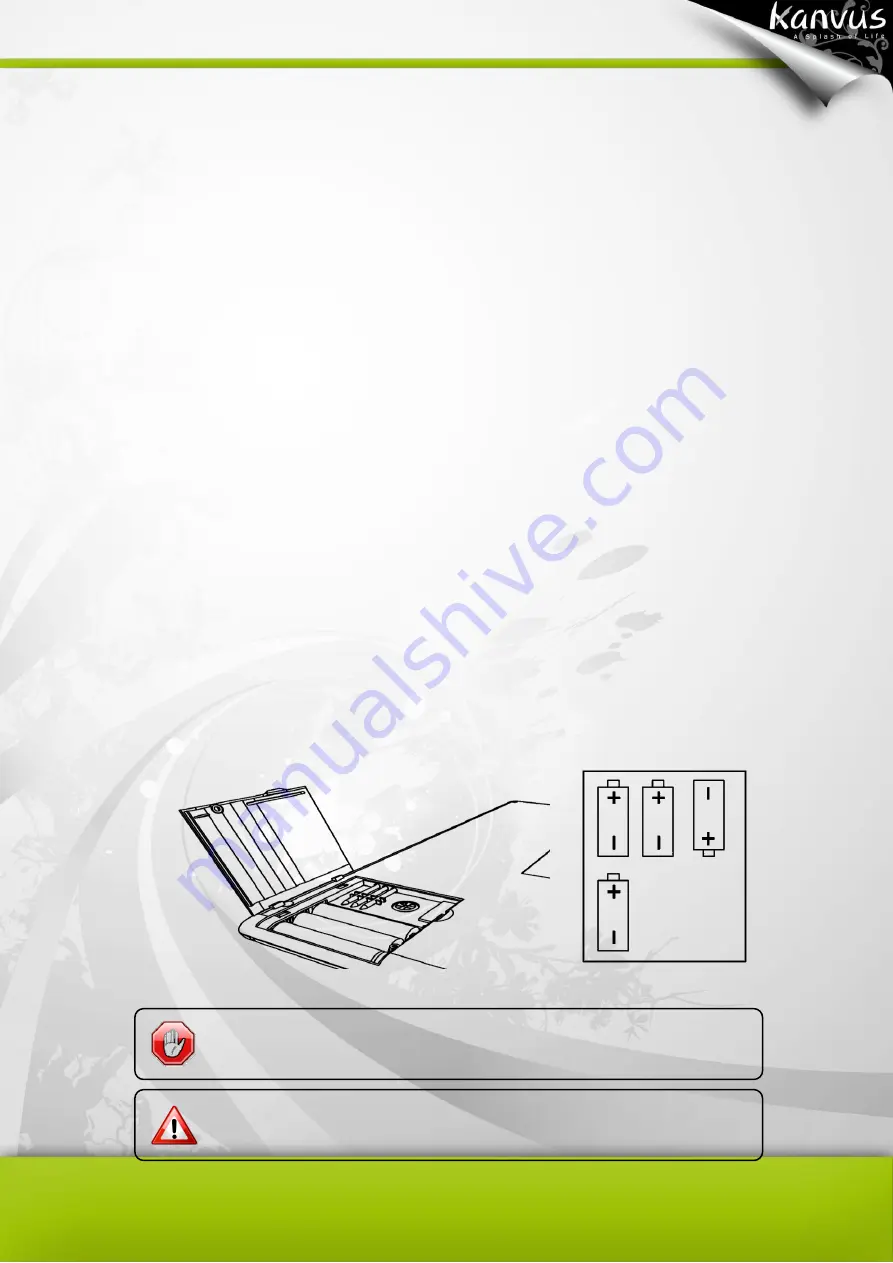
Inserting the batteries into the Kanvus Note A5
Open the batteries trough and insert the batteries. After that, close the cover trough. For
replacing the batteries, open the battery trough, remove the old batteries, and then replace with
the new ones.
If the batteries are installed in a wrong way, the battery liquid will
leak out.
Turn off the power before changing the batteries or the memory
data may appear with errors
.
Содержание Note A4
Страница 1: ......
Страница 2: ...1 User Manual Windows Macintosh V1 0...
Страница 6: ...5 1 Introducing the Kanvus Note A4 Package Contents Tablet Digital Ink Pen Digital Pen...
Страница 8: ...6 Tablet Components overview...
Страница 28: ...26 3 G e t t i n g S t a r t e d Installation Configuration...
Страница 42: ...40 Mac OS Go to Tablet Setting Page 1 1 Click GO Applications 1 2 Click Pen Tablet Setting...
Страница 43: ...41 1 3 Click Tablet Setting There are 5 tabs Info Button Scope Pressure...
Страница 44: ...42 1 Info The Info tab displays the version number of the driver and Tablet Mac information...
Страница 55: ...53 Working Area...
Страница 68: ...66 6 Specification Summary Tablet Digital Pen Digital Ink Pen...
Страница 72: ...70 7 T r o u b l e s h o o t i n g Testing your device FAQ Service and Technical Support Driver Download...
Страница 85: ...1 User Manual Windows Macintosh V1 0...
Страница 89: ...5 1 Introducing the Kanvus Note A5 Package Contents Tablet Digital Ink Pen Digital Pen...
Страница 91: ...6 Tablet Components overview...
Страница 111: ...26 3 G e t t i n g S t a r t e d Installation Configuration...
Страница 125: ...40 Mac OS Go to Tablet Setting Page 1 1 Click GO Applications 1 2 Click Pen Tablet Setting...
Страница 126: ...41 1 3 Click Tablet Setting There are 5 tabs Info Button Scope Pressure...
Страница 127: ...42 1 Info The Info tab displays the version number of the driver and Tablet Mac information...
Страница 138: ...53 Working Area...
Страница 151: ...66 6 Specification Summary Tablet Digital Pen...
Страница 155: ...70 7 T r o u b l e s h o o t i n g Testing your device FAQ Service and Technical Support Driver Download...
Страница 165: ...80 Ordering Components and Accessories To purchase parts and accessories please contact your local dealer or distributor...


