Manual: CMOS Industrial Camera LOGLUX
i5
Version 1.08 (04/07)
KAMERA WERK DRESDEN GmbH
Page 11 of 46
If no difficulties occurred during installation, the CameraLink
™
MVtitan-CL PC plug-in card is properly
installed.
Note:
In general, no re-registration with Microsoft
, the maker of the Windows
operating system,
(Microsoft
safety system) will be necessary. Please make sure you use drivers certified by Microsoft
where possible. See also the information of the plug-in card manufacturer.
Installation of the CMOS industrial camera LOGLUX
i5 CL
Once the CameraLink
™
(see above) has been properly installed, the installation of the CMOS
industrial camera LOGLUX
i5 CL is very easy.
First mount the CMOS industrial camera LOGLUX
i5 CL in a safe and stable manner. Use the slot on
the bottom of the camera housing and the associated keys for the purpose, where possible, as these
allow safe fastening to various modular design systems having fitting counterparts.
Once the CMOS industrial camera LOGLUX
i5 CL has been safely mounted, connect the cables to
the host system (PC or IPC).
For the purpose, plug the properly laid
customized
data
cables
into
the
corresponding
electrical/mechanical
connectors on the camera and into the
CameraLink
™
MVtitan-CL PC plug-in
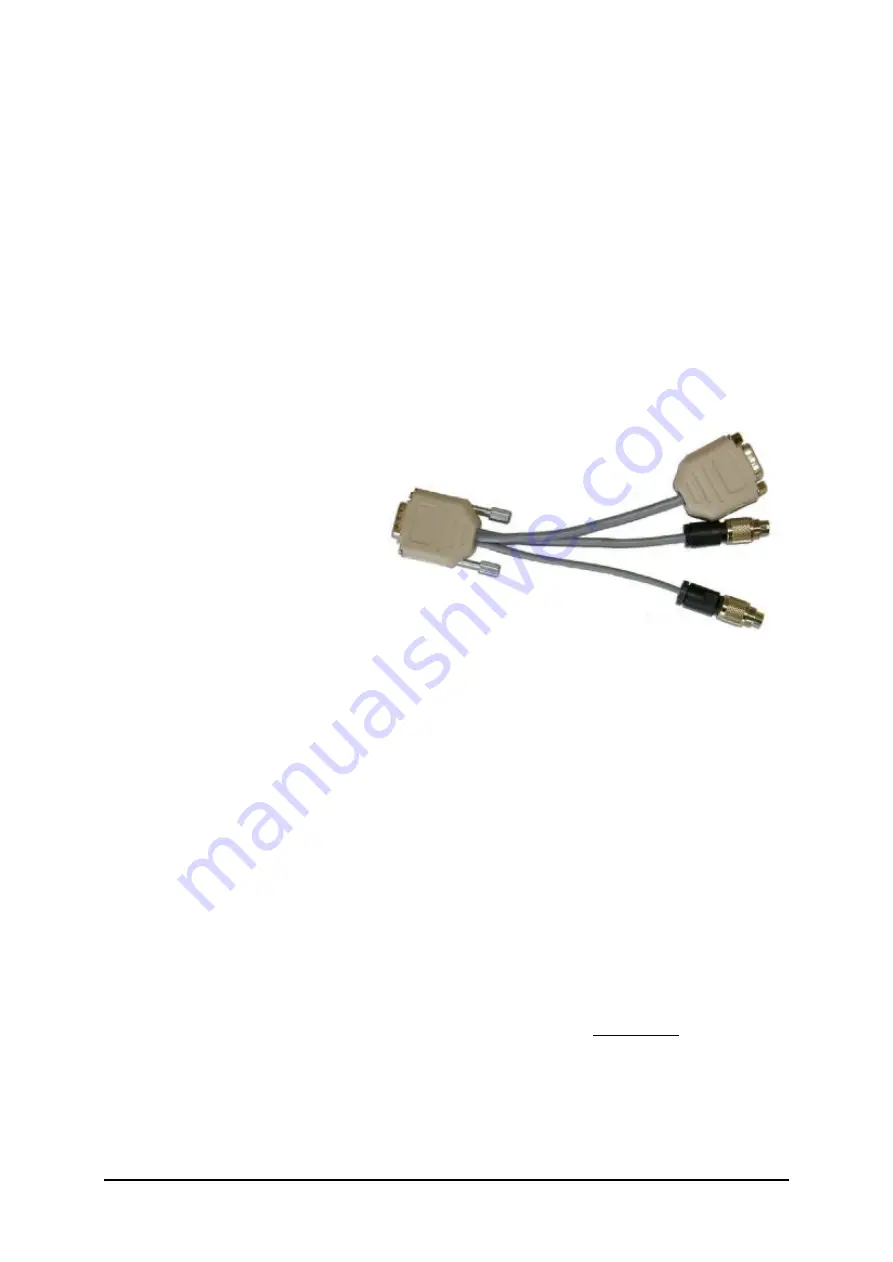
card of the PC or IPC. Then connect the
split adapter (Fig. 7) to the 9-pole D-
SUB connector on the camera and
power supply unit (plug-type or DIN/EN
bus-bar
power
supply
unit).
Furthermore, you may use the split
adapter to link the camera up with an
optional triggering system, e.g. the
switching output of a light barrier, in
order to trigger the framegrabbing
process in an event-controlled mode. The same plug connector is provided with two additional
switching outputs.
Once the plug connectors and data cables have been safely connected, the operating voltage (24 V
±
10%) can be applied to the camera.
Caution:
Always use the plug-type power supply unit
supplied with the
CMOS industrial camera
LOGLUX
i5 CL SET, or DIN bus-bar type 24V power supply units which are suitable for
industrial control systems (PLCs)! Always connect the camera to a separate power supply!
Readiness for operation is indicated by the continuously lit green status LED on the rear of the CMOS
industrial camera LOGLUX
i5 CL.
The CMOS industrial camera LOGLUX
i5 CL is now ready for operation. The next step is the
installation of the ‚LOGLUX
LuxWare‘ configuration tool.
Installation of the LOGLUX
LuxWare configuration tool
Once the CMOS industrial camera LOGLUX
i5 CL has been properly prepared, the installation of the
LOGLUX
LuxWare is very easy.
After booting the PC and logging into the Windows
operating system as administrator, the LOGLUX
LuxWare software is automatically started after insertion of the CD ROM if you have activated the auto
CD ROM start option on your computer.
If not, start ‚Setup.exe‘ in the main directory of the CD ROM manually.
In both cases, follow the instructions given by the installation software.
⇐
to camera
D-SUB 9-pole
RS-232 D-SUB 9-pole
to PC/IPC
⇒
to power supply
⇒
2-pole connector
Trigger inputs/
switching outputs
⇒
4-pole connector
Figure 8 :
View of a split cable


