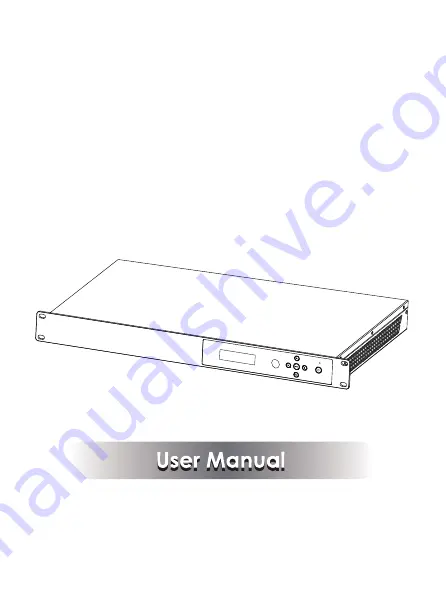
8x8 HDMI 18Gbps Matrix with
Audio De-embedded
VER 2.1
Страница 1: ...8x8 HDMI 18Gbps Matrix with Audio De embedded VER 2 1 ...
Страница 2: ...ct contains sensitive electrical components that may be damaged by electrical spikes surges electric shook lighting strikes etc Use of surge protection systems is highly recommended in order to protect and extend the life of your equipment 1 Introduction 2 Features 3 Package Contents 4 Specifications 5 Operation Controls and Functions 5 1 Front Panel 5 2 Rear Panel 6 IR Remote 7 Web GUI User Guide...
Страница 3: ...DCP 2 2 and HDCP 1 4 compliant Up to 4K2K 60Hz YUV 4 4 4 on all HDMI ports Supports pass through audio up to 7 1 channels of High Definition audio LPCM Dolby TrueHD and DTS HD Master Audio Audio de embedded is supported via coax port HDR CEC and smart EDID management supported Control is via on panel button IR remote Web GUI and ASCII command 1U rack mounted design with metal enclosure 1x 8x8 HDMI...
Страница 4: ...8kV Air gap discharge 4kV Contact discharge Power Supply Dimensions Weight Metal Enclosure Operating Temperature Storage Temperature Relative Humidity 20 90 RH non condensing Power Consumption Color Black 483mm W 253mm D 44 5mm H Housing Video Resolutions Color Space RGB YCbCr 4 4 4 YCbCr 4 2 2 LPCM 2 5 1 7 1 Dolby Digital DTS 5 1 Dolby Digital Dolby TrueHD DTS HD Master Audio Dolby Atmos DTS X In...
Страница 5: ...ss the MENU button to confirm this operation B On the initial OLED display you can press the Up or Down button to check each input EDID setting press the Menu button go back to the initial OLED display C On the initial OLED display you can press Menu button to operate the following functions by the combination of these five buttons press Up or Down button to select function 1 Select EDID Press the...
Страница 6: ... baud press the Right button to confirm this operation 7 Factory Reset Press the Right button to setting factory reset status then press the Right button to confirm this operation or the Left button to quit this operation The EDID table EDID Mode EDID Description 1 2 3 4 5 6 7 8 9 10 11 12 13 14 15 16 720P 2 0 CH 1080P 2 0 CH 1080P 5 1 CH 1080P 7 1CH 1080I 2 0 CH 1080I 5 1 CH 1080I 7 1CH 3D 2 0 CH...
Страница 7: ...ine of sight the IR receiver cable can be inserted to this IR EXT port to extend IR signal 4 DC 12V Plug the 12V 3A adapter to AC wall outlet for power supply 5 CONTROL LAN connects to an active Ethernet link by an RJ 45 cable RS 232 Connect to a PC or control system by D Sub 9 pin cable to control the matrix with RS 232 commands 6 AUDIO OUTPUT Connect to audio amplifiers or speakers The audio is ...
Страница 8: ...rce Press these button to select the last or the next input signal source Output 1 2 3 4 5 6 7 8 Press these button to select output signal source All Press this button to select all output signal source simultaneously Operating instructions User need select output button firstly and then select input button to select output display corresponding input signal source Web GUI connection diagram L A ...
Страница 9: ...tocol Version 4 TCP IPv4 Step 1 The LAN port connects directly PC with an UTP cable Step 2 On the PC go to Control Panel Network and Internet Network Connections Local Area Connections right click on it choose Propertiers 7 19 ...
Страница 10: ... OK click on OK again Note The IP address of the computer and matrix should be in the same network segment As the matrix s IP address is 192 168 1 100 the computer s IP should be 192 168 1 X X contains 1 255 except 100 Step 3 Input the IP address from front panel into a browser on the PC to enter Web GUI page The pages like below 8 19 ...
Страница 11: ...ave connected input or output source and no represent not connection Power switch The Matrix will work when open this switch Otherwise the Matrix will standby Beep switch Open this switch press the Matrix on panel button will have voice Close this switch it will mute Click this button will reboot device Click this button will set it to factory reset General page 9 19 ...
Страница 12: ...thers OUTPUT ports have similar to function about Tab 1 2 3 4 Select EDID mode to input source then click Set button Copy EDID from output display to input source then click Set button Open EDID file to input source Display the input source EDID mode status Matrix page EDID page 1 10 19 ...
Страница 13: ... IP Subnet Gateway and Mac address In this moment click the Save Changes button to save current status information Note If user have set a new IP address and click the Save Changes button At this moment user have changed the IP address Net Status button Click this button will refresh currently network configuration information to display in Status Log Status Log Display the Net configuration infor...
Страница 14: ... head of the serial cable is connected the RS 232 control port with DB 9 at the rear of the Matrix and the USB head of the serial cable is connected a PC Open any of a Serial Command tool on PC such as Docklight to send command to control the Matrix The fellowing is shown RS 232 pin s definition and connection way 1 2 3 4 5 6 7 8 9 9 Pin male DIN interface 8 ASCII control command 12 19 ...
Страница 15: ...ver Data 3 SOUT Serial Out or Transmit Data 4 DTR Data Terminal Ready 5 GND Ground 6 DSR Data Set Ready 7 RTS Request To Send 8 CTS Clear To Send 9 RI Ring Indicate Pin s definition Double click the Docklight shortcut icon Please see the following picture 1 Picture 1 13 19 ...
Страница 16: ...Click the COM area there will be a Project Settings page Choose the COM port to connect the software and you need to setting the Baud Rate Data Bits Parity Stop Bits and then click the OK button Please see the following page 1 5 14 19 ...
Страница 17: ...ing page At label 2 you can explain sequence definition At label 3 you need to choose the sequence mode At label 4 you can input the RS 232 command of the product Then click the OK button 2 3 4 Finally you need to click label 5 button to send the command 15 19 ...
Страница 18: ...l the output channel all out on s edid x c y Copy the display EDID on the x output port to the y input port copy EDID from output x to input y s edid x d y Copy the built in EDID number y to the x input port use default edid y to input x s edid all c y Copy the display EDID on the x output port to all inputs copy edid from output y to all inputs s edid all d y Copy the built in EDID number y to al...
Страница 19: ...t power on s power off Machine shutdown power off r power Query power state a power on s rboot Machine reboot rboot s factory reset Restore factory settings r type Query matrix model a HDM B88 r version Query software version a aa bb aa bb aa bb r status Query the status of the entire machine s dhcp off Set up network module using static IP s dhcp on Set up network modules using dynamic IP r dhcp ...
Страница 20: ...rk board a a b c d CR r gateway Get the gateway of the network board a a b c d CR r port Get network port number a 8000 CR s net name Set the name of the network module r net name Get the name of the network module a CR RS 232 Command Function description Feedback Note In this table you can send RS 232 Commands to control the product in any serial command tool The Function description will explain...
Страница 21: ...y Internet Modem or Router RS 232 Equipped PC or Notebook 1 Q Does this product require an HDMI line length for the connection interface A According to HDMI line length test HDMI input output with 4K2K 60Hz YUV 4 4 4 is the longest line length up to 16 4ft 5m The use of Premium High Speed HDMI cable is highly recommended 10 FAQ Audio amplifier Audio amplifier 19 19 ...