5
A-11
Using the hex wrench supplied, remove the set screw from the lever in
question.
A-12
Remove the lever and rotate it 180º. Slide the lever back onto the lock.
A-13
Using the hex wrench supplied, reinstall the set screw. Assure the lever
rotates freely.
A-14
Reinstall the rubber plug, which was removed earlier.
B.
MARKING THE TEMPLATE AND DRILLING THE DOOR
B-1
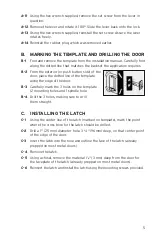
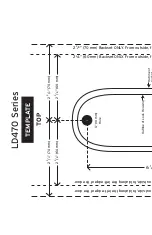
Find and remove the template from the installation manual. Carefully fold
along the dotted line that matches the backset the application requires.
B-2
From the exterior (or push button side) of the
door, place the dotted line of the template
along the edge of the door.
B-3
Carefully mark the 3 holes on the template
(2 mounting holes and 1 spindle hole.
B-4
Drill the 3 holes, making sure to drill
them straight.
C.
INSTALLING THE LATCH
C-1
Using the center line of the latch (marked on template), mark the point
where the cross bore for the latch should be drilled.
C-2
Drill a 1" (25 mm) diameter hole, 3
3
⁄
4
" (96mm) deep, on that center point
of the edge of the door.
C-3
Insert the latch into the hole and outline the face of the latch (already
prepped on most metal doors).
C-4
Remove the latch.
C-5
Using a chisel, remove the material
1
⁄
8
" (3 mm) deep from the door for
the faceplate of the latch (already prepped on most metal doors).
C-6
Reinsert the latch and install the latch using the mounting screws provided.


