background image

WinKey USB SMT Assembly and Operation Guide - Version 1.5   12/26/2017         Pg 14 

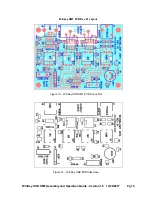
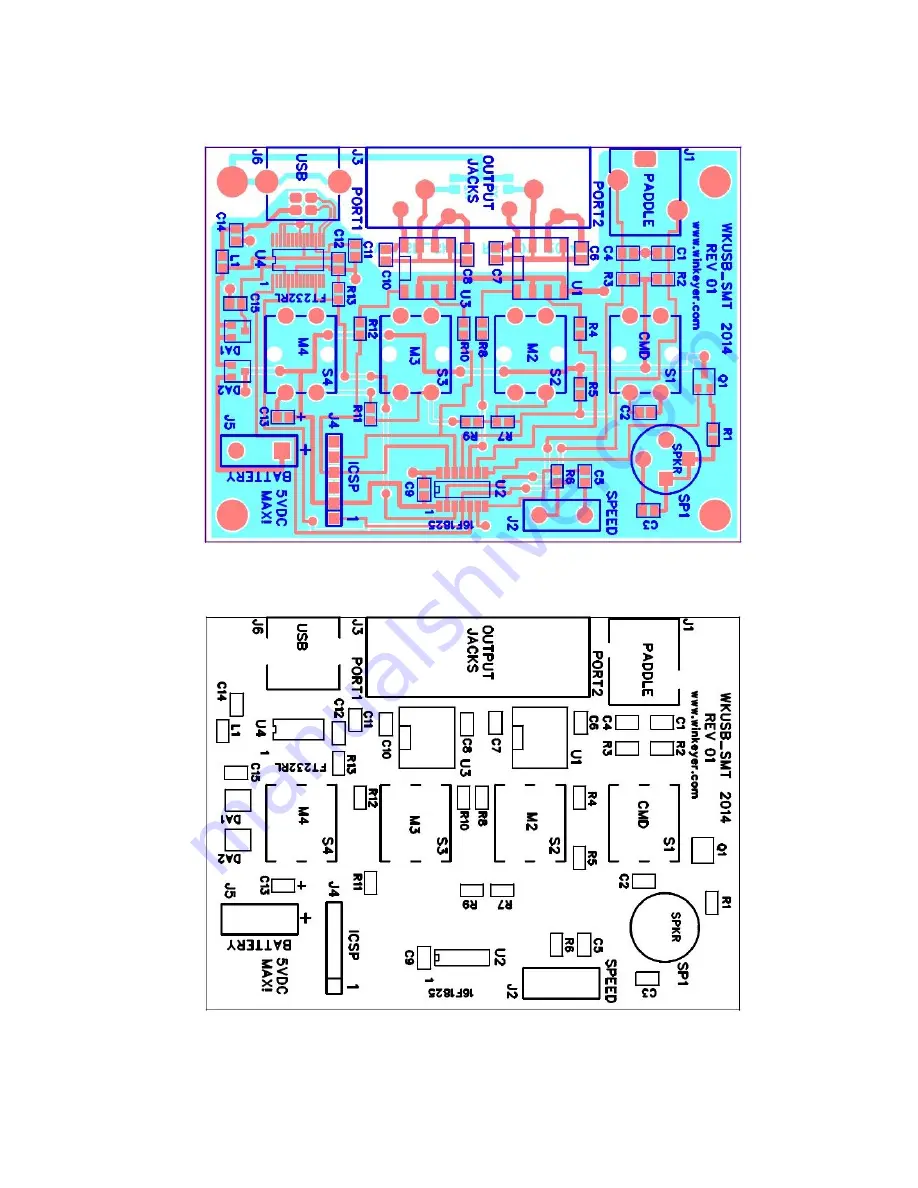
Winkey SMT PCB Rev 01 Layout 


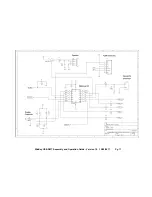
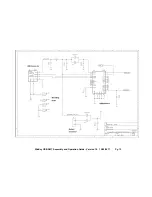
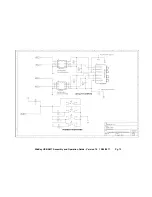
Figure 13 – WinKey USB SMT PCB Check Plot 


Figure 14 – WinKey USB PCB Silkscreen 

Содержание WinKey

Страница 1: ...t be followed exactly as described WinKey SMT PCB Bill of Materials QTY Ref Designator Value Description Package Chk 4 S1 S2 S3 S4 SPST Pushbutton Switch PC mount THS 3 Plastic Push Cap Pushbutton Cap Black Square OB 1 Plastic Push Cap Pushbutton Cap Red Square OB 1 J1 1 8 phone jack Connector Paddle Input THS 1 J3 4 way RCA Jack Connector Key PTT Out THS 1 J6 USB connector Connector USB_B THS 1 S...

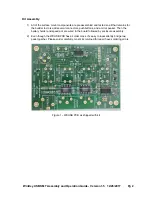
Страница 2: ...he builder to do is add several connectors pushbuttons and a mini speaker Then the battery holder and speed pot are wired to the board followed by enclosure assembly 2 Even though the WKUSB PCB has a solder mask it s easy to inadvertently bridge two pads together Please solder carefully most kits returned for repair have soldering errors Figure 1 WKUSB PCB as shipped with kit ...

Страница 3: ...he holding tabs and make sure it is flush to the board before soldering It helps to tack solder one of the tabs first to hold it in place The signal pins on this connector are very easy to bridge together if you use too much solder 5 Install and solder piezo speaker SP1 observe polarity and align speaker to silkscreen There are four holes two pairs with different spacing Rotate the speaker to find...

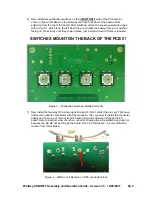
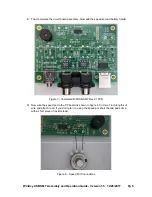
Страница 4: ...ce just a small amount of force is required SWITCHES MOUNT ON THE BACK OF THE PCB Figure 3 Pushbutton switches installed correctly 7 Now install the four way RCA phono jack block at J3 Don t solder the pins yet We have had several reports of problems with this connector It is very easy to install the connector hastily and have one or more of its pins bend under and not make it through the PC board...

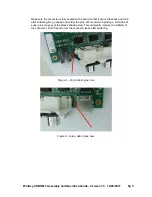
Страница 5: ...t cannot flex back and forth after soldering No go ahead and solder the pins We recommend placing a small dab of super glue or epoxy at the places shown below This will greatly improve the stability of the connector Don t forget to trim the connector leads after soldering Figure 5 Put a dab of glue here Figure 6 And a dab of glue here ...

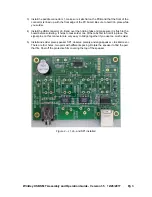
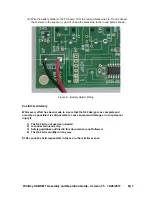
Страница 6: ... add the speed pot and battery holder Figure 7 Completed WKUSB SMT Rev 01 PCB 9 Now wire the speed pot to the PC board as shown in figure 8 Cut two 7 inch lengths of wire and attach to J2 If you don t plan on using the speed pot short the two pads of J2 with a short piece of resistor lead Figure 8 Speed Pot Connections ...

Страница 7: ... 9 Battery Holder Wiring Customer Advisory While every effort has been made to insure that the K42 design is as complete and accurate as possible it is still possible to cause equipment damage or incur personal injury if 1 The K42 kit is not used as intended 2 Is connected incorrectly 3 Safety guidelines outlined in this document are not followed 4 The K42 kit is modified in any way K1EL cannot be...

Страница 8: ...is signifies that the messages slots are eMpTy Now press and hold the red pushbutton and after a few seconds WKUSB will respond with a R Release the button and after a few more seconds it will send a question mark If you have a paddle set handy plug it in and check that WKUSB will send dits and dahs Turning the speed pot will change the WPM rate The keyer initially starts in standalone mode so you...

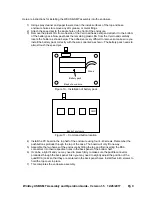
Страница 9: ...e wires oriented as shown The battery pack needs to almost touch the speed pot Battery pack Back of enclosure Wires Figure 10 Installation of battery pack Back of enclosure CMD Figure 11 Command button location 4 Install the PC board in the top half of the enclosure using four 4 40 screws Remember the pushbuttons protrude through the top of the case The board will only fit one way 5 Assemble the t...

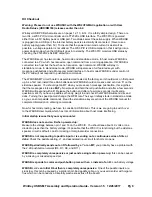
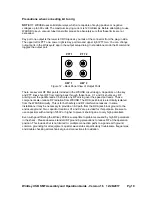
Страница 10: ...TT lines shunt RF from coming back through those lines C1 and C4 shunts any RF arriving over the paddle leads C5 shunts any RF arriving over the speed pot leads These components also reduce RF radiation from WKUSB The RCA jack block is electrically isolated from the WKUSB circuitry This is for both safety and RF interference reasons In some installations it may be necessary to provide an AC path f...

Страница 11: ...WinKey USB SMT Assembly and Operation Guide Version 1 5 12 26 2017 Pg 11 ...

Страница 12: ...WinKey USB SMT Assembly and Operation Guide Version 1 5 12 26 2017 Pg 12 ...

Страница 13: ...WinKey USB SMT Assembly and Operation Guide Version 1 5 12 26 2017 Pg 13 ...

Страница 14: ...WinKey USB SMT Assembly and Operation Guide Version 1 5 12 26 2017 Pg 14 Winkey SMT PCB Rev 01 Layout Figure 13 WinKey USB SMT PCB Check Plot Figure 14 WinKey USB PCB Silkscreen ...

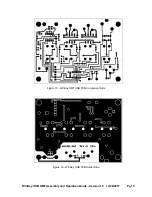
Страница 15: ...WinKey USB SMT Assembly and Operation Guide Version 1 5 12 26 2017 Pg 15 Figure 15 WinKey SMT USB PCB Component Side Figure 16 WinKey USB PCB Solder Side ...

Страница 16: ...til an application opens it The only serial commands WKUSB will accept while in standalone are ADMIN commands 5 WK3MGR works by directly reading and writing the EEPROM in the WK3 IC The EEPROM contains all of the standalone settings and local messages Since the EEPROM is accessed by ADMIN commands WKUSB can remain in a closed state 6 When an application opens WKUSB WKUSB leaves standalone mode and...

Страница 17: ...e 5 Figure 6 And a dab of glue here 5 Figure 7 Completed WKUSB SMT Rev 01 PCB 6 Figure 8 Speed Pot Connections 6 Figure 9 Battery Holder Wiring 7 Customer Advisory 7 Kit Checkout 8 Figure 10 Installation of battery pack 9 Figure 11 Command button location 9 Precautions when connecting kit to a rig 10 Figure 12 Back Panel View of Output Ports 10 Figure 13 WinKey USB SMT PCB Check Plot 14 Figure 14 ...

Отзывы: