Connection/Installation
86
Ñ
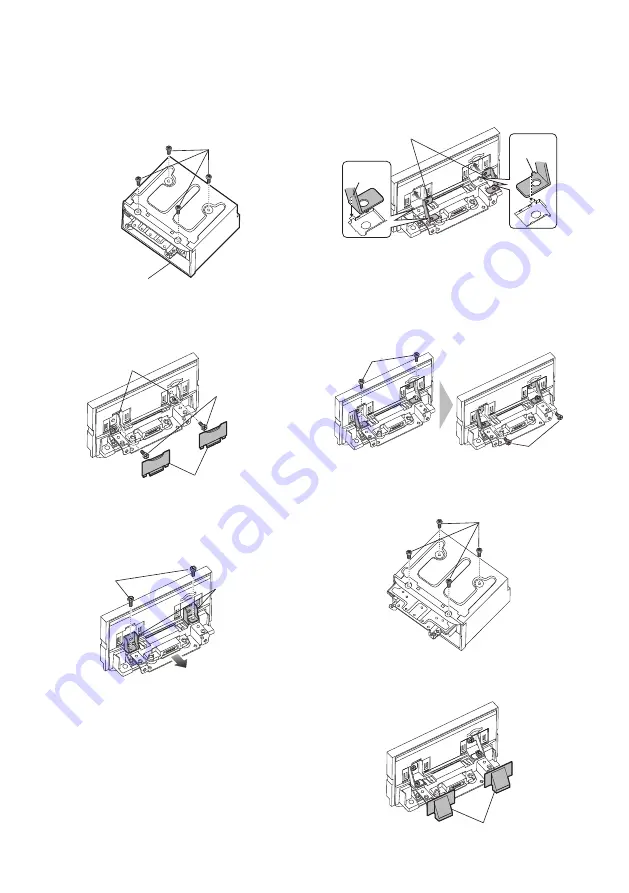
Positioning the slider in
forward
1
Remove the four screws from the bottom
of the main unit.
Main unit
Screw
2
Remove the two cover for back position,
and then remove the two hexagon head
screws from the bracket for back position.
Hexagon head
screw
Bracket for back
position
Cover for back
position
3
Pull the slider block forward and remove
the two hexagon head screws to remove
the bracket for back position.
Bracket for back
position
Hexagon head
screw
4
Install the bracket for forward position
(accessory
0
) each side so that its
projections are aligned with the slots on
the main unit.
Projection
Projection
0
5
Fix the bracket for forward position to
the slider block with the two hexagon
head screws. Push the slider block until it
stops and then fix the bracket for forward
position to the main unit with the two
hexagon head screws.
Hexagon
head screw
Hexagon head
screw
6
Reinstall the four screws to the bottom of
the main unit.
Screw
7
Install the cover for forward position
(accessory
9
) to two locations, as shown.
9


